Link a database to Git
dbForge Studio for MySQL allows users to version-control database schemas and data, roll back unwanted changes, handle static data conflicts, and maintain database integrity. The tool helps link a database to Git, a distributed version control system.
Before you start, install Git for a Windows client on the machine you’ll be version-controlling a database.
To link a database to a remote repository, you must have a cloned copy of the remote repository, which may be hosted on platforms such as GitHub or GitLab or created locally using the git init --bare Git command.
See how to clone a remote repository and link a database to a Git repository in GitHub.
When dbForge Studio connects to a Git repository, is the connection secure? In other words, is TLS enabled?
dbForge Studio connects to Git using the standard Git client for Windows, which supports current security protocols, including TLS 1.2. Secure connections are established when the server both supports them and requires them. For instance, if a repository’s address begins with HTTPS and the server stipulates the use of TLS, the connection will comply with these security requirements. The choice of security protocol is determined by the server’s configuration, not by dbForge settings.
See the following how-to topics to learn how to clone a remote repository and link a database to a Git repository in:
Work with a local Git repository
dbForge Studio doesn’t work with either local or remote repositories directly – only through a clone. Therefore, you will need to create a local Git repository and then clone it.
For this, perform the following steps:
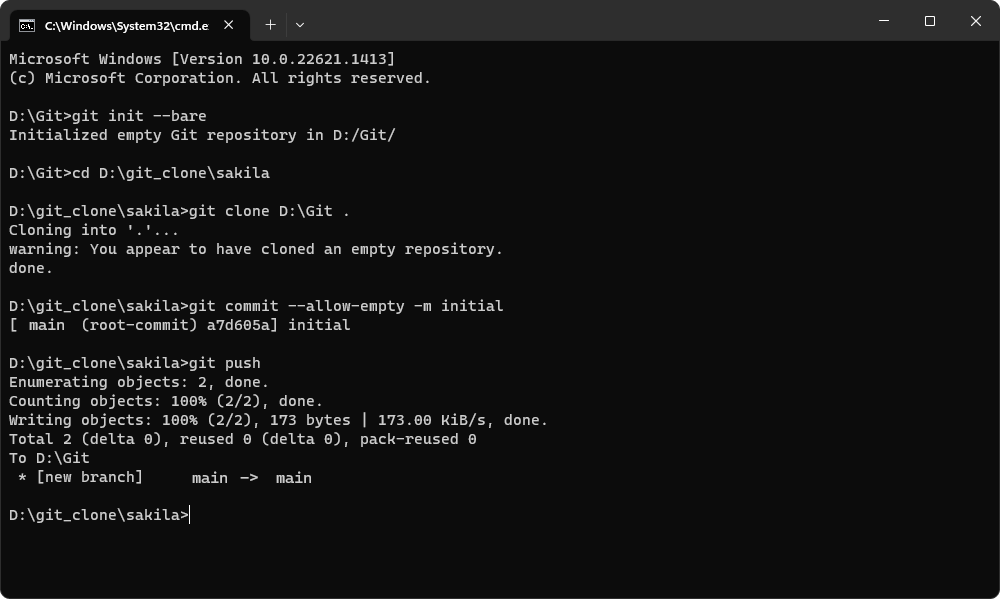
1. Create two empty folders on the disk of your computer where the local repository will be stored.
2. Start Windows Command Prompt (CMD).
Note
To navigate to the folder where the main local repository will be located, in the Command Prompt, use the
cdcommand.
3. Type git init --bare to create the main repository locally.
4. Navigate to the second folder and clone the local repository you have just created using git clone <pathToMainRepo>. Make sure to place a dot at the end of the command to clone the repository to the folder you have created. Otherwise, another subfolder will be created.
Note
<pathToMainRepo>is the path to the main repository you created locally when executing thegit init --barecommand.
5. Execute these CMD commands in the folder in question:
git commit --allow-empty -m initialto make an initial commitgit pushto push the changes to the remote repository
6. Link source control to the folder with the cloned repository.
Automate the cloning of a Git local repository from the command line
It is also possible to automate the cloning of a Git repository executing the .bat file with the script from the command line. The script will clone the repository, make an initial commit, and push the changes to the repository.
To do this, perform the following steps:
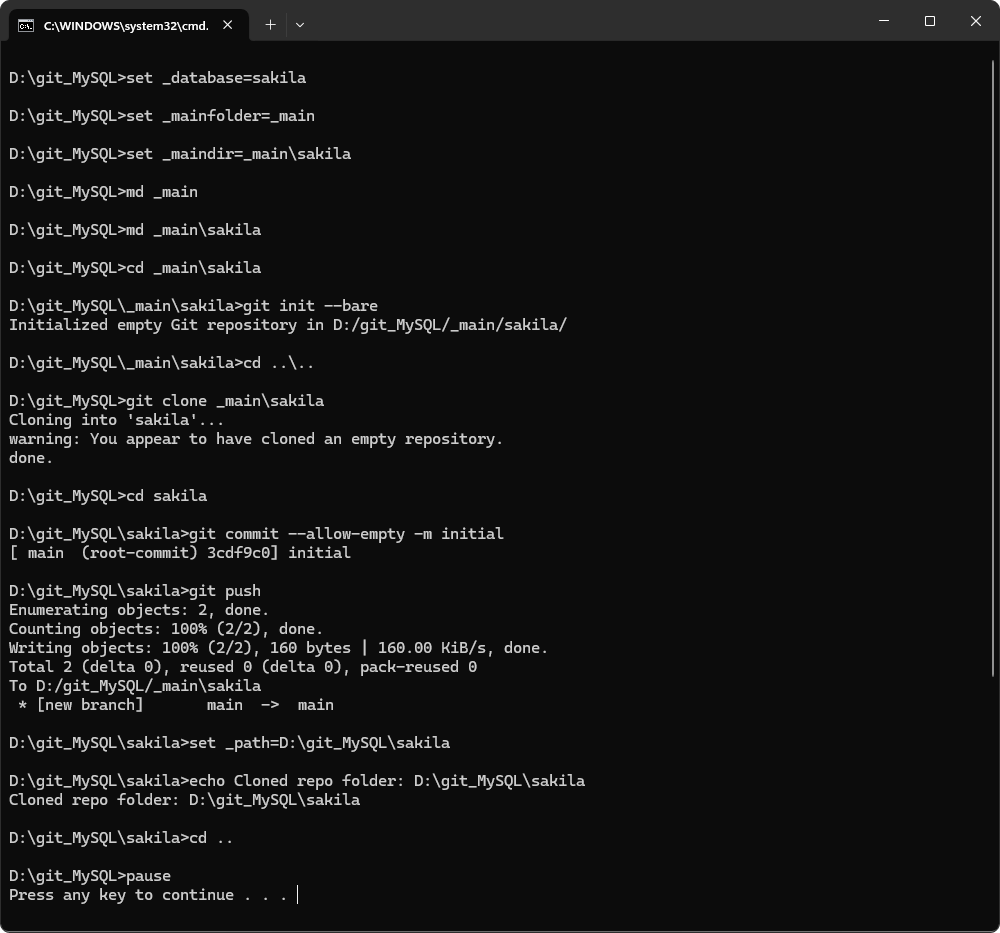
1. In a text editor, enter the following script to create a batch file to clone the repository:
:: Change DatabaseName to your database name; it will be the repository folder name.
set _database=DatabaseName
:: Change _main if desired; it will be the folder for the main repository.
set _mainfolder=_main
:: Please do not change the following variables and commands.
set _maindir=%_mainfolder%\%_database%

:: Create the main folder to store the main repository.
md %_mainfolder%
:: Create a subfolder under the main folder with the name of the database.
md %_maindir%
:: Navigate to the subfolder.
cd %_maindir%
:: Initialize the main repository (it will be empty).
git init --bare

:: Go back to the root directory.
cd ..\..
:: Clone the main repository, creating a folder with the name of the database.
git clone %_maindir%
:: Navigate to the cloned folder.
cd %_database%
:: Run git commands in the cloned folder.
git commit --allow-empty -m initial
git push
set _path=%cd%
:: Print the repository folder for reference.
echo Cloned repo folder: %_path%
cd ..

pause
Note
Replace
DatabaseNamewith the actual database name. This folder will be your repository.Optional: Change the name of the main repository folder -
_main.Do not change the following variables and commands:
%_mainfolder%and%_database%.
2. Save the file with a .bat extension in the folder that will store the repositories.
3. Run the script.
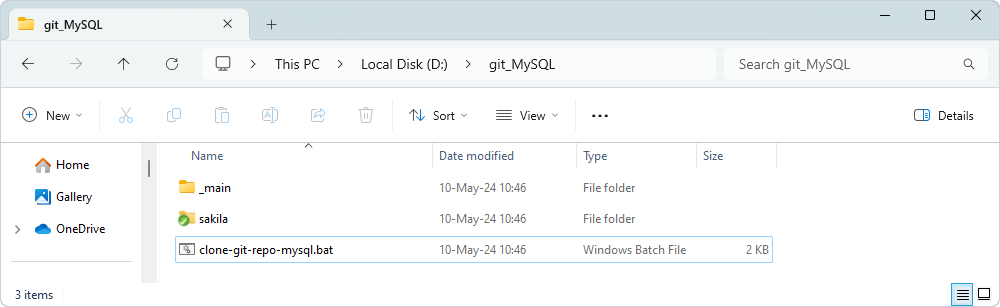
Next, navigate to the folder that stores the repositories. In our example, it is D:\git_MySQL. As you can see, the following folders have been created:
_main, which is a folder for the main repository.sakila, which is a cloned copy of the repository.clone-git-repo-mysql.bat, which is a batch file used to automate the cloning of a Git local repository from the command line.
Link a database to the repository
After the repository has been cloned, you can link dbForge Source Control to that folder. To do this, perform the following steps:
Note
In our example, we’ll link the sakila database to the repository.
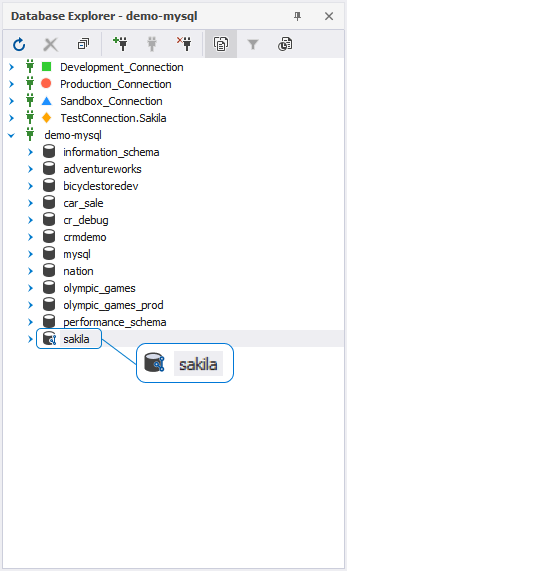
1. In Database Explorer, right-click the database you want to link to source control and select Source Control > Link Database to Source Control.
Alternatively, navigate to the main Database menu and select Link Database to Source Control.
2. In the Link Database to Source Control dialog, click + in the Source control repository field to enter the source control repository properties.
3. In the Source Control Repository Properties dialog, do the following:
- From the Source control system dropdown list, select Git.
- In the Repository folder field, click
 More to select therepository folder.
 - Optional: The Repository name is automatically derived from the name of the repository folder. However, you can specify adifferent name of the repository.
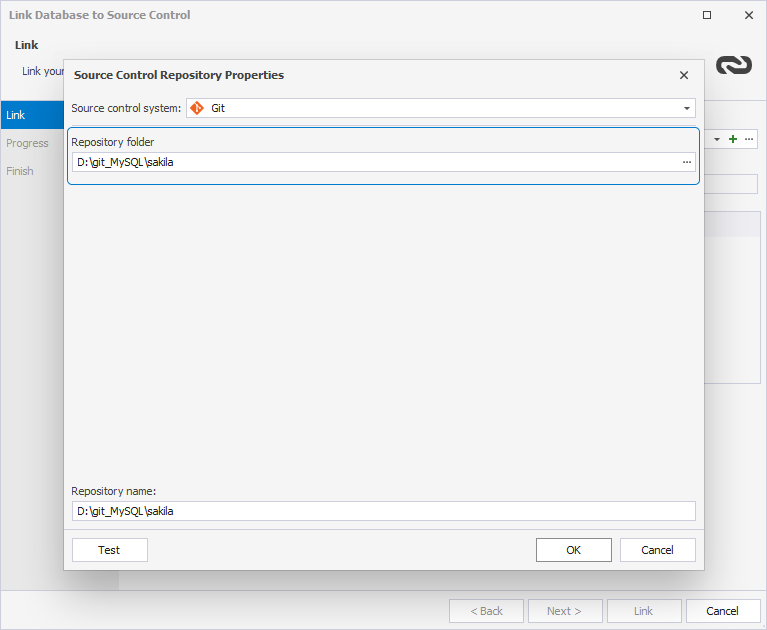
-
Optional: Click Test to verify that the database has successfully been connected to source control.
-
Click OK to apply the changes and close the Source Control Repository Properties dialog.
4. Select a database development model: shared or dedicated.
5. Click Link to establish the connection between the database and source control.
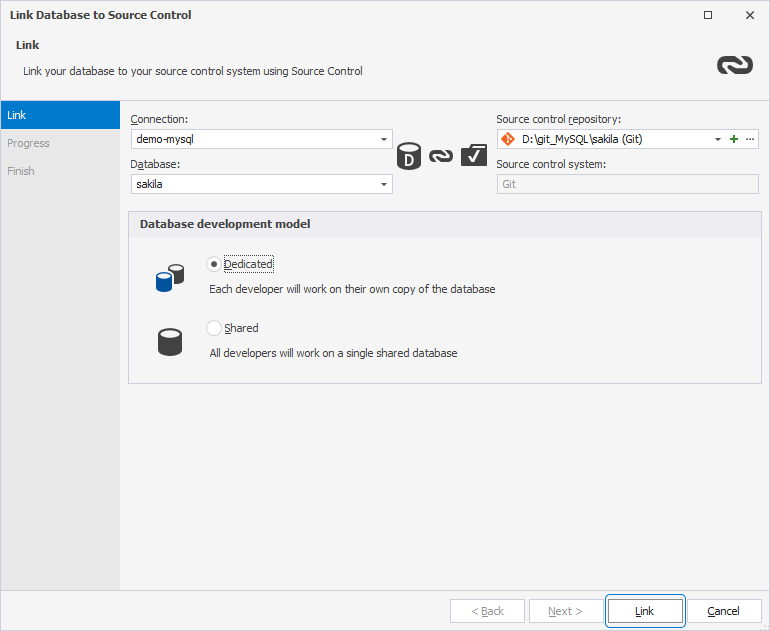
The Refresh progress window opens automatically, showing the stages of the refresh operation. The linked database gets the following icon in Database Explorer: