Group and filter comparison results
This topic explains how to group and filter comparison results in the result grid.
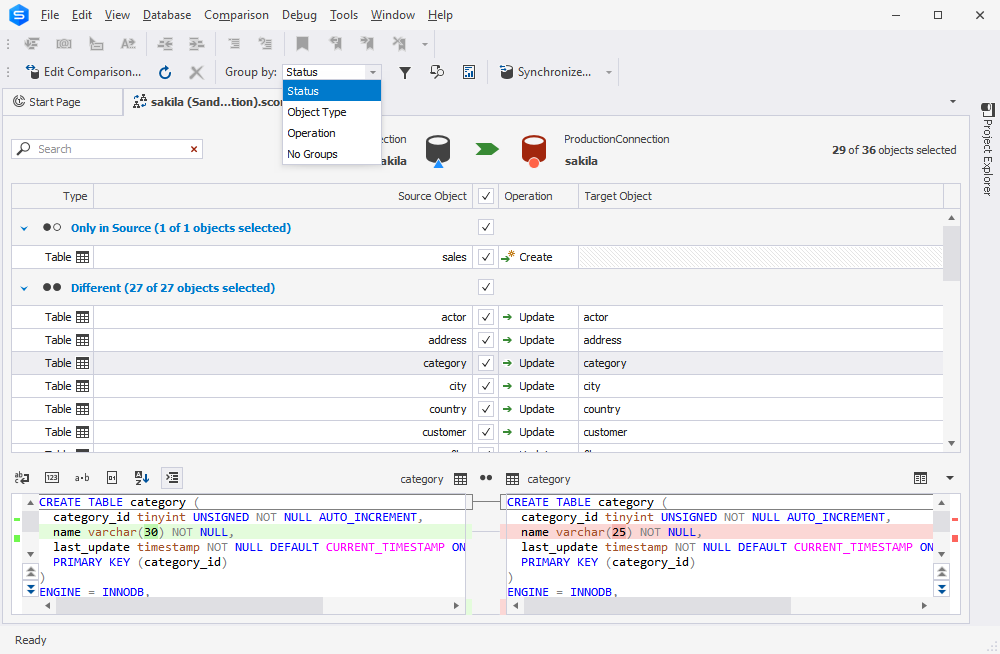
Group comparison results
Schema comparison results can be grouped by:
- Status: only in source, different, equal. By default, comparison results are grouped by status.
- Object type: tables, views, procedures, functions, and triggers.
- Operation: create, update, none.
You can change grouping by using one of the following ways:
- Right-click the document grid and select Group By > required group.
- On the toolbar, select the required group from the Group by dropdown list.
Filter comparison results
The Object Filter feature allows you to filter database objects in the comparison results document. You can apply multiple filters or create custom filters with Filter Editor.
To open the Object Filter pane, use one of the following ways:
- On the toolbar, click
 Apply a custom filter to the results.
 - Right-click the document grid and select Objects Filter.
- Press Ctrl+L.
By default, all object types are selected.
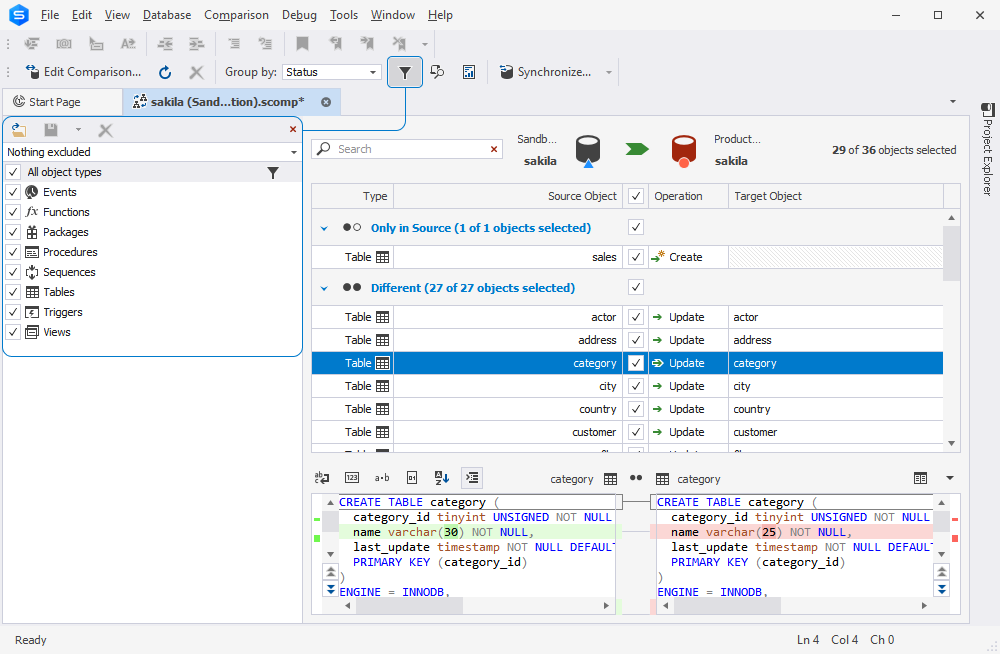
The default filter is Nothing Excluded. To include or exclude object types into/from the comparison results, select or clear the corresponding checkbox(es) in the Objects Filter pane. After that, Custom with an asterisk is displayed in the Filter box. An asterisk means that there are unsaved changes.
To discard filtering, select the All object types checkbox in the pane and click Save.
You can create filter rules for a specific object type or for all objects that a filter includes or excludes.
Create a filter rule
1. In the Objects Filter pane, click ![]() Edit Filter next to the corresponding object type for which you want to modify a filter.
Edit Filter next to the corresponding object type for which you want to modify a filter.
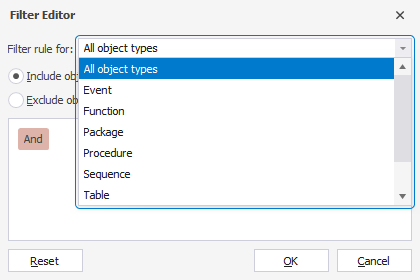
The Filter Editor dialog opens where you can set a filter rule.
2. From the Filter rule for dropdown list, select the object type to which you want to apply a filter rule.
3. Select Include objects if: If the specified condition is met, the filter will include the objects in the comparison result.
4. Select Exclude objects if: If the specified condition is met, the filter will exclude the objects from the comparison result.
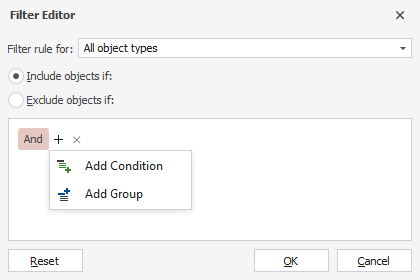
5. In the text box, set up a new filtering condition:
-
Select the upper-level operator from the dropdown list based on which you want to add a condition:
- And displays the records when both conditions are TRUE.
- Or displays the records when at least one of the conditions is TRUE.
- Not And/Not Or meets the opposite condition set in the WHERE clause.
Note
When you click the upper-level operator, you can also add a new condition or a new condition group, or clear all conditions.
-
Click
 to add a condition or group.
-
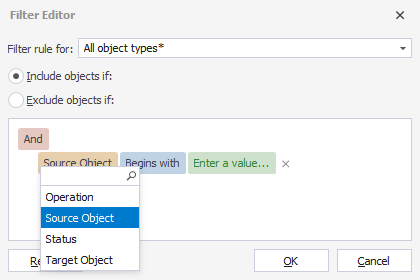
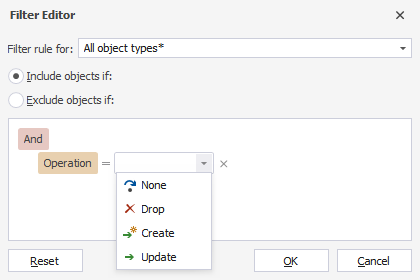
Select the property from the dropdown list. They include:
- Operation is an action that occurs to a source object during schema synchronization. Operations can be None, Drop, Create, or Update.
- Source Object and Target Object refer to an object in either Source or Target for schema comparison and synchronization. By default, the Source Object is displayed.
- Status indicates the status of an object as a result of schema comparison. Statuses can be Equal, Different, Only in Source, Only in Target, Unknown, and Inconsistent.
-
Select the comparison or logical operator for the condition from the dropdown list.
-
Click Enter a value to set the condition.
Note
To clear all filter settings, click Reset. Alternatively, you can click the upper-level operator and select Clear all.
To remove a condition or a group of conditions, click
Delete next to the corresponding condition or group of conditions.
6. To save the changes, click OK.
Save the filter
When you hover over the filter in the Objects Filter pane, the hint with the filter criteria is displayed. If you want to remove the filter, click the cross icon. If you want to update the filter, click ![]() Edit Filter.
Edit Filter.
You can save the filter to use it across multiple projects. To save a filter, ![]() Save on the Objects Filter toolbar, choose a file location, enter the file name, and then click Save. The filter will be saved in a .scflt file. When you save the modified filter, you can either save it with the same name or change the name to create a new filter.
Save on the Objects Filter toolbar, choose a file location, enter the file name, and then click Save. The filter will be saved in a .scflt file. When you save the modified filter, you can either save it with the same name or change the name to create a new filter.
Also, you can open a different filter. To do so, in the Objects Filter pane, click ![]() Open an existing filter and choose the required filter.
Open an existing filter and choose the required filter.
Filter objects for synchronization
The filter defines which objects will be displayed in the Comparison results document and which objects can be selected for synchronization. Objects or object types, which have been excluded by the filter, will be deleted from the comparison results and cannot be selected for synchronization.
However, if the excluded object is referenced by the objects that you selected for synchronization, you will be notified of this dependency. You can choose the excluded object for synchronization in the Schema Synchronization Wizard on the Dependencies page.
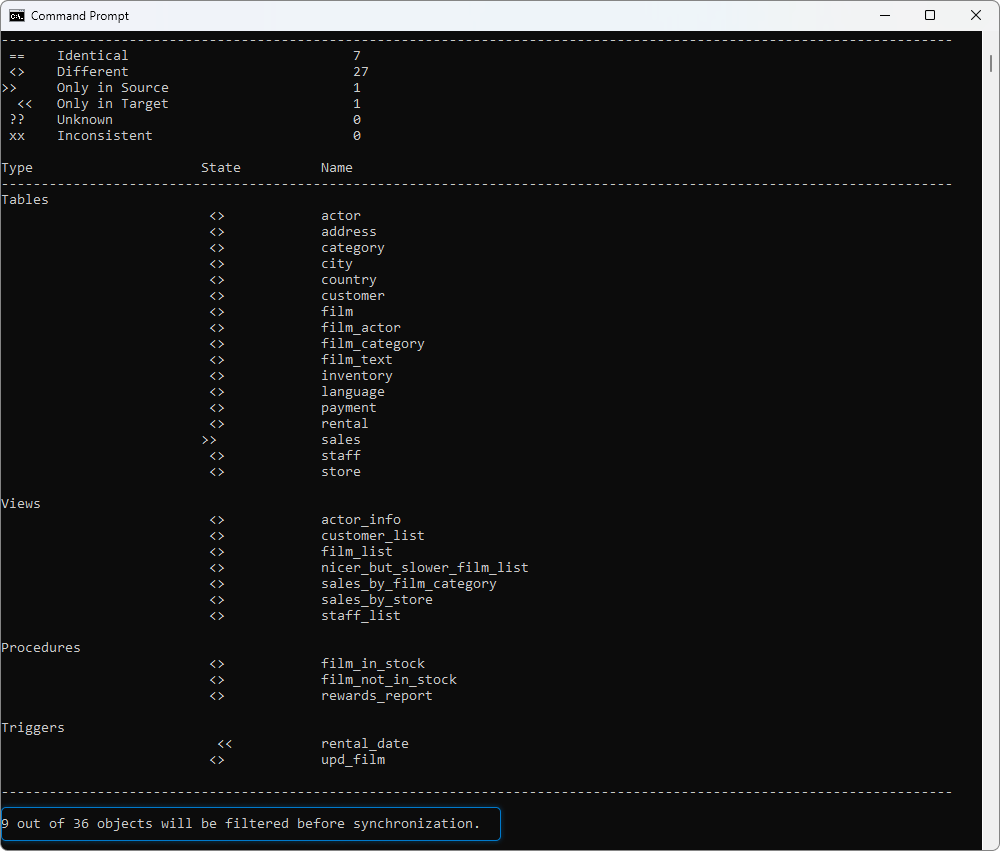
Filter objects for synchronization from the command line
In addition, you can filter objects for synchronization from the command line. To apply the filter to the objects from the command line, do the following:
1. Open the Command Prompt: Click Start, type cmd, and press Enter.
2. In the Command Prompt, execute the following:
C:\Program Files\Devart\dbForge Studio for MySQL\dbforgemysql.com/schemacompare /compfile:"D:\MyComparison.scomp" /filter:"D:\Custom_filter.scflt"
Note
The path to the executable file will differ depending on how you have installed the Studio - as a standalone tool or as part of the dbForge Edge bundle. Make sure that you have specified a correct path. If you have installed the Studio as part of dbForge Edge, change the path accordingly:
C:\Program Files\Devart\dbForge Edge\dbForge Studio for MySQL>dbforgemysql.com
where
- MyComparison.scomp is the path to the file containing the comparison of two MySQL databases.
- Custom_filter.scflt is the path to the file containing the saved filter.
The result can be as follows: