Link a database to a Git repository in GitLab
GitLab is a free and open-source web-based platform for Git repositories that allows web developers to collaborate on their code, plan, test, deploy, and track the changes within a single tool. Some main features that GitLab offers include built-in CI/CD pipelines, container registry, and code review tools. It also allows users to host their own GitLab instance on-premises or on a private cloud, making it an attractive option for organizations that require complete control over their source code management tools.
Prerequisites
Make sure that you have:
- Git for a Windows client installed on the machine.
- GitLab account.
Step 1: Create a repository on GitLab
In GitLab, a Git repository is located in the project. So, to create a repository, you need to create a new project or fork an existing project. This procedure will show us how to create a project/repository.
1. Sign in to your GitLab account.
2. On the ribbon, click Create new > New project/repository.
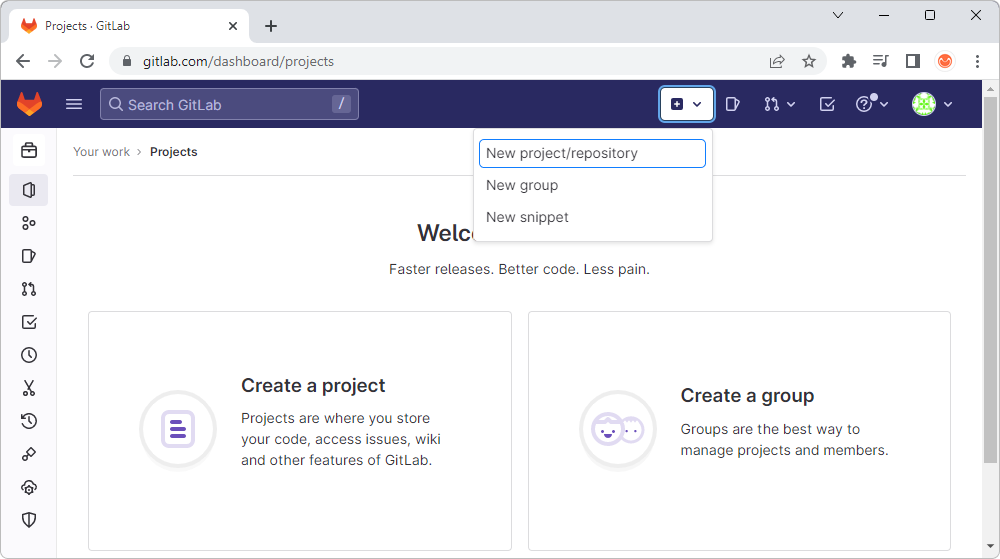
3. Click Create blank project to create a repository.
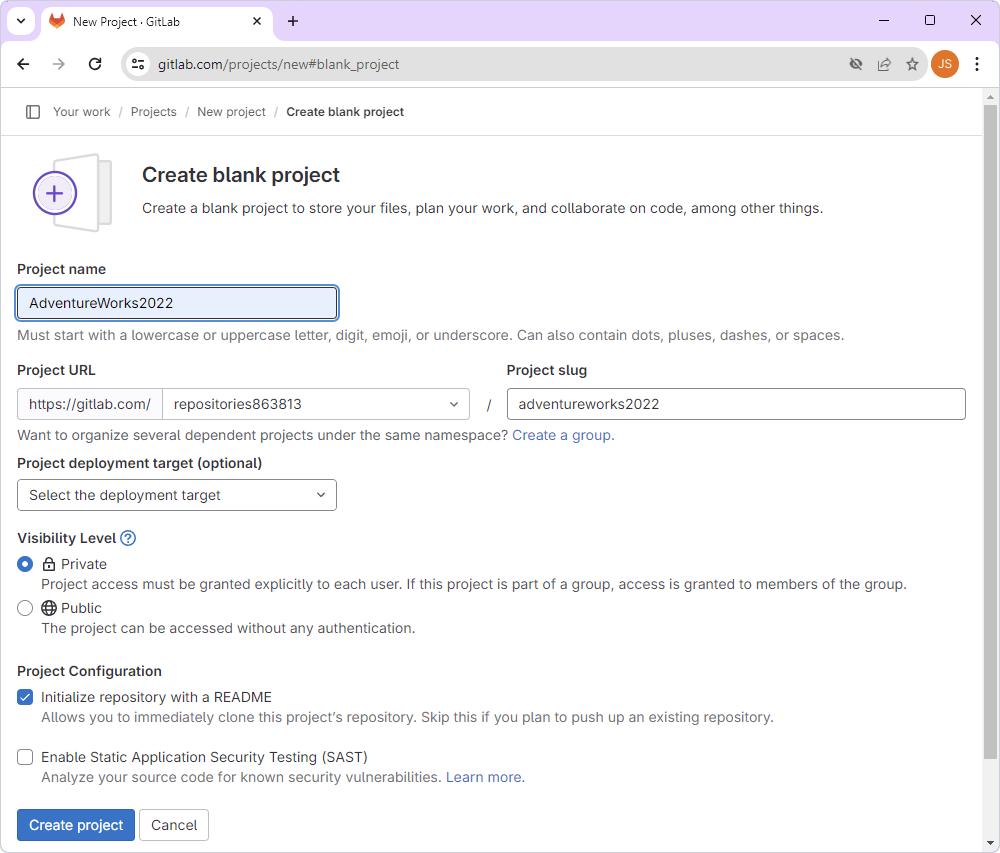
4. On the Create blank repository page, add the repository details:
- In the Project name field, specify a project name. The project name must start with a lowercase or uppercase letter, digit, emoji, or underscore. It can also contain dots, plus or dash signs, or spaces. Adding the project name will automatically create the project slug.
- In the Project slug field, enter the path to your project.
- Optional: In the Project deployment target field, select your project’s deployment target.
- Select a visibility level:
- Private (the default option) to grant access to specific users.
- Public to provide access to all users without any authentication.
- Select Initialize repository with a README (the default option) to initialize the repository and set it up properly. It will also create a README file for the repository and the default branch (main). If you want to push an existing repository, clear the checkbox.
- Optional: Select Enable Static Application Security Testing (SAST) to check the source code for known security vulnerabilities.
4. Click Create project to create the new repository on GitLab.
Step 2: Clone a repository using the command line
1. Create an empty folder on the drive of your computer to store the local repository. For example, you can create a folder named gitlab on the drive D.
2. Log in to your GitLab account. In the sidebar, click Projects and then click the repository you want to clone.
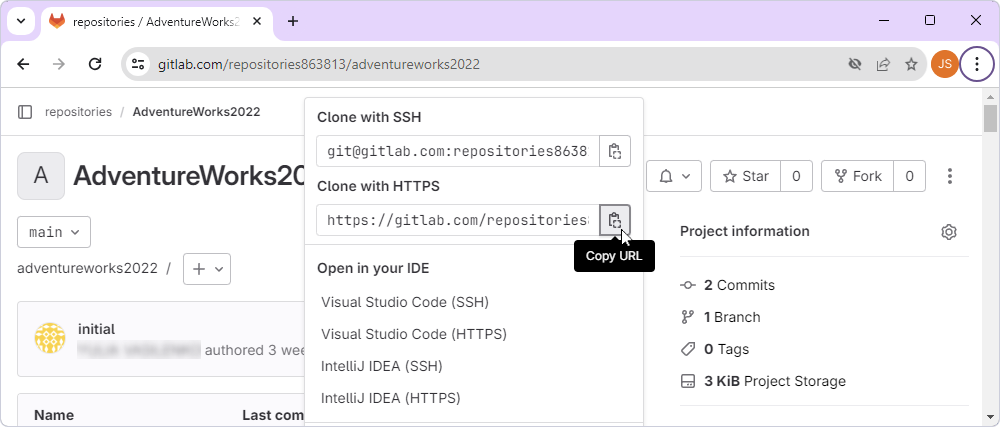
3. In the upper-right corner of the repository page, click Clone and select the connection protocol to copy the repository URL:
- Clone with HTTPS to authenticate with user and password each time you perform an operation between your computer and GitLab. In the example, HTTPS protocol connection is used.
- Clone with SSH to authenticate once using an SSH key pair - a public and a private key.
4. Start Windows Command Prompt (CMD). If you need to change the disk drive and navigate to the empty folder you created in Step 1, use the cd command.
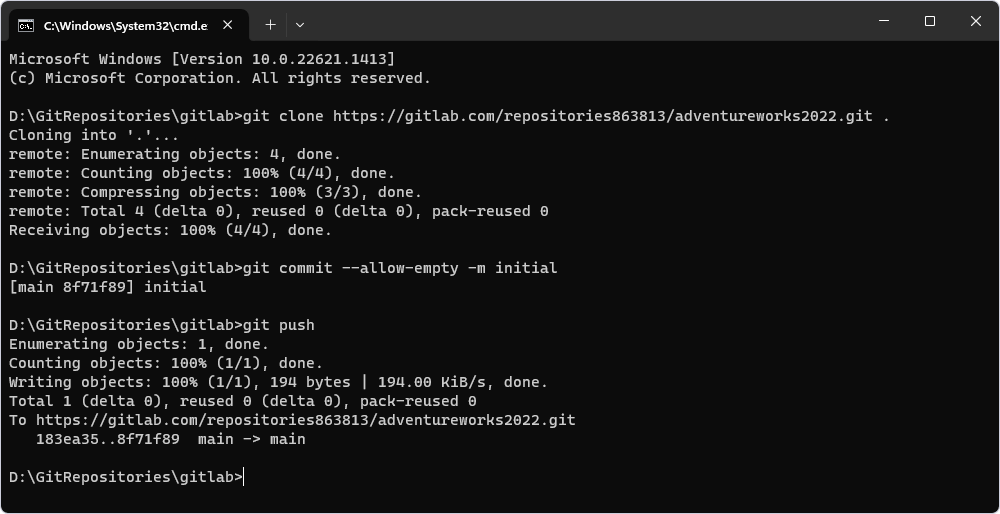
5. Execute the git clone command for the repository URL you have created on GitLab.
Note
Specify a dot at the end of the command to clone the repository to the folder you have created. Otherwise, another subfolder will be created.
git clone <repository URL> .
where <repository URL> is the URL you’ve copied in Step 3 of this procedure.
Once done, Git will create a local copy of the repository in the folder you specified in Step 1 of this procedure (gitlab in our example).
If you didn’t add any files to the repository when you created it for the first time, execute the following commands:
-
git commit --allow-empty -m initial -
git push
Step 3: Link a SQL Server database to source control
You can link the database to source control using the dbForge Source Control add-in for SSMS.
1. In SSMS Object Explorer, right-click the database you want to link to source control and select Source Control > Link Database to Source Control.
2. In the Link Database to Source Control dialog that opens, click + in the Source control repository field.
3. In the Source Control Repository Properties dialog that opens, do the following:
- From the Source Control system dropdown list, select Git as a source control system.
- In the Repository folder field, click
 More to add the repository folder. In the Select Folder window that opens, select the folder, which is a local copy of your GitLab remote repository, and then click Select Folder.
Note
The repository folder name represents a path to the local copy of the remote repository and must not contain the URL of the remote repository.
- Optional: In the Repository name field, you can change the name of the repository folder.
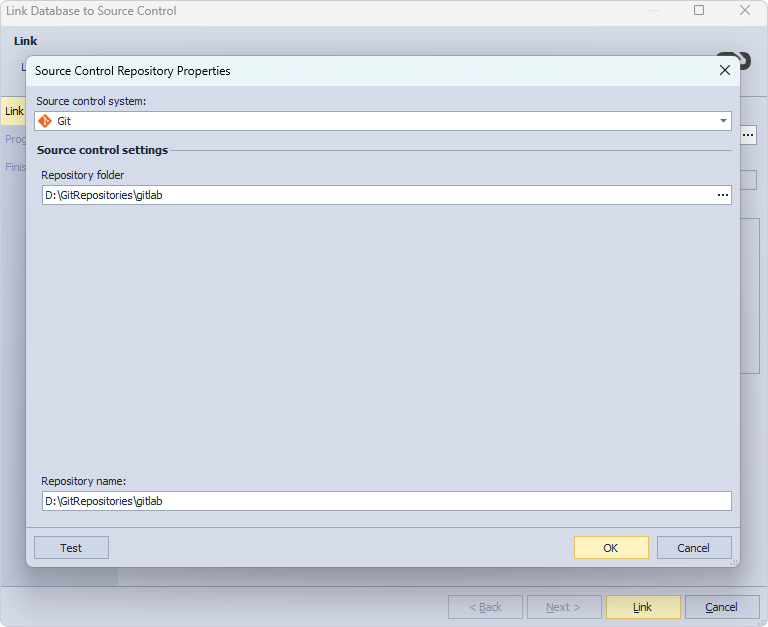
4. Optional: Click Test to verify that the database has successfully been connected to source control.
5. Click OK to apply the changes and close the Source Control Repository Properties dialog.
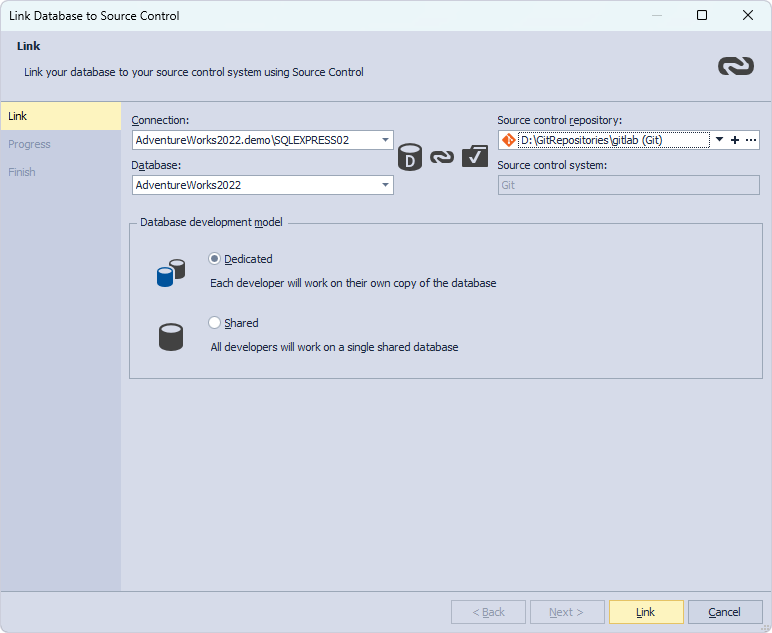
6. In the Link Database to Source Control dialog, Select a database development model: dedicated or shared.
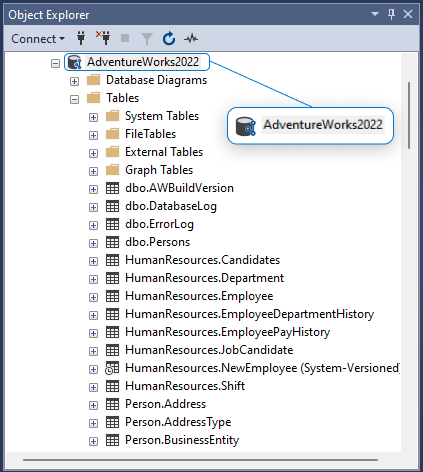
The Refresh progress window opens automatically, showing the stages of the refresh operation. The linked database gets the following icon in Object Explorer.
Step 4: After linking a database to the GitLab repository
If you are the first person who links this database, you must make an initial commit. For this, in Source Control Manager, go to the Local changes section, select the database objects to commit, and click Commit.
If you linked a database that is already in source control, you can update your database to the latest version. For this, in Source Control Manager, go to the Remote changes section, select the objects, and click Get Latest, which is available only in the dedicated model but not in the shared model.