Link a database to a Git repository in Azure DevOps
Azure DevOps is a cloud-based service that provides a comprehensive set of software development tools and code collaboration tools. It includes a Git repository to store code and track changes, along with a number of features that make it easy to work with Git repositories. For example, you can clone a repository to your local machine, which creates a copy of the repository you can work on offline. You can also push changes from your local machine to the remote repository, which makes them available to other team members.
Prerequisites
Make sure that you have:
- An organization set up in your Azure DevOps account. If you haven’t created one yet, you can sign up as described in the Azure DevOps documentation.
- A project within the organization. If you don’t have one, Step 1 provides a step-by-step guide about how to do so.
- Appropriate permissions to create a repository, which are granted by default to project administrators.
- Git for a Windows client installed on your local machine.
- A Git repository created locally or cloned from the remote repository. If you haven’t done this yet, Step 3 provides a step-by-step procedure to clone a repository using the command line.
Step 1: Create a project
1. Sign in to your organization https://dev.azure.com/YourOrganizationName and click + New project in the upper-right corner of the page.

2. In the Create new project dialog that opens, enter the project details:
- In the Project name field, specify the name of your project.
- Optional: In the Description field, add detailed information describing your project.
- Under Visibility, select Public to make your project viewable for anyone on the Internet, or Private to make the project viewable only for the users you grant access to.
- Expand the Advanced options and select the Git version control and work item process.
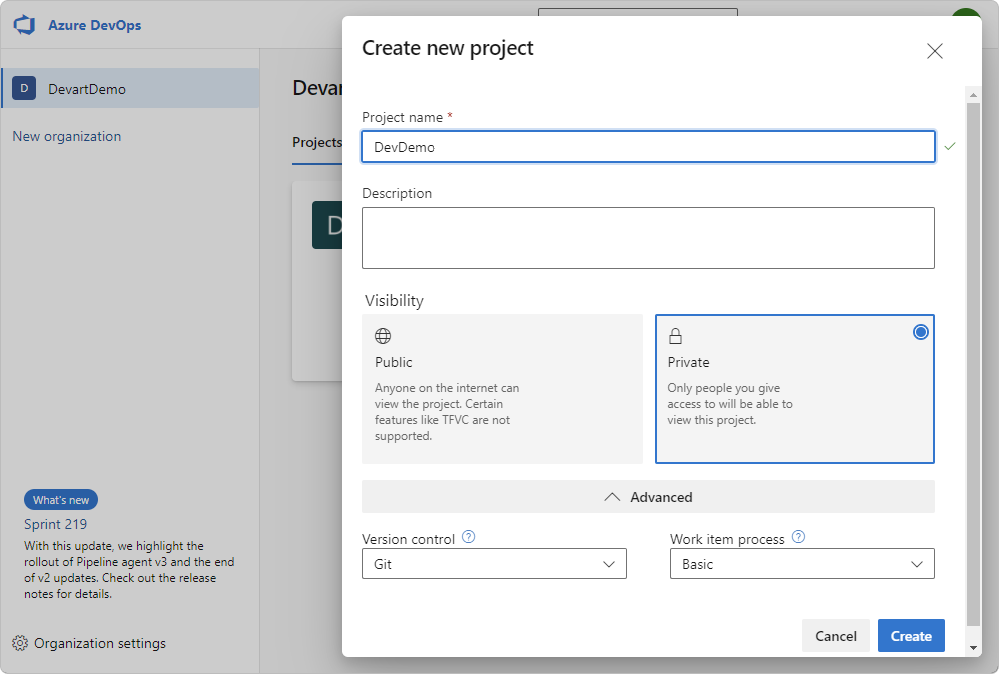
3. Click Create to create a project.
Step 2: Create a repository
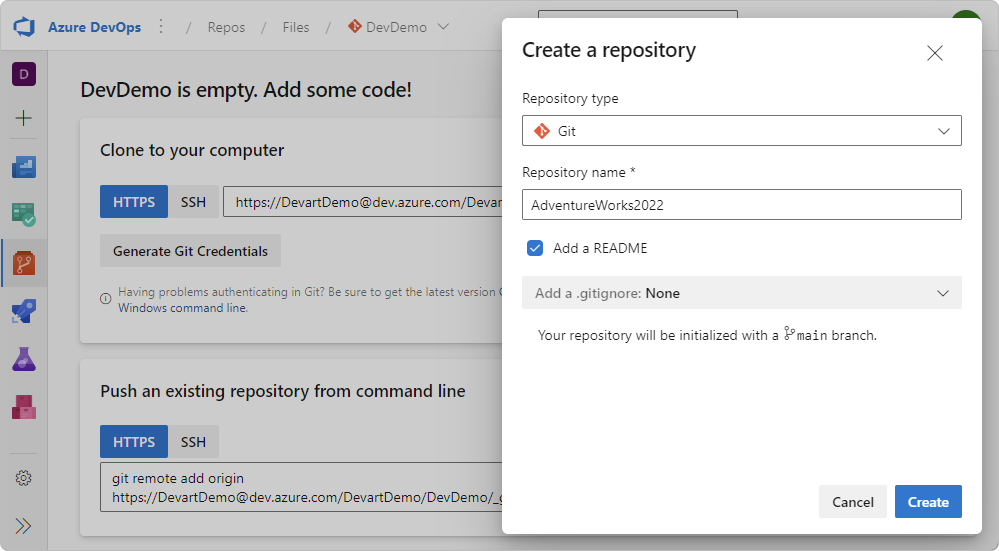
1. Go to https://dev.azure.com/YourOrganizationName, hover over your project, and select Repos.
2. On the top bar, select DevDemo > + New repository from the repository dropdown menu.
3. In the Create a repository dialog that opens, add the repository details:
- In the Repository type dropdown list, select Git (the default option) or TFVC.
- In the Repository name field, enter a name for your Git repository.
- Leave the Add a README selected to create a readme file containing information about the code in your repository.
- In the Add a .gitignore dropdown list, select the types of the files to ignore that will be added to the .gitignore file. If you do not want to add the .gitignore file, select the default Add a .gitignore: None option.
4. Click Create to create the new repository, which will be initialized with the default main branch.
Step 3: Clone a repository using the command line
You can create a local copy of a remote Git repository by cloning it into a local folder on your computer. Cloning a remote repository links each branch in your local copy of the repository with the corresponding branch of the remote repository.
1. Create an empty folder on the drive of your computer to store the local repository. For example, an azuredevops folder stored on the drive D.
2. Go to https://dev.azure.com/YourOrganizationName and click the project which repository you want to clone to your computer.
3. On the repository page, click Repos and select Files.
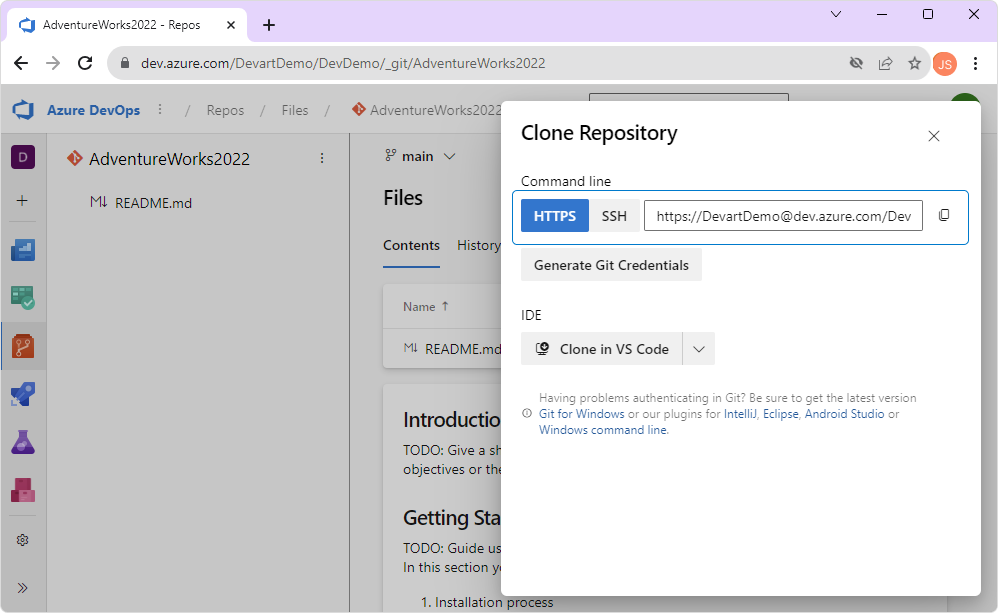
4. In the upper-right corner of the Files page, click Clone to open the Clone Repository pop-up window.
5. Select the HTTPS connection protocol and copy a clone URL of the repository.
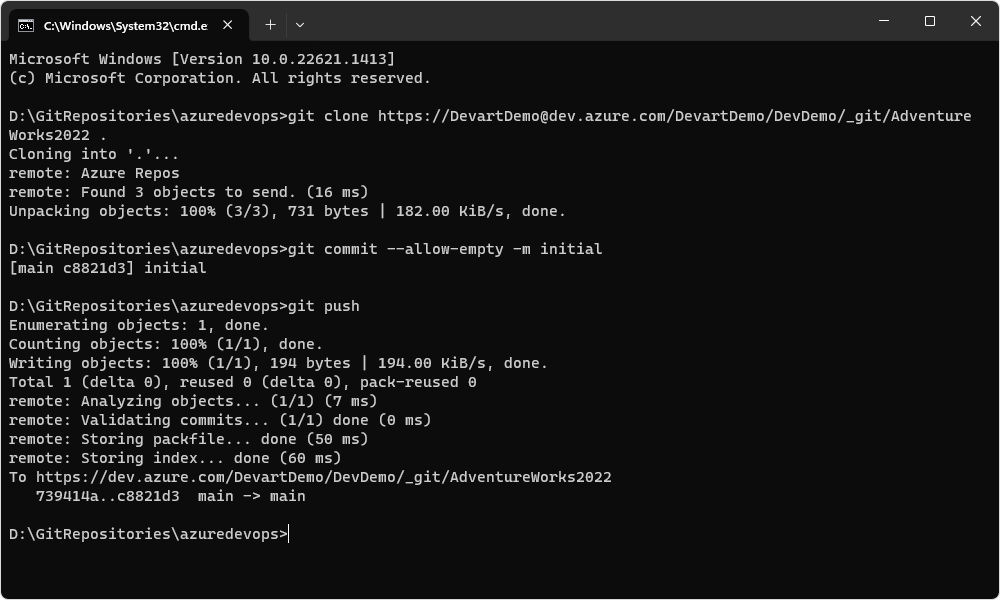
6. Start Windows Command Prompt (CMD). If you need to change the disk drive and navigate to the empty folder you created, use the cd command.
7. In the Command Prompt, paste the clone command with the repository URL to create a cloned copy of the repository in the local folder (azuredevops in our case).
Note
Place a dot at the end of the command to clone the repository to the folder you have created. Otherwise, another subfolder will be created.
If you didn’t add any files to the repository when you created it for the first time, execute the following commands:
-
git commit --allow-empty -m initial -
git push
Step 4: Link a SQL Server database to source control
After you cloned the remote repository to the folder on your local computer, you can link the database to source control using the dbForge Source Control add-in for SSMS.
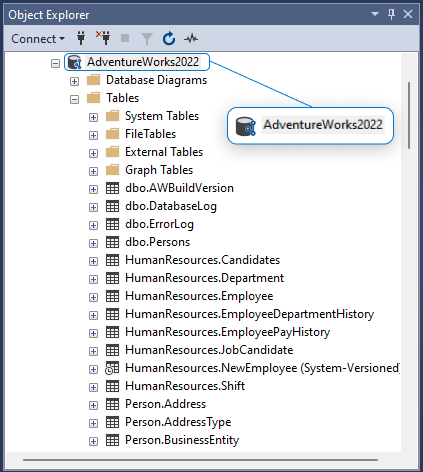
1. In SSMS Object Explorer, right-click the database you want to link to source control and select Source Control > Link Database to Source Control.
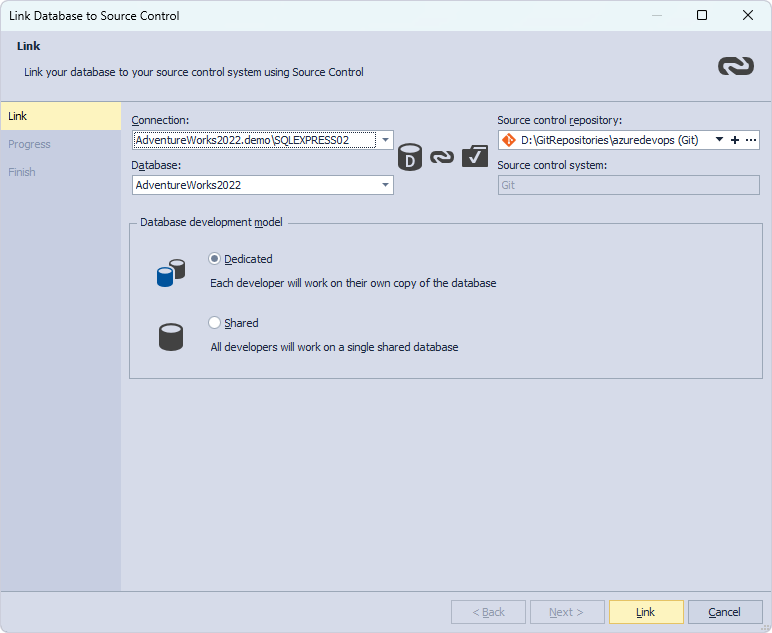
2. In the Link Database to Source Control dialog that opens, click + in the Source control repository field.
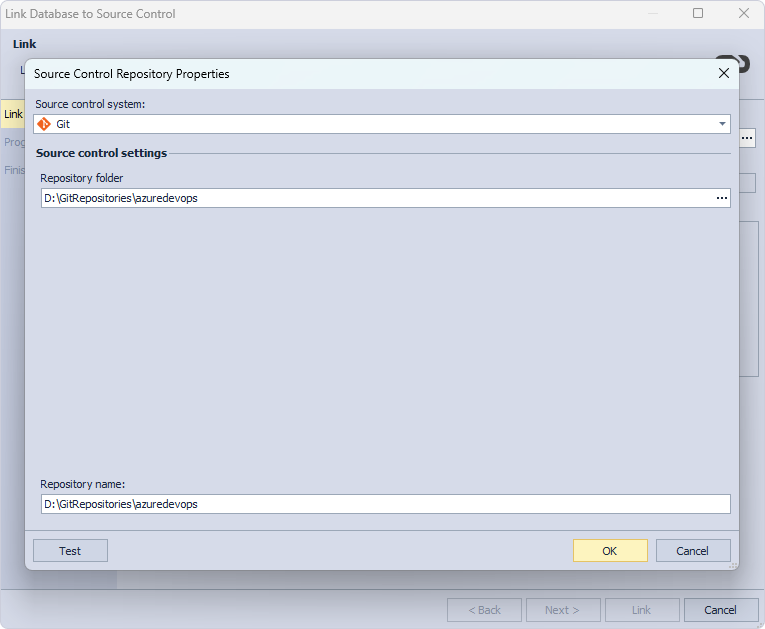
3. In the Source Control Repository Properties dialog that opens, do the following:
- From the Source Control system dropdown list, select Git as a source control system.
- In the Repository folder field, click
 More to add the repository folder located on your computer. In the Select Folder window that opens, select the folder, which is a local copy of your remote repository located in AzureDevOps, and then click Select Folder.
Note
The repository folder name represents a path to the local copy of the remote repository and must not contain the URL of the remote repository.
- Optional: In the Repository name field, you can change the name of the repository folder.
4. Optional: Click Test to verify that the database has successfully been connected to source control.
5. Click OK to apply the changes and close the Source Control Repository Properties dialog.
6. In the Link Database to Source Control dialog, select a database development model: dedicated or shared.
7. Click Link to establish the connection between the database and source control.
The Refresh progress window opens automatically, showing the stages of the refresh operation. The linked database gets the following icon in Object Explorer.
Step 5: After linking a database to the repository
If you are the first person who links this database, you must make an initial commit. For this, in Source Control Manager, go to the Local changes section, select the database objects to commit, and then click Commit.
If you linked a database that is already in source control, you can update your database to the latest version. For this, in Source Control Manager, go to the Remote changes section, select the objects, and click Get Latest, which is available only in the dedicated model but not in the shared model.