Restore individual objects from a backup
Recovering individual objects from a backup may be necessary for several reasons, for example:
-
Data corruption: In the event of data corruption, a single table or database may be affected. In such cases, restoring the entire backup would be unnecessary and time-consuming. Instead, recovering only the corrupted object can help minimize data loss and downtime.
-
Disaster recovery: In the event of a disaster, such as a server failure, restoring individual objects from a backup can help quickly restore critical business operations without having to restore the entire database.
Overall, recovering individual objects from a backup can help users minimize downtime, reduce data loss, and ensure database integrity.
Restore objects from a backup
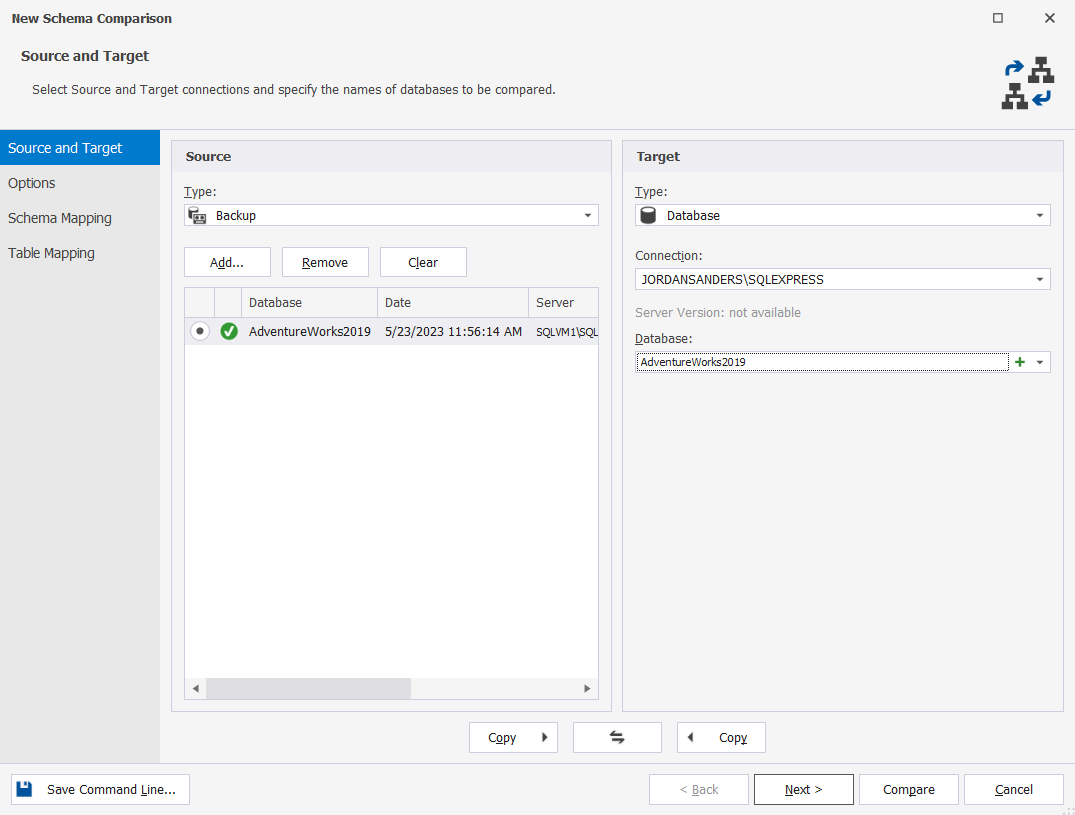
1. On the toolbar, click New Schema Comparison.
2. On the New Schema Comparison wizard > Source and Target page, select the source and target sources:
- Under Source:
- Type: Select Backup as the data source
- Click Add to add a backup file. In the Open window, select the file and click Open.
- Under Target:
- Type: Select Database as the target source
- Connection: Select the server connection on which the target database is located
- Database : Select the database to be compared
3. Switch to the Options page, set up data options, and then click Next. For more information, see Configure comparison options.
4. On the Schema Mapping page, you can edit schema mappings. For more information, see Custom schema mapping.
5. On the Table Mapping page, you can edit table and column mappings. For more information, see Map tables and columns.
6. In the Schema Comparison document that opens, you can include or exclude individual objects from the comparison results using the comparison results grid or the left-side Objects Filter panel. To open the Objects Filter panel, use one of the following options:
- On the Comparison menu, click Objects Filter.
- On the toolbar, click
 Apply a custom filter to the results.
 - Press Ctrl+L.
By default, all object types are included. To exclude specific object types from the comparison results, clear the corresponding checkboxes.

In addition, the Objects Filter feature enables users to apply multiple filters or create custom rules for specific objects in the Filter Editor and then save and use them for further comparisons if needed.
7. When everything is set, click Synchronize objects to the target database to proceed with the synchronization process. For more detailed information about how to configure the synchronization, see the Deploy schema changes documentation.
After the synchronization has been done, the recovery of the database is complete.
Also, you can compare backups. For more information, see Compare and synchronize backup files.
Create custom rules for specific objects
1. In the Objects Filter panel, click the object type for which you want to edit a rule and then click Edit Filter to open the Filter Editor.

2. In the Filter Editor that opens, edit the rule:
- In the Filter rule for box, select the individual object type for which you want to create or edit a filtering rule. Also, you can select All object types to create a rule for all objects.
- Select Include objects if to include the objects that meet a given condition.
- Select Exclude objects if to exclude the objects that meet a given condition.
3. To add a condition, do the following:
- Click And to choose the operator based on which you want to create a condition, or add a group or a condition. The default value is And.
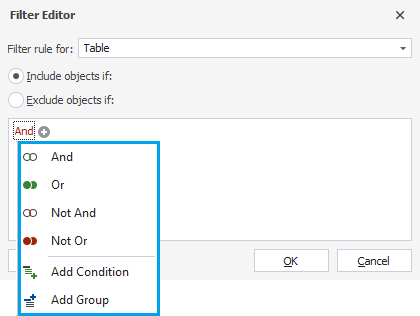
- Click + Add a new condition to this group next to the upper-level operator to add a condition.
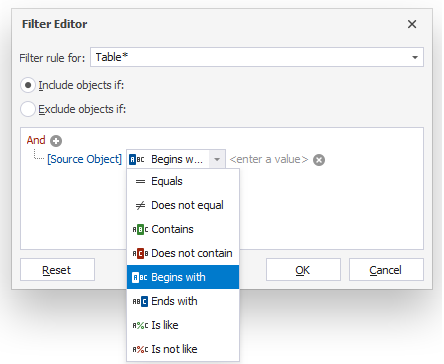
- Define a filtering expression:
- Select the property to filter on from the dropdown. By default, Source Object is selected.
- Select the way the filter applies the value to the property
- Enter the value you want to compare to the property
Note
An asterisk next to the object type means that there are unsaved changes.
If you want to remove a condition, you can click the cross icon next to the object in the Objects Filter panel.
4. To save the changes, click OK.