Map tables and columns
After you select data sources for your comparison project, Schema Compare automatically maps tables and columns having the same name in the source and target data sources.
However, with Schema Compare you can also map tables and columns with different names. This option helps prevent data loss when deploying tables or columns that have been renamed for some reason.
For instance, when you map the table ‘1A’ in the source to the same table that has been renamed as ‘1B’ in the target, the tables will be compared as objects that exist in both data sources. And when deploying, the table will not be dropped and re-created.
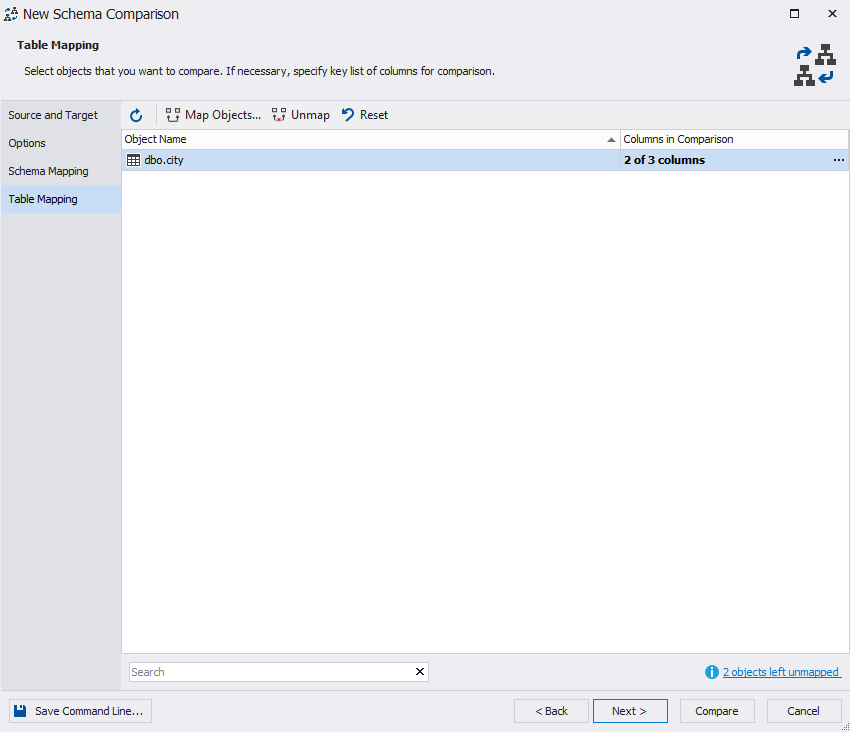
To check or change the mapping of tables and columns, click the Table mapping tab of the New Schema Comparison wizard.

The table displays mapped objects.
Map tables
To map tables:
To check and change the unmapped tables click … objects left unmapped in the right-left corner of the window.
Alternatively, click Map Objects button 
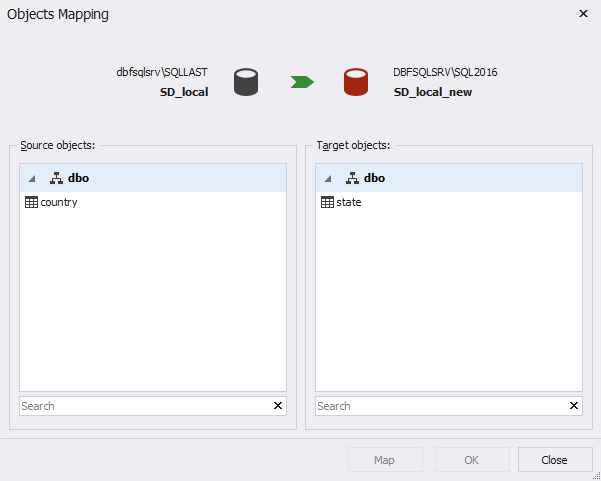
In the Objects Mapping dialog box that appears, you can select the tables you want to map. Click Map after that.

Schema Compare will move the selected tables to the list of mapped tables.
To unmap tables:
- Select the tables you want to unmap on the Table mapping tab.
- Click the Unmap button

Schema Compare will move the selected tables to the list of unmapped tables.
Map columns
Mapping columns option is useful when you need to compare columns in a table and the column names are different. In this case, you can map the columns as required.
Note
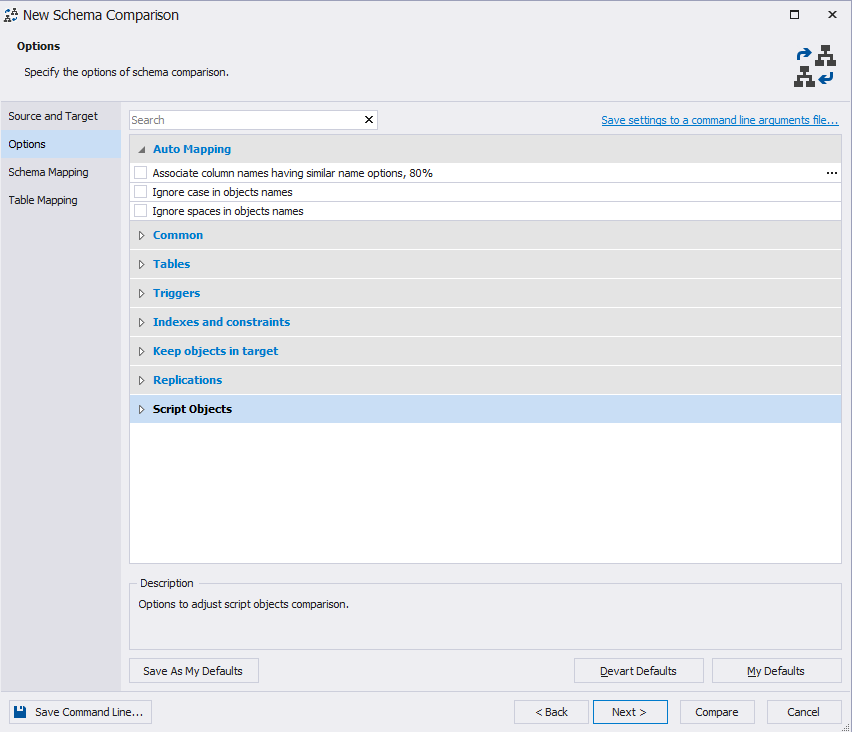
Schema Compare can automatically map column names having similar name options. The tool also allows ignoring case and spaces in objects’ names. You can enable or disable those features in the Auto Mapping section of the Options tab.
To map columns:
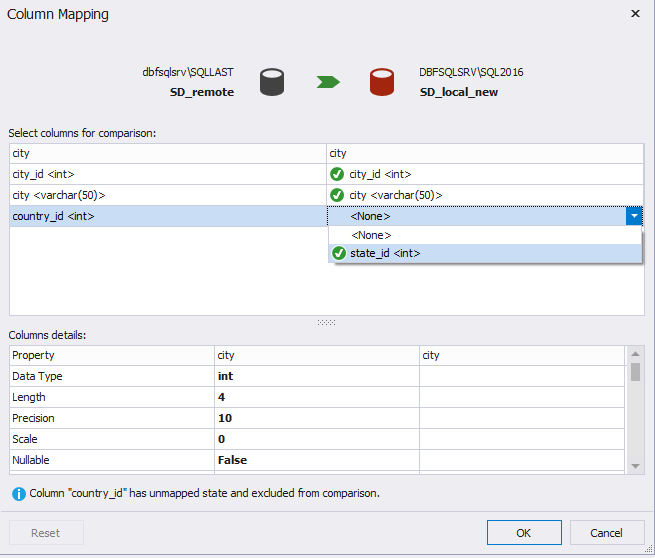
1. Click < … > next to the columns in comparison.

2. In the Column Mapping dialog box that appears you can select the columns you want to map.

3. Click OK.
To unmap columns:
1. In the Column Mapping dialog box click the column you want to unmap and select < None > from the drop-down list.

2. Click OK.
