How to Update to Review Assistant 3.5 or Higher
Review Assistant 3.5 runs on SQL Server database engine, which substituted SQLite used in the previous versions of Review Assistant.
To update the older versions of Review Assistant to version 3.5 or higher, perform the following steps:
-
There are conditions that need to be fulfilled prior to installation:
- you should not delete the SQLite database of the previous version from the server;
- you need to create a new empty SQL Server database;
-
Download and run the Review Assistant installer. The Install Wizard will appear and guide you through the installation. Please note, that here we describe only those steps of installation that require special attention. The rest of the steps are quite self-explanatory.
-
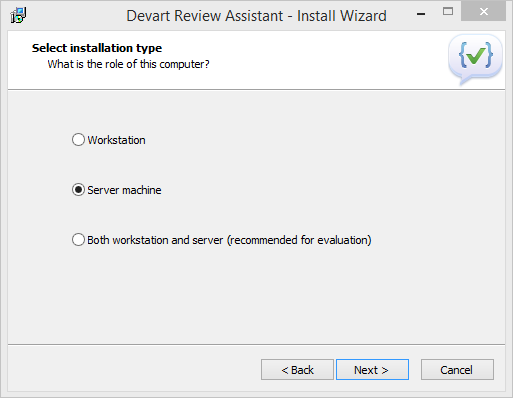
On the Select installation type page, select Server machine.
-
On the Select destination location page, you can change the default installation directory.

-
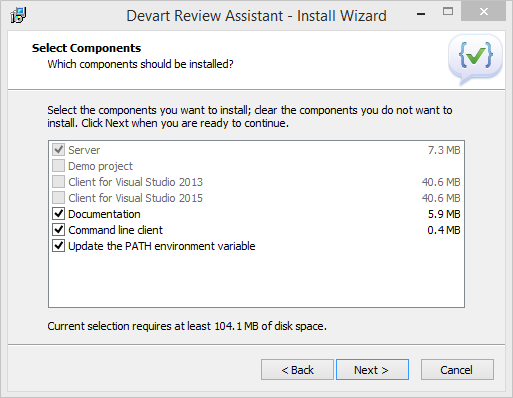
On the Select Components page, you can see the components, which are selected by default for this type of installation. Select or clear the required components. Note that the Server component is selected by default and its check-box is disabled so you cannot clear it.
For successful installation, make sure the Command line client component is selected.
-
On the next step, click Install. This will launch the installation process.
-
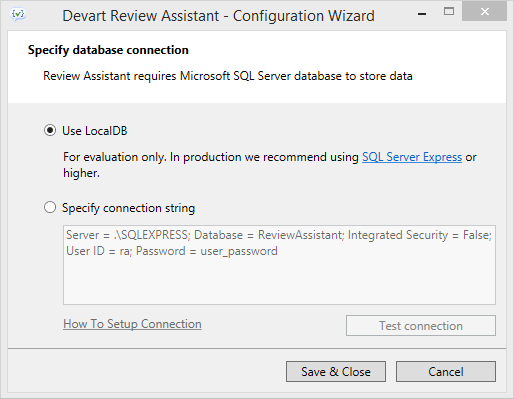
After the installation process is complete, the Configuration Wizard appears, where you can specify SQL Server database connection. You have an option to select LocalDB or specify a connection string to connect to the SQL Server database you’ve created earlier.
-
Clicking the Save&Close button initiates the migration process. During migration, a backup file of the SQLite database (reviewassistant.db.bak) is created and the connection string (if valid) is written into the Settings.xml file. Both files can be found here: C:\ProgramData\Devart\Review Assistant.
-
For adding/changing the database connection settings, you can invoke the Configuration Wizard by running the ReviewAssistantServerConfig.exe file located in the installation destination folder (which is C:\Program Files\Devart\Review Assistant by default).
Alternatively, open the Settings.xml file to change server settings. Make sure you restart the Review Assistant server for the changes to be applied.