How to design conditions for JOIN clauses
A JOIN clause combines columns from one or more tables into a new table. Depending on a JOIN type, you can get different results for the same joined tables.
dbForge Query Builder for SQL Server allows you to visually create 5 kinds of JOINs: INNER, LEFT OUTER, RIGHT OUTER, FULL OUTER, and CROSS JOINs. In the Joins tab of the Tabbed Editor, you can create new JOINs between tables, remove existing JOINs, select a type of JOINs, group JOINs, and add conditions to the JOIN clause.
Add JOINs
To add a JOIN between two tables, do either of these:
- Use the diagram - Drag a column from the source table to the column from the target table.
- Use the Joins tab of the Tabbed Editor
Note
JOINs are automatically added when a table with a foreign key and its referenced table are dragged onto the diagram.
To create a JOIN using the Tabbed Editor
1. On the Joins tab, click ![]() Add a new join with condition.
Add a new join with condition.
2. In a new JOIN syntax construction that opens, do the following:
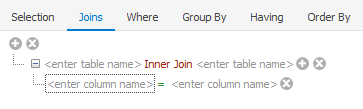
- Click the red-colored JOIN type and select the JOIN type you want to set.
- Click enter table name on the left and on the right side of the JOIN type to select tables you want to join.
- Click a green-colored equals sign (=) to set a logical operator (for example, <= or <>) to be used to compare values in the columns.
- Click enter column name on the left and on the right side to set a join condition.
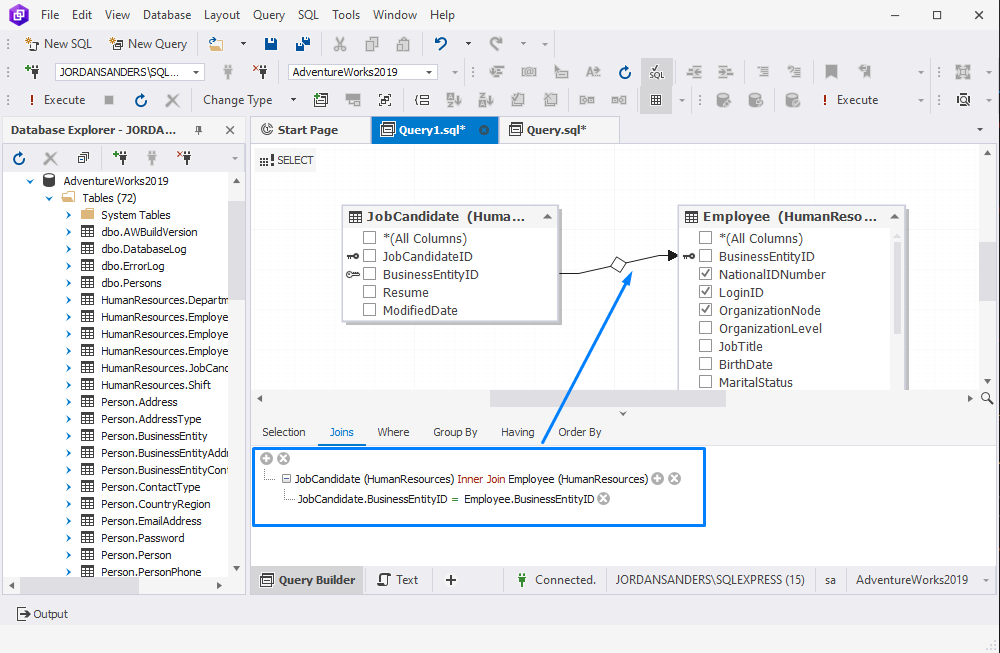
3. The JOIN clause is added and the logical relationship between tables is displayed on the diagram.
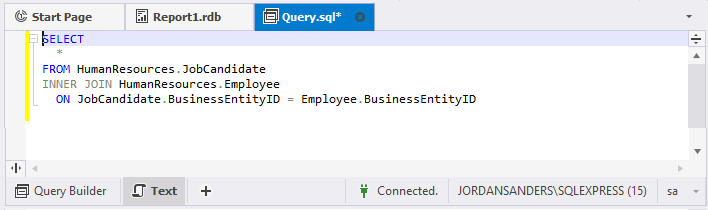
4. When switching to the Text view, you can preview the SELECT statement.
Work with JOIN conditions and condition groups
The Tabbed Editor shows the JOIN clause as a tree with the JOIN type, condition, and condition groups. A group consists of several conditions or subgroups, combined with a logical operator.
To navigate between conditions and groups, use the UP ARROW and DOWN ARROW keys. Use the LEFT ARROW and RIGHT ARROW keys to navigate between a criteria operator and operands.
Create conditions and groups in JOINs
To add a new group, click the upper-level group operator or JOIN type and select Add Group.

To add a new condition
1. On the Joins tab, open the condition construction by using one of the following ways:
- Click
 Add new condition to join next to the join
 - Click the JOIN type and select Add Condition
- Press CTRL+PLUS SIGN
2. Click enter column name and select a column.
3. Click the condition criteria operator and select the logical operator you want to apply.

4. If the condition operator requires operand values, specify them.
Remove conditions, groups, and JOINs
To remove a condition, click ![]() Delete or navigate to the condition and press the DELETE or MINUS SIGN keys.
Delete or navigate to the condition and press the DELETE or MINUS SIGN keys.
To remove a group, do one of the following:
- Click
 next to the group.
 - Click its logical operator and select Remove Group on the shortcut menu.
- Navigate to the group and press the DELETE or MINUS SIGN keys.
You can remove a JOIN in one of the following ways:
- Click Delete.
- Click the JOIN type and select Remove Join.
To remove a JOIN on the diagram, right-click the selected connector and select Remove from Diagram.
Edit JOINs
To edit JOINs, do one of the following:
- On the Query toolbar, click
 Select All rows from [table_name] and
  Select All rows from [table_name] to change the JOIN type.
 - On the diagram, right-click the selected relationship and select Select All rows from [table_name].
You also can copy, cut, and paste conditions and groups with the CTRL+C, CTRL+X, and CTRL+V keys.