Build queries on a diagram
A database diagram is a graphical representation of the structure of the database and relations between database objects. In dbForge Query Builder for SQL Server, you can build queries, add or remove tables from a query, work with subqueries, specify sort order, add columns to output data, change query types, set aliases for tables and columns, control layout diagram by aligning tables and joins.
You can start building a query in one of the following ways:
- On the standard toolbar or from the Start Page, click New Query and drag tables from Database Explorer.
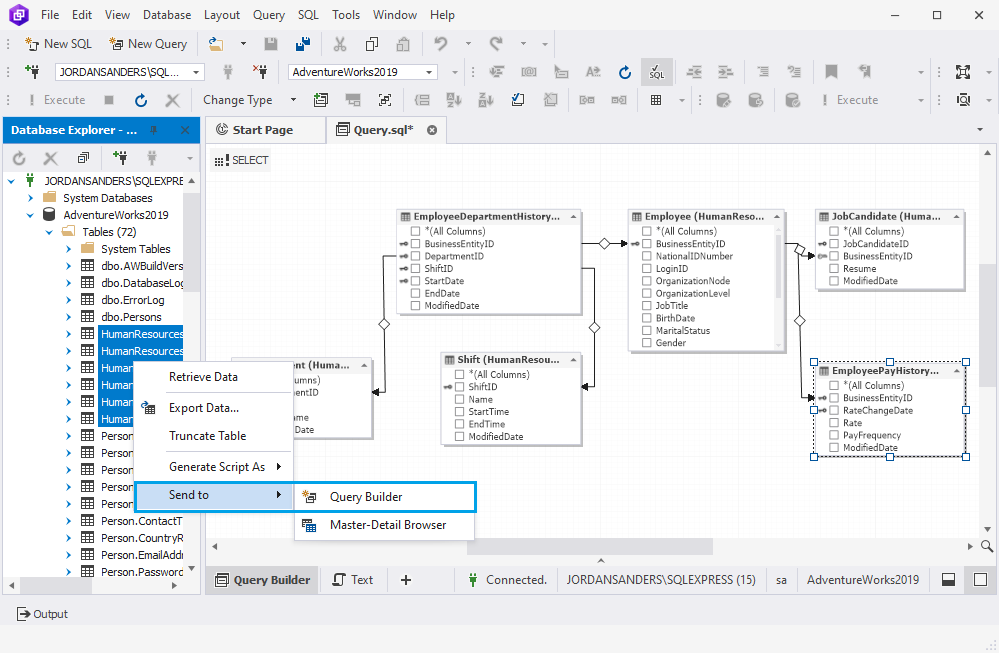
- In Database Explorer, right-click the table and select Send to > Query Builder.
Note
You can add multiple tables to the diagram at once by holding Ctrl and selecting the tables in Database Explorer.
If there are foreign keys between tables, then JOINs between them will be created on the diagram automatically and displayed on the Joins tab of the Tabbed Editor. By default, the SELECT statement opens. If you need to change the type of the statement, you can do this using the Change Type functionality. For more information about query types, see How to work with different query types.
After the tables are added, you can select the columns visually. Once done, they automatically appear on the Selection tab of the Tabbed Editor. For more information about how to create a SELECT statement, see How to design conditions for the SELECT clause. Then, you can specify filtering conditions, group, or order results, preview the query text, and run the query.
In addition, using the drag-and-drop feature, diagram shapes can be moved, resized, or aligned to the diagram grid.
Add tables to a query
When you create a query, you retrieve data from a table or other objects structured like tables - views and certain user-defined functions.
To add tables to the diagram, use one of the following ways:
-
In Database Explorer, select a required table, tables or table-valued objects and drag them onto the diagram.
-
In Database Explorer, right-click the selected tables and select Send to > Query Builder.
Tables and views are automatically added to the query when you reference them in the statement in the SQL editor.
Note
Database objects you drag onto the diagram and Query Builder document you use should be connected to the same server.
Remove tables from a query
You can remove a table or any table-valued object from the query.
To remove the table from the query, use one of the following ways:
-
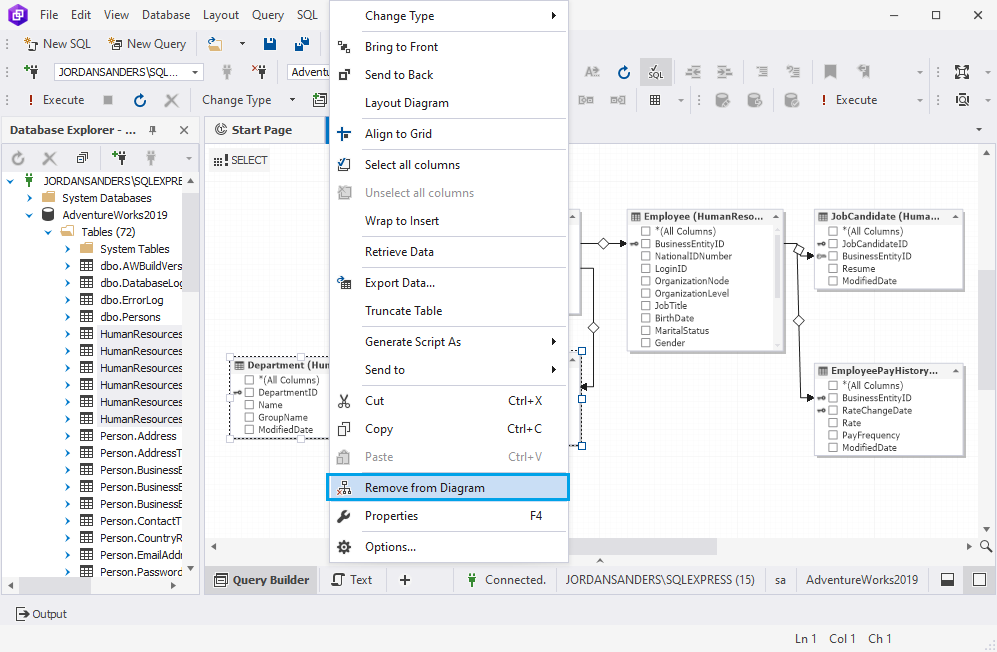
On the diagram, right-click the table(s) you want to delete and select Remove from Diagram. You can remove multiple objects at a time. For this, select the objects by holding the Ctrl and repeat the step.
-
Remove all references to the object in the SQL editor.
Note
When you remove a table or table-valued object, Query Builder automatically removes JOINs that involve that table or table-valued object and removes references to the object’s columns in the SQL editor.
Removing a table or table-valued object does not delete anything from the database, it only removes it from the current query.
Add columns to the query
You can add a column to the query, sort it, search the contents of the column, or summarize its contents.
To add an individual column, use one of the following ways:
-
On the diagram, select the checkbox next to the column that you want to add.
-
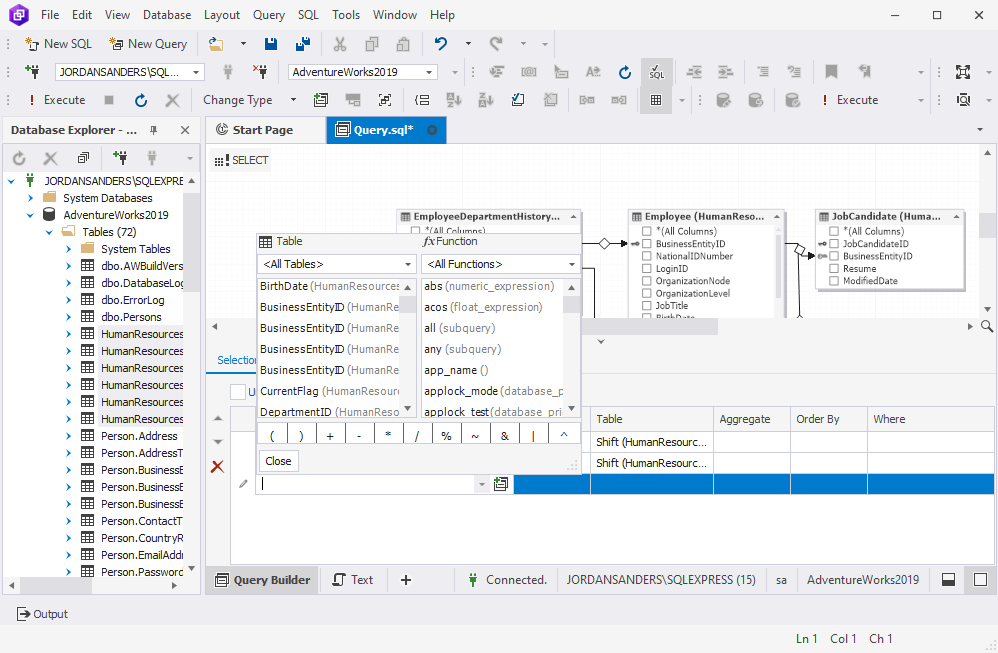
In the Tabbed Editor, click the empty row in the Column grid column, select a table and a column name from the drop-down list. To open the Tabbed Editor, on the Query toolbar, click
 Show Tabbed Editor or on the Query menu, and select Show Tabbed Editor.
To add all columns for one table or table-valued object, do either of the following:
- On the diagram, select the checkbox next to *(All Columns).
- On the Query toolbar, click
 Select all columns.
 - On the Query menu, select Select all columns.
To add all columns for all tables and table-structured objects
1. On the diagram, select all tables.
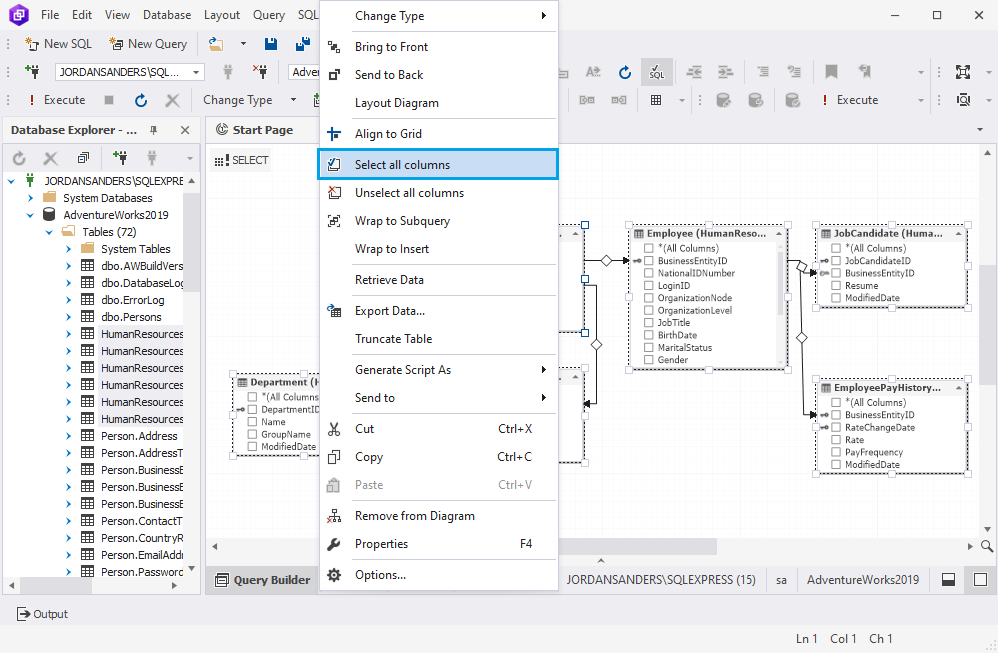
2. Right-click any table header and select Select all columns on the shortcut menu.
Note
Make sure that no JOIN lines on the diagram are selected.
Align shapes
Each shape may be aligned to the grid. To align a shape to the grid, select the table on the diagram and click Align > to Grid on the Layout toolbar. Alternatively, you can also use corresponding commands of the Align submenu of the Layout menu.
Several shapes can be aligned in a column or in a row.
- To align in a row, select shapes and click Align Tops, Align Middles, or Align Bottoms on the Layout toolbar to align the shapes by their top, center, or bottom of the primary selection respectively. Their horizontal position remains unchanged.
- To align in a column, select shapes and click Align Rights, Align Lefts, or Align Centers to align the shapes by their right side, left side, or center of the primary selection respectively. Their vertical position remains unchanged.
![]()
Change shape size
Query Builder for SQL Server allows you to layout a diagram automatically or manually. To resize the diagram automatically, do either of the following:
- Right-click the diagram and select Layout Diagram on the shortcut menu.
- Select the diagram and click Layout Diagram on the Diagram toolbar.
To change the shape size, select it and drag the square resize markers at the shape sides and corners. To fit the shape size to the grid, select it and click ![]() Size to Grid on the Layout toolbar. Alternatively, on the Layout menu, select Make Same Size > Size to Grid. Shapes have minimum and maximum height and width. The minimum width and height are constant. The maximum width depends on the length of the name of the longest column in a table shape. Maximum height depends on the table shape column count.
Size to Grid on the Layout toolbar. Alternatively, on the Layout menu, select Make Same Size > Size to Grid. Shapes have minimum and maximum height and width. The minimum width and height are constant. The maximum width depends on the length of the name of the longest column in a table shape. Maximum height depends on the table shape column count.
To fit the same size for multiple shapes, select the shapes and click ![]() Make Same Width or
Make Same Width or ![]() Make Same Height on the Layout toolbar. Alternatively, you can use the corresponding commands of the Make Same Size submenu of the Layout menu. When using this feature, the size of the selected shapes will be aligned with the size of the primary selection.
Make Same Height on the Layout toolbar. Alternatively, you can use the corresponding commands of the Make Same Size submenu of the Layout menu. When using this feature, the size of the selected shapes will be aligned with the size of the primary selection.
To change the shape order, do either of the following:
- Right-click tables and select Bring to Front or Send to Back from the shortcut menu.
- On the Layout toolbar, click
 Bring to Front or
  Send to Back.
Note
A primary selection is one of the selected shapes. Its resize markers are blue, while resize markers of other selected shapes are black. If a selected shape cannot have the same size as the primary selection, its size will be changed to become as close to the primary selection size as possible.
Control spacing between shapes
The diagram provides flexible control over spacing between shapes on it. You can proportionally increase and decrease the horizontal and vertical spacing between the shapes, make it equal or remove it.
To work with spacing, use the Layout toolbar.

- To increase the spacing between shapes, select the shapes to be moved and click Increase Horizontal Spacing or Increase Vertical Spacing on the Layout toolbar. Alternatively, on the Layout menu, select Horizontal Spacing or Vertical Spacing > Increase.
- To decrease the spacing between shapes, select the shapes to be moved and click Decrease Horizontal Spacing or Decrease Vertical Spacing on the Layout toolbar. Alternatively, on the Layout menu, select Horizontal Spacing or Vertical Spacing > Decrease.
- To make the spacing between shapes equal, select the shapes to be moved and click Make Horizontal Spacing Equal or Make Vertical Spacing Equal on the Layout toolbar. Alternatively, on the Layout menu, select Horizontal Spacing or Vertical Spacing > Make Equal.
- To remove the spacing between shapes, select the shapes to be moved and click Remove Horizontal Spacing or Remove Vertical Spacing on the Layout toolbar. Alternatively, on the Layout menu, select Horizontal Spacing or Vertical Spacing > Make Equal.
Note
When increasing or decreasing spacing or making it equal, spacing is considered as the distance between centers of shapes. But when removing spacing, it is considered as the distance between shape borders.
When you remove, for example, vertical spacing, shapes will be located in the following way: the top of the second shape will be located at the same height as the bottom of the highest shape, the top of the third one will be located at the same height as the bottom of the second shape and so on.