How to work with different query types
The Query Builder tool allows you to build different types of SQL queries, such as SELECT, INSERT (results and values), UPDATE, and DELETE.
Overview of query types
The table provides a description of the query types supported in the tool.
| Query Type | Description |
|---|---|
 |
Creates a SELECT query that allows you to retrieve data from the tables. |
 |
Creates an INSERT RESULTS query using an INSERT INTO statement. It allows you to transfer data from one table to another or copy data within the same table. |
 |
Creates an INSERT INTO query that allows you to insert rows and values into the table. |
 |
Creates an UPDATE query that allows you to update one or more records in a table. |
 |
Creates a DELETE query that allows you to delete records from the selected table. |
Note
In the INSERT VALUES SQL query, you can add only one row to a table in one query.
The current query type is displayed in the upper-left corner of the diagram.
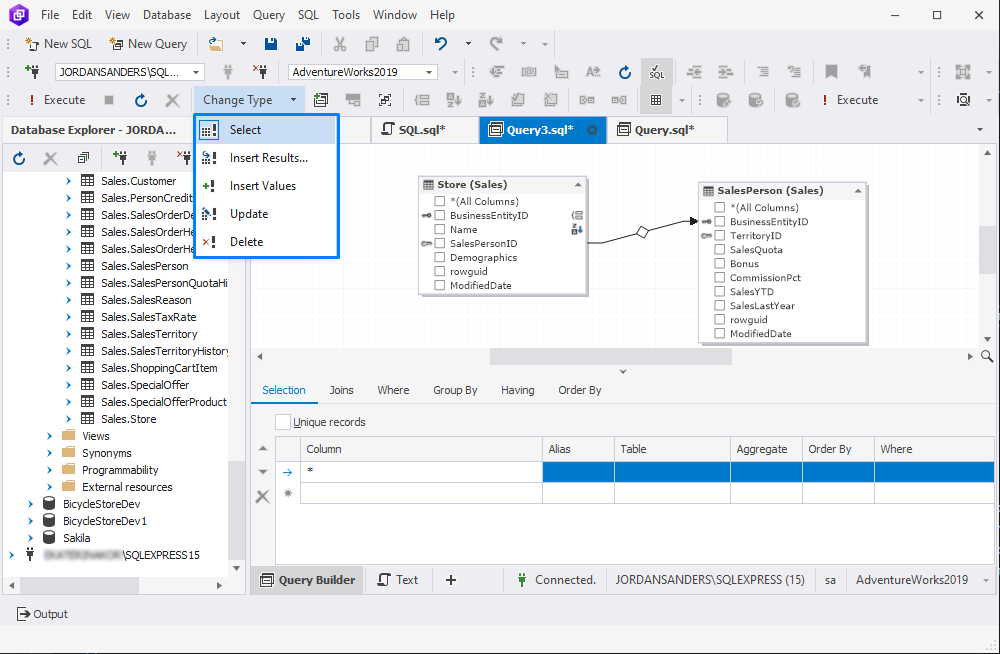
Change query types
The default SQL statement is SELECT. You can change the query type by using one of the following ways:
- On the Query toolbar, click Change Type and select the type from the drop-down list.
- On the Query menu, select Change Type > required type.
- On the diagram, right-click the type you use and select Change Type > required type on the shortcut menu.
- Right-click the diagram and select Change Type > required type.
INSERT RESULTS
When selecting the INSERT RESULTS query type, you need to specify the table to insert data to. You can use this type of the query to add data from multiple tables to a single table. For more information about how to create a SQL INSERT RESULTS query, see How to create a SQL INSERT statement.
In the Choose Target Table to Insert Data to that opens, select the target database, schema, and table or view to insert data to. Then, click OK. You can also search for the required table or view it in the Search field. Start typing the name and the names matching the input criteria will be highlighted in the Tables and Views column.
Then, specify the needed values and conditions in the corresponding tabs of the Tabbed Editor. For more information about how to perform these operations, see the list of how-to topics:
- How to design conditions for the SELECT clause
- How to design conditions for JOIN clauses
- How to design conditions for WHERE clauses
- How to design conditions for GROUP BY clauses
- How to design conditions for HAVING clauses
- How to design conditions for ORDER BY clauses
INSERT INTO
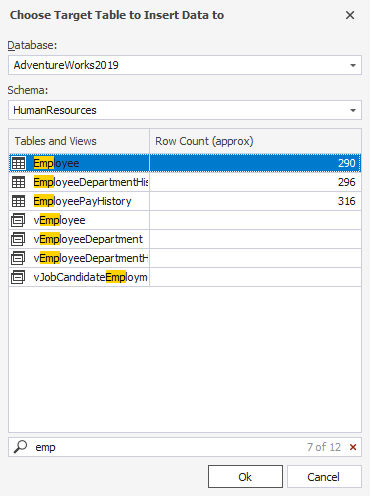
When selecting the INSERT INTO query type, you need to specify the table to insert data to. For more information about how to create a SQL INSERT VALUES query, see How to create a SQL INSERT statement.
In the Choose Target Table that opens, select the database, schema, and table or view to insert data to. Then, click OK. If there are multiple tables, you can search for the required table or view. For this, in the Search field, start typing the name. The names matching the input criteria will be highlighted in the Tables and Views column.

After the table is selected, in the Tabbed Editor, add the values to the columns by doing the following:
- In the Name column, click the empty row and select the column from the drop-down list.
- In the Value column, enter the value to be inserted.
- In the Default column, select whether the value will be default or not.
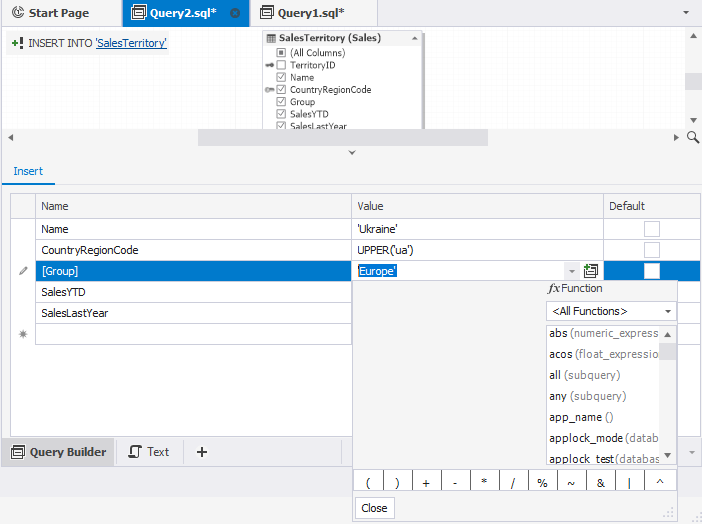
Switch to the Text view to preview the SQL statement.

UPDATE
When selecting the UPDATE query type, you should specify the table you want to update. For more information about how to create a SQL UPDATE query, see How to create a SQL UPDATE statement.
In the Choose Target Table dialog that opens, select the database, schema, and table or view to insert data to. Then, click OK. If there are multiple tables, you can search for the required table or view. For this, in the Search field, start typing the name. The names matching the input criteria will be highlighted in the Tables and Views column.

On the Update tab, you can modify the columns and values as you did for the Insert into query.
On the Where tab, you can add the condition based on which the data will be filtered. For more information about how to add conditions and groups, see How to design conditions for WHERE clauses.
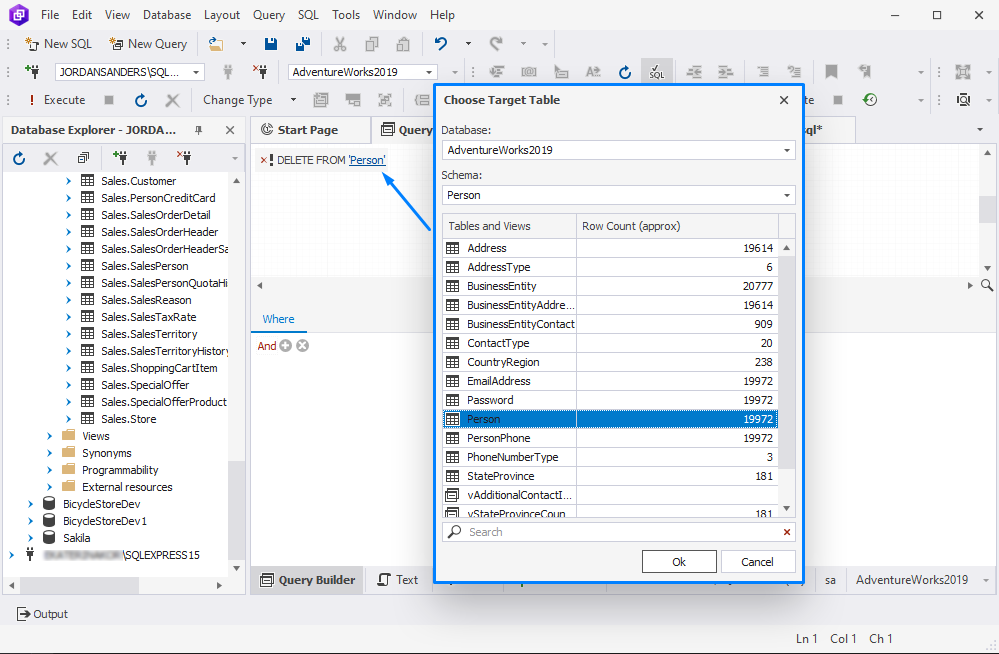
DELETE
When selecting the DELETE query type, you should specify the table from which you want to delete records. For more information about how to create a SQL UPDATE query, see How to create a SQL DELETE statement.
In the Choose Target Table that opens, select the database, schema, and table or view to delete.
Then, on the Where tab, specify the condition based on which the records will be deleted. For more information about how to set up conditions, see How to design conditions for WHERE clauses.