Loading data from other servers
The guide describes how to import data using the ODBC data providers.
Loading data using the ODBC data provider
With dbForge Data Pump for SQL Server, you can migrate data not only from the file but also between different servers. For example, you can import data using native ODBC drivers or ODBC drivers provided by third-party providers, for example, Devart.
Note
Since SSMS is a 32-bit application, only 32-bit ODBC drivers should be downloaded and installed for the correct work of dbForge Data Pump.
Devart ODBC Drivers are cutting-edge connectivity solutions for 32-bit and 64-bit Windows, macOS, and Linux that can increase performance, make the deployment process much easier, and provide a fast access to databases. For more information about using Devart ODBC drivers, see How to configure Devart ODBC drivers.
Depending on the operating system you use, you can install Devart ODBC drivers using the following how-to topics:
- Installing and Configuring an ODBC Driver on Linux (DEB / RPM)
- Installing and Configuring an ODBC Driver on macOS
- Installing and Configuring an ODBC Driver in Windows 10 (32 / 64-bit)
To start using ODBC drivers in the Data Import wizard, they should be installed and configured in advance.
To configure ODBC drivers for a specific server, see the following topics:
- How to configure ODBC data source for MySQL
- How to configure ODBC data source for Oracle
- How to configure ODBC data source for PostgreSQL
- How to configure ODBC data source for SQL Server
- How to configure Devart ODBC drivers
In addition, you can export data using the ODBC provider.
To load data using the ODBC data provider
1. In Object Explorer, right-click a database from which you want to import data and select Data Pump > Import Data.
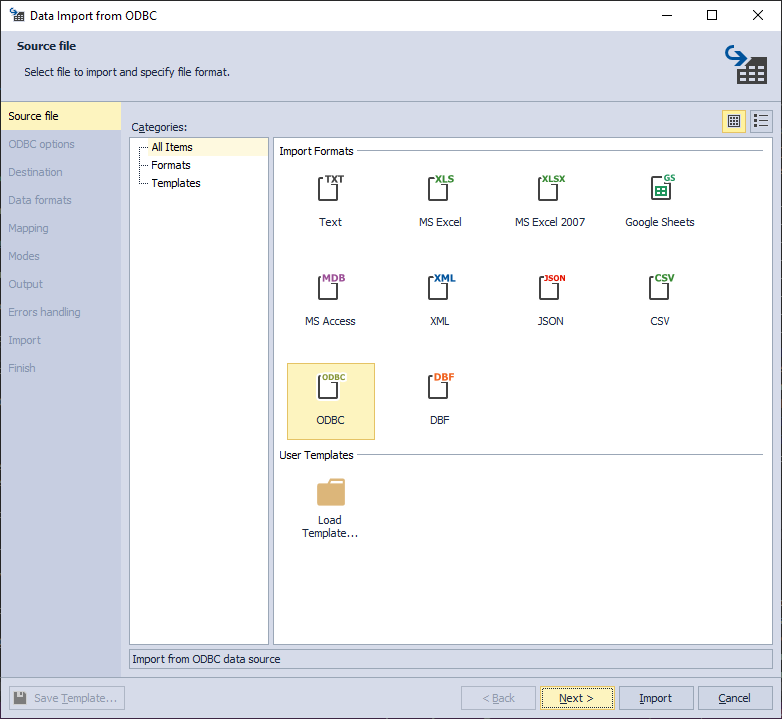
2. In the Data Import Wizard that opens, on the Source file tab, select ODBC and click Next.
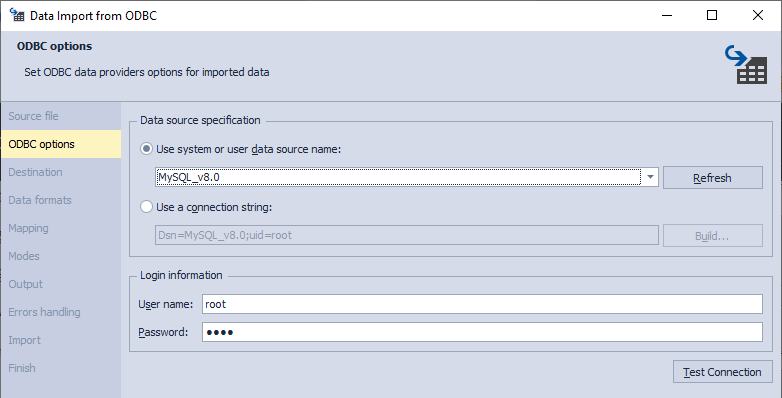
3. On the ODBC options tab, set ODBC data provider options for import:
-
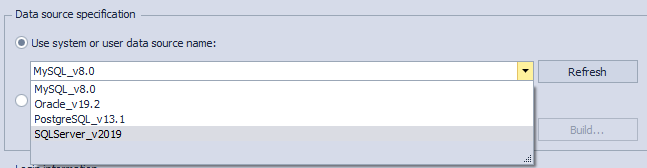
Under Data source specification, select one of the following options:
- (For the previously configured ODBC data sources) Use system or user data source name from the drop-down list. You can click Refresh to update the list.
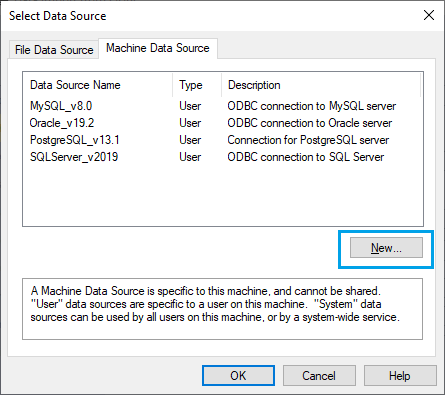
- Use a connection string. To create a new data source, click Build. In the Select Data Source dialog that opens, switch to the Machine Data Source and click New. Then, follow the steps from the above-mentioned how-to topics about ODBC driver configuration for a specific server.
-
Under Login information, enter the user name and password and click Next.
Optional: To verify the connection, click Test Connection. In the pop-up window informing that dbForge Data Pump was successfully connected, click OK.
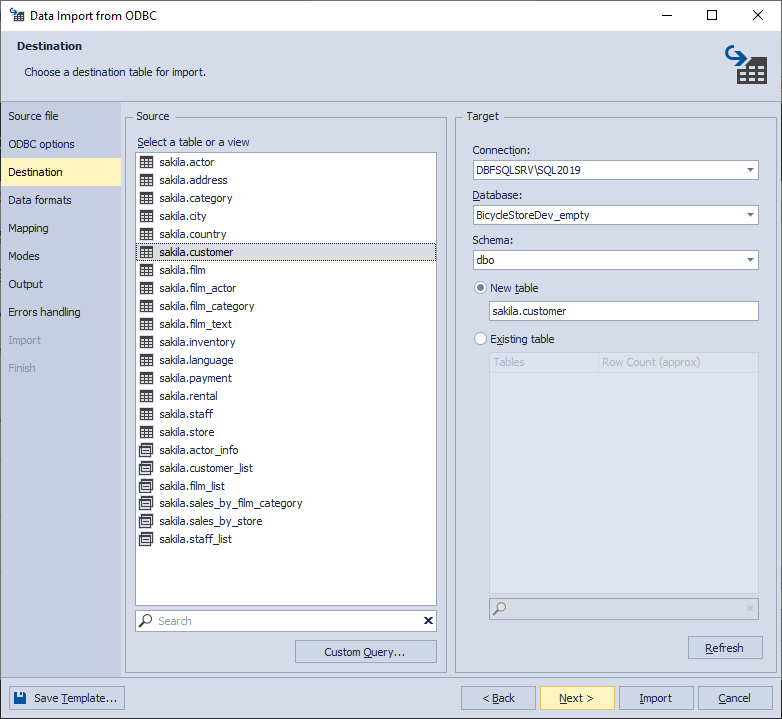
4. On the Destination tab, select a target table for import, a server connection, a database, and its schema. Then, select whether you want to import to a new table or an existing one and click Next.
To find a specific table in the list, start typing its name in the Search field. The list will be filtered to show only those tables that contain matching characters in their names. You can use a query to import specific data. To do this, click Custom Query, edit the query, and then click OK to save the changes.
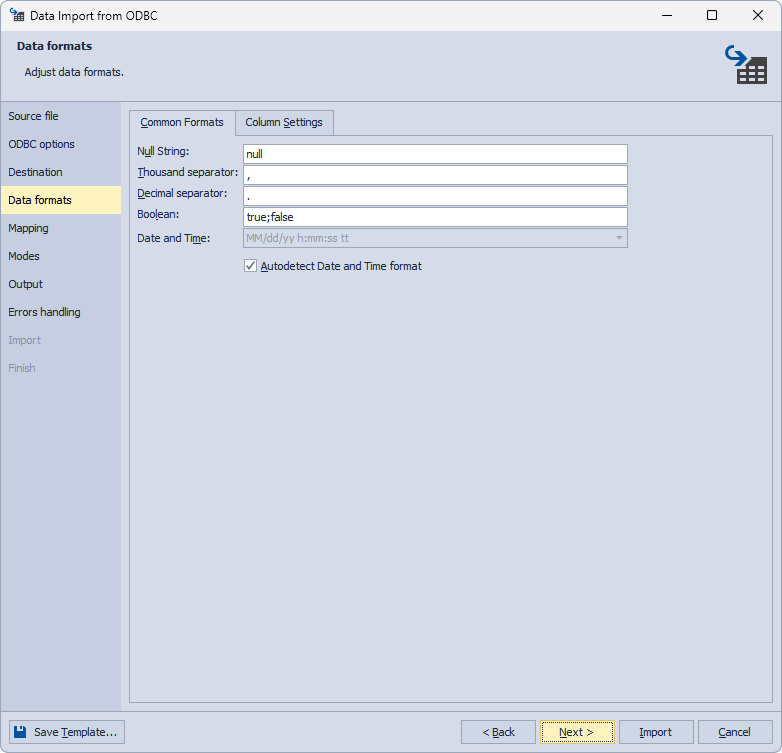
5. On the Data formats tab, specify data formats and column settings and click Next.
6. On the Mapping tab, map the source columns to the target ones and click Next.
If you are importing the data into a new table, all the columns will be automatically created and mapped.
If you are importing into an existing table, only columns with the same names will be mapped, the rest should be mapped manually. (If no columns with the same name are found, they are mapped in succession - the 1st column in Source with the 1st column in Target, etc.)
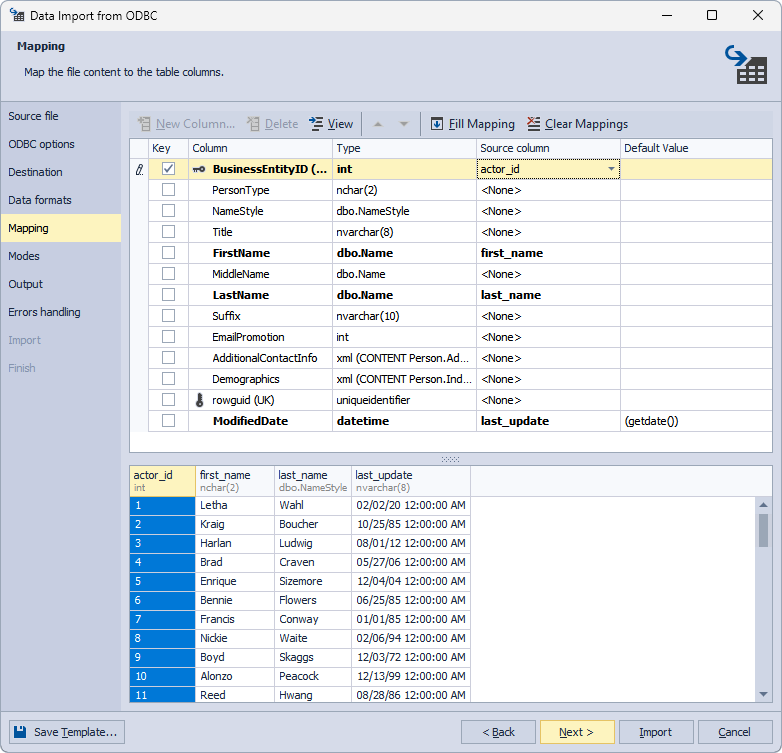
The Target columns are displayed on top and the Source columns - at the bottom of the wizard page.
On the toolbar, you can perform the following actions:

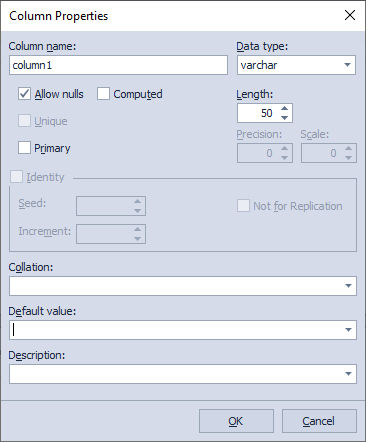
- Add a new column by clicking New Column. In the Column Properties dialog that opens, set column properties, such as a name, a data type, whether it contains NULLs or is a primary key, etc. To save the changes, click OK, or to discard the changes, click Cancel.
-
Delete the column by clicking Delete.
-
Edit the column by clicking Edit or double-clicking the existing column.
-
Move columns up
 or down
-
Add column mapping by clicking Fill Mapping.
-
Cancel mapping of all columns, click Clear Mappings.
Note
If you are importing into a new table, you can edit the Target column properties by double-clicking them on the upper grid. Select the Key check box for a column with a primary key and click Next. Note that you should select at least one column with a primary key, otherwise, some of import modes on the Modes tab will be disabled.
7. On the Modes tab, select an import mode and click Next.
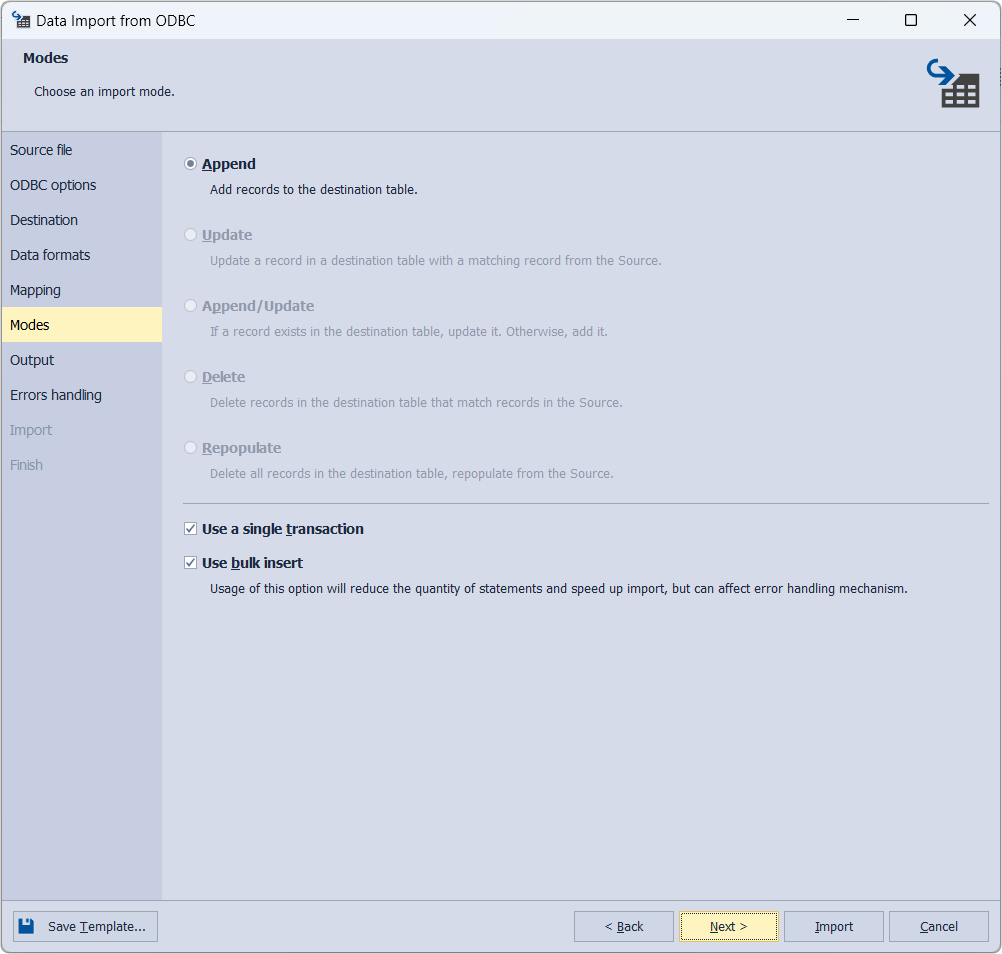
On the Modes tab, you can also do the following:
- Select the Use a single transaction check box to wrap INSERT statements in a single transaction and, thus, to keep data consistency.
- Select the Use bulk insert to reduce the number of statements and speed up the import. However, note that this may affect an error handling mechanism.
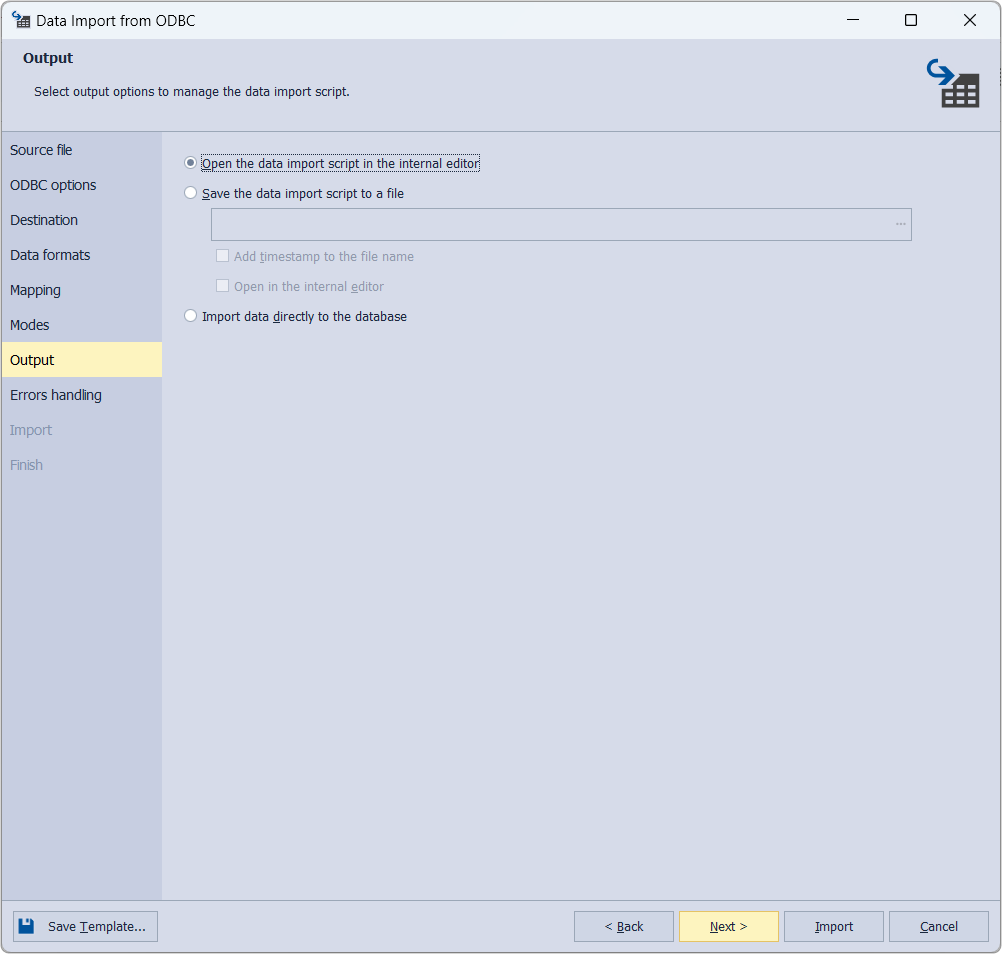
8. On the Output tab, select one of the following output options to manage the import script and click Next:
- Open the data import script in the internal editor: The script will be opened in a new SQL document of the dbForge Data Pump tool where you can add custom add or execute the script by clicking Execute on the toolbar or pressing F5.
- Save the data import script to a file: The script will be saved locally on your PC. When selected, specify a path to the folder you want to save the script to.
If you want to add date and time to the file name, select the Add timestamp to the file name check box.
If you want to open the script in the internal editor after saving, select the Open in the internal editor check box.
- Import data directly to the database: The script will be executed without your review.
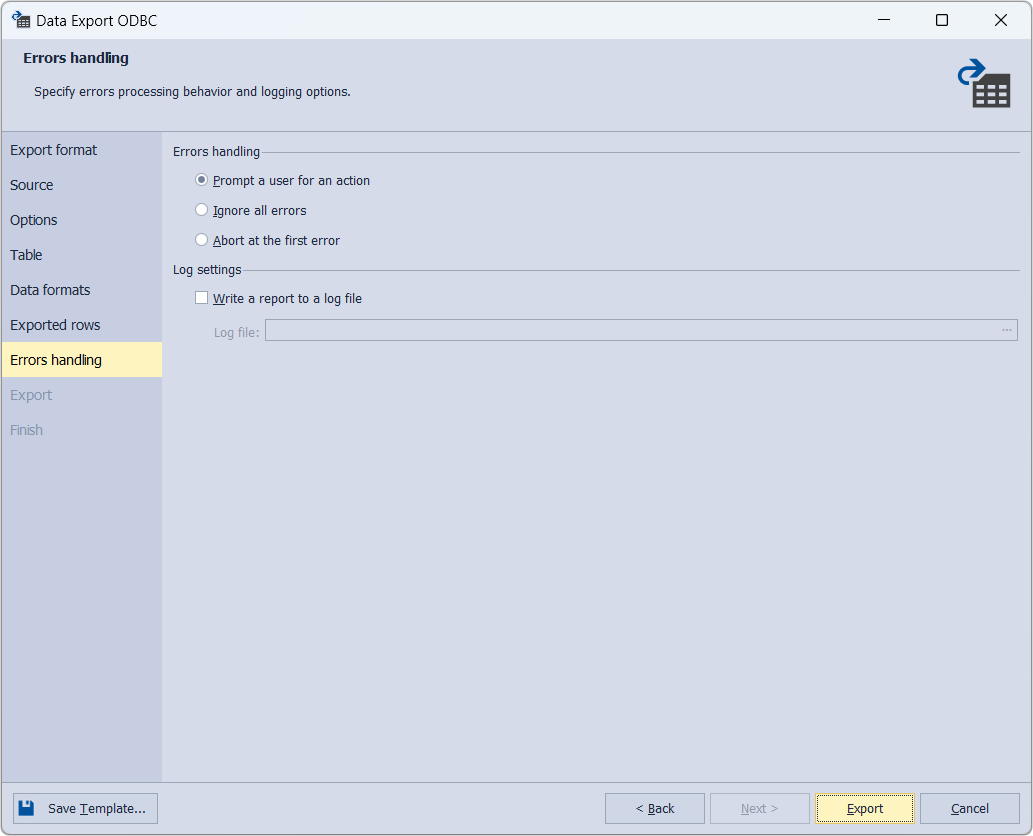
9. On the Error handling tab, specify the behavior of the tool in case of errors that may arise during data import. You can select one of the following options:
On the tab, you can also select to write a report to a log file and specify a path to it.
10. Click Import to see the import progress. dbForge Data Pump will notify you whether the import was completed successfully or failed.
If you want to open the log file, click Show log file. If you want to start another data import, click Import more.
Note
You can save the import settings as a template for future use. To save import settings, click Save Template on any wizard tab. Next time you should only select a template and specify a location of the source data - all the settings will be already set. For more information, see How to use data import templates.
11. To close the wizard, click Finish.