Statement execution
SQL Complete enables you to execute SQL scripts in various ways, including running entire scripts, selected blocks of text, or individual statements.
Execute the current statement
A specific SQL statement can be executed without selecting it. It is enough to place the mouse pointer in the statement and press Ctrl+K or Ctrl+E, and dbForge SQL Complete will define the statement boundaries itself.
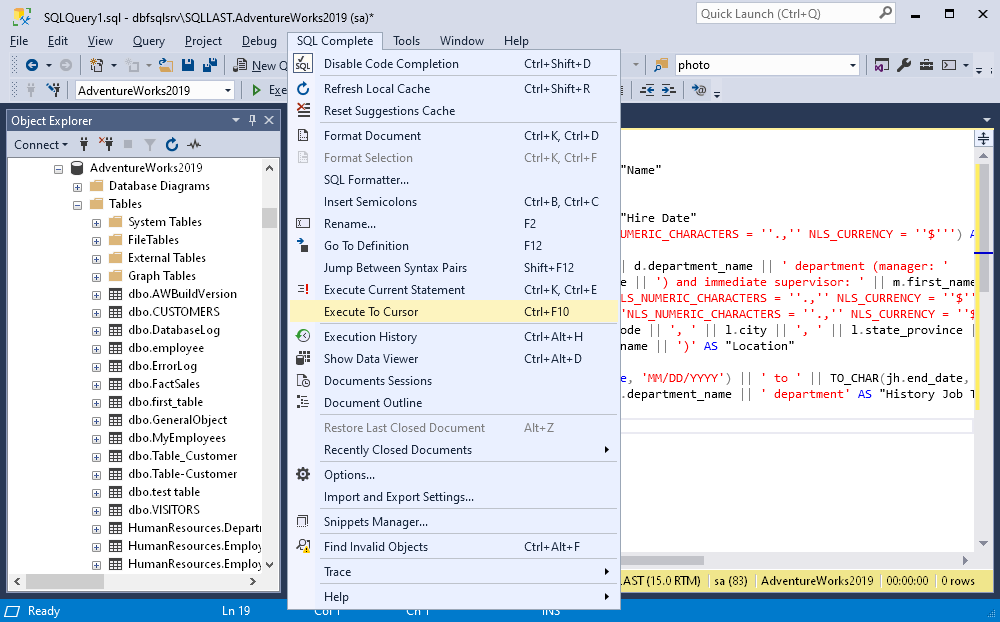
Execute to cursor
This handy feature allows you to execute a script to the current position of the cursor.
To execute a statement to a cursor, position your cursor in the required place of the SQL document and select the Execute To Cursor command from the SQL Complete menu.
When the statement contains multiple queries or T-SQL commands, the Execute To Cursor option will run all statements above the cursor, including the one where the cursor is positioned. Any statements below the cursor will not be executed.
Note
To better understand the Execute To Cursor option, study the following examples:
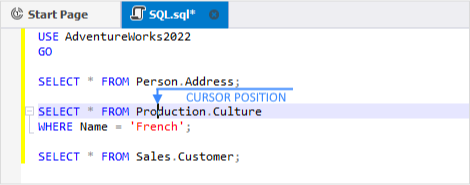
Example 1.
The SELECT Address and SELECT Culture queries will be executed. Please note, that the WHERE clause of the SELECT Culture query will also be executed. The SELECT Customer query won’t be executed.
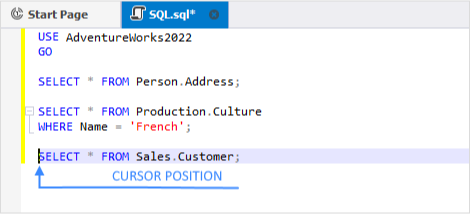
Example 2.
The SELECT Address, SELECT Culture, and SELECT Customer queries will be executed.
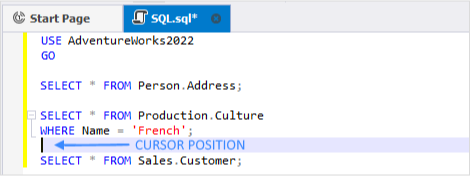
Example 3.
The SELECT Address and SELECT Culture queries will be executed whereas the SELECT Customer query won’t be executed.
Stop execution
Multi-database execution
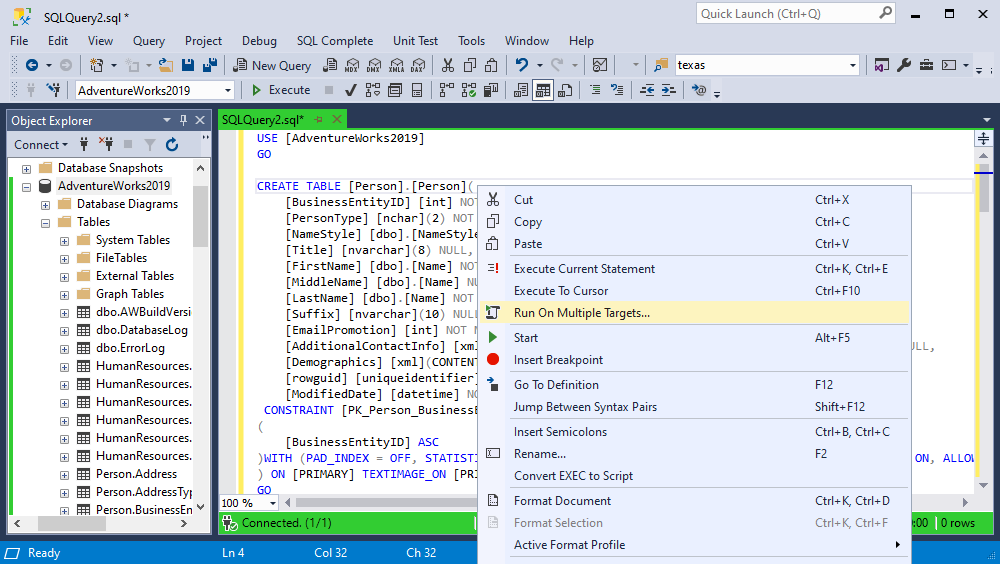
With SQL Complete for SQL Server, you can execute a script against multiple databases. To use the multi-scripts feature, right-click anywhere in the SQL document and select Run On Multiple Targets.
The Run On Multiple Targets wizard will open.
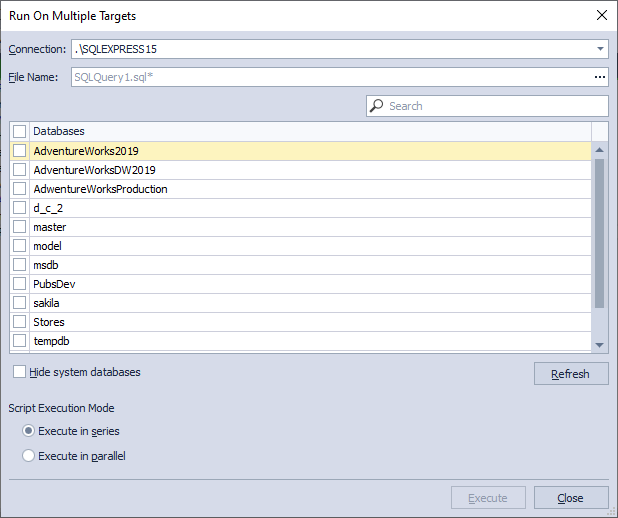
Here you need to:
1. Specify the database server connection.
Note
You can execute a script against multiple databases within a single operation only if those databases are hosted on the same database server. However, if you need to execute a script against multiple databases that reside on different servers, you will have to do it in several steps by switching the connection in the wizard.
2. In the File Name field, provide a path to the script file or leave the field empty to execute a script from the SSMS SQL document.
3. Select the databases against which you want to execute the script.
For convenience, you can hide the system databases from the list.
4. Select the Script Execution Mode:
Execute in series - SQL Complete executes the script against the first database in the list. After the execution is completed, the script will be executed against the next database in the list.
Execute in parallel - the script is executed against all the selected databases simultaneously.
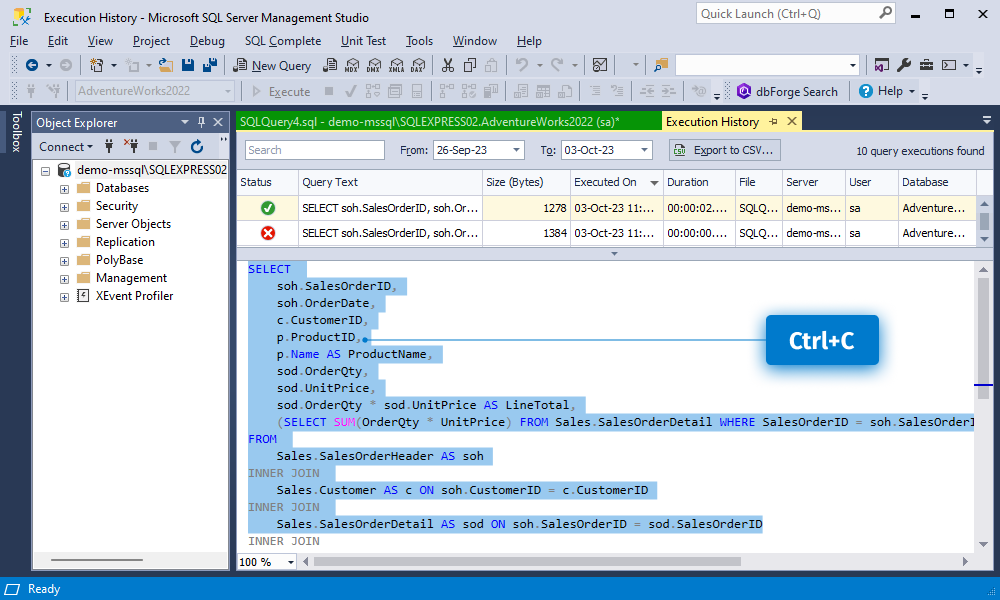
Query History
You do not have to save all the queries that have already been executed or need to be executed regularly (e.g., once a month) in a separate file. Instead, you can easily retrieve them from the Query History. It stores the main information about the executed SQL statements for a particular period of time. This helps the user view, edit, and search the queries that were run on the database. It is also possible to see who executed a query and when, as well as get other valuable information.
The Query History information can come in handy for a number of cases. For instance, there might be a need to investigate a particular work case, check the backup history, or recover a specific query if your SQL Server crashes.
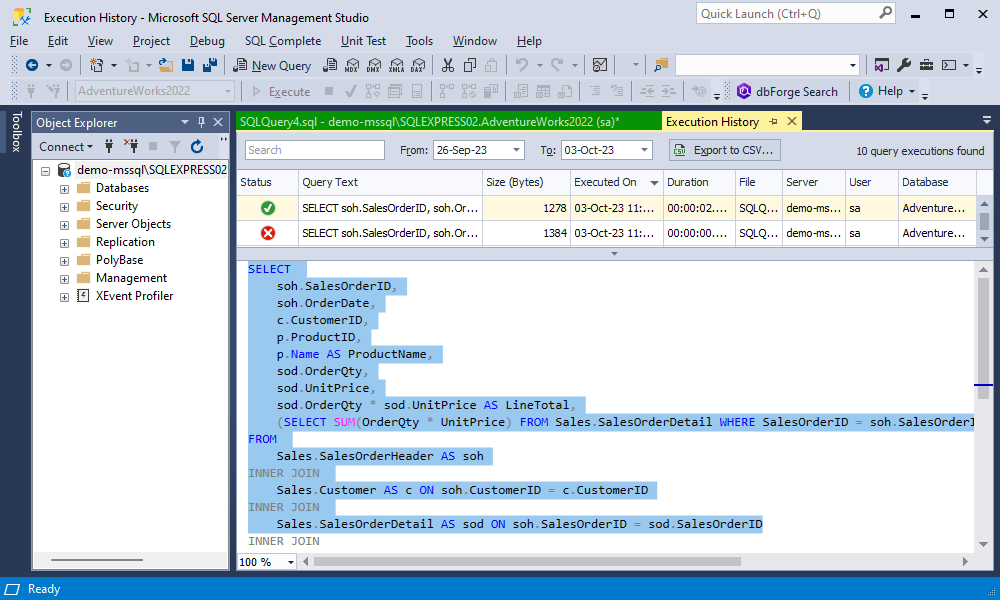
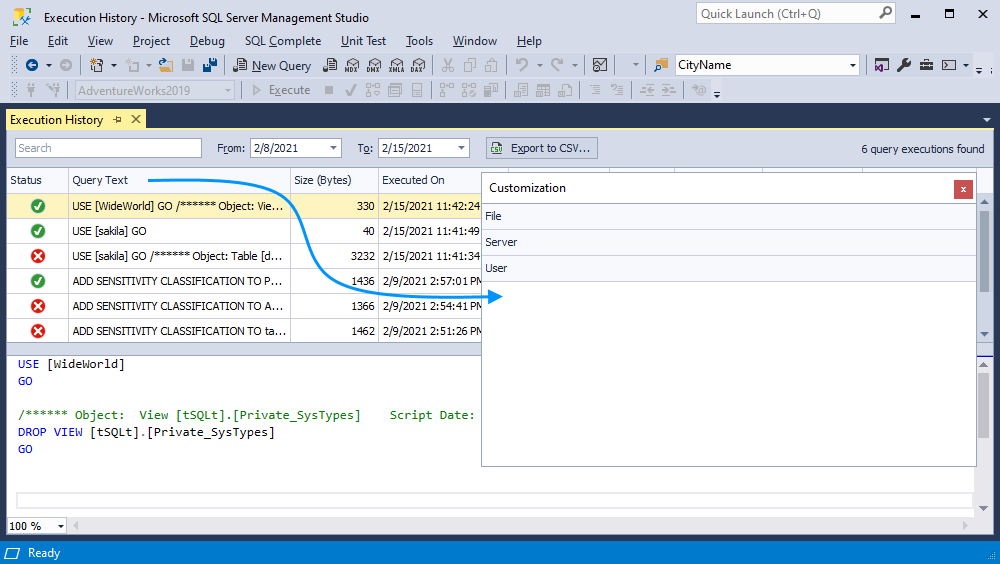
The Query History document is divided into two views:
- Query History grid
- Preview pane
The columns in the Query History grid include:
-
Status: Reflects the success or failure of the query execution.
-
Query Text: The text of SQL query that was executed.
-
Size (Bytes): The memory footprint of the query.
-
Executed On: The exact time and date the query was run.
-
Duration: The time it took for the query to execute.
-
File: The name of the file containing the SQL statement.
-
Server: The server on which the query was executed.
-
User: The individual who initiated the query execution.
-
Database: The name of the database where the query ran.
In the Preview pane, you can select a single statement or section of code and copy it using Ctrl+C.
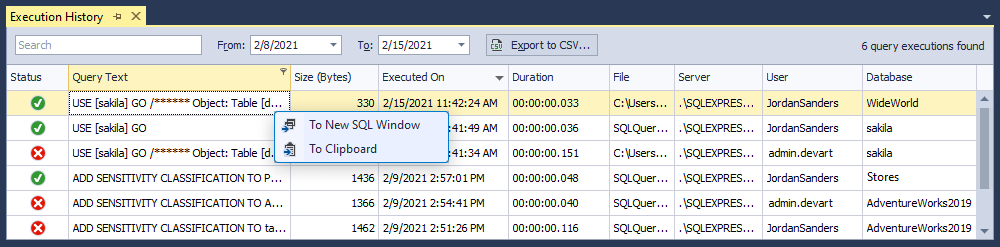
How to edit an executed SQL query
To edit an executed SQL query, right-click it in the Query History list and select To New SQL Window. This will open the query in a new SQL document, where you make any necessary modifications to its text.
Alternatively, simply double-click the required query in the Query History list.

Query History filters
Each column has a separate set of filters to help you navigate many entries. To open the filter window, point to the column name and click the funnel icon:
![]()
1. Status
Choose the status of the queries to be displayed in the Query History grid.
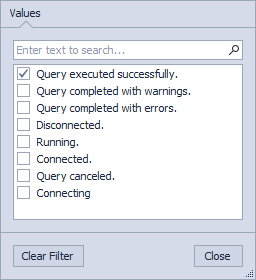
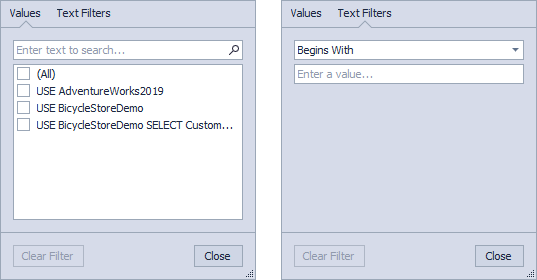
2. Query Text
Filter the entries either by choosing from the options on the Values tab or using Text Filters. When using the latter, select the filter from the list and enter the value you are looking for.
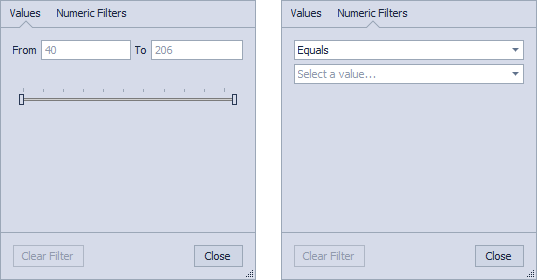
3. Size (in bytes)
Select the minimum and maximum values to filter the entries. To do that, either use the slider on the Values tab or switch to Numeric Filters to fine-tune the filter.
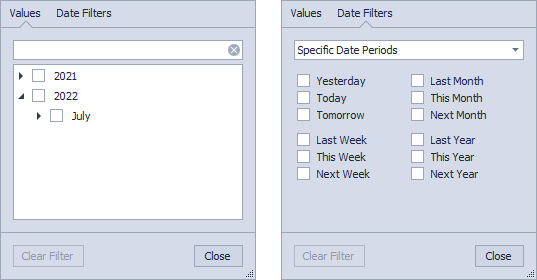
4. Executed On
Select the date range from the list on the Values tab or configure the filter on the Date Filters tab.
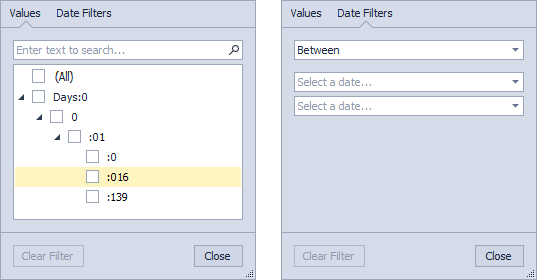
5. Duration
Select the query duration from the list on the Values tab or configure the filter using the Date Filters tab.
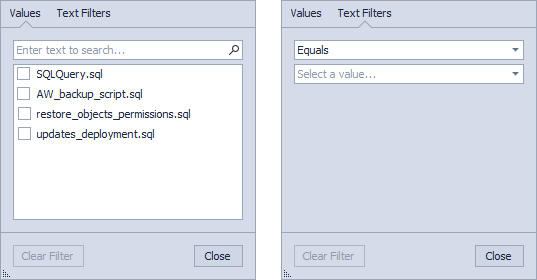
6. File
Select the desired file from the list on the Values tab. Alternatively, go to the Text Filters tab and configure the filter according to your needs.
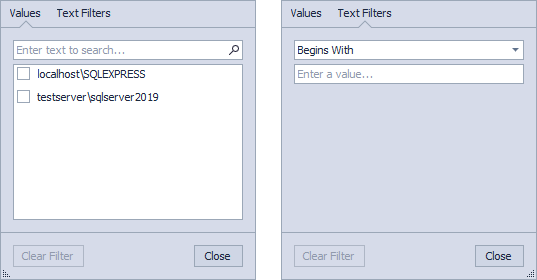
7. Server
Choose one or more servers from the list on the Values tab or go to the Text Filters tab and configure it according to your needs.
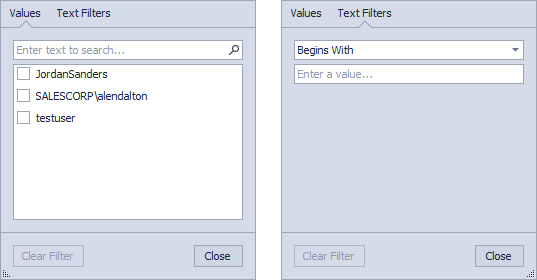
8. User
Choose a user from the list on the Values tab. Alternatively, configure Text Filters according to your needs.
Above the grid, you will find:
- a search bar, where you can search out required queries by text
- a field for specifying the desired log output timeframe
- Clear to remove found results
Export to CSV allows you to export the Query History as a CSV file:
1. Click Export to CSV.
2. Select a folder to store the CSV file.
3. Enter the file name and click Save.
To learn more about various methods for obtaining Query History, refer to the How to Check SQL Server Query History blog article.
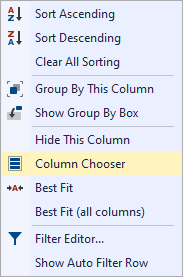
The Query History shortcut menu offers the following options:
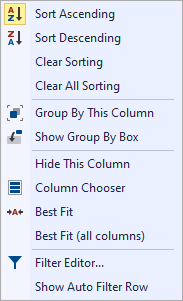
- Sort Ascending - apply ascending sort order to any column
- Sort Descending - apply descending sort order to any column
- Clear All Sorting - reset sorting to default
- Group By This Column - group completed statements by the selected column
- Show/Hide Group By Box - drag a column header to the Group By Box field to group data by that column
- Hide This Column - hide the selected column
- Column Chooser - drag columns to remove them from the grid or add them back at your convenience
- Best Fit - adjust the width of a column to fit the value with maximum characters
- Best Fit (all columns) - ditto for all columns
- Filter Editor - editor with rich filtering options
- Show/Hide Auto Filter Row - show or hide a row to filter data directly from the grid

Note
Query History is stored in the ExecutedQueries.db file. To specify a path to the folder where this file will be stored, go to SQL Complete menu > Options > Query History. The default path is %appdata%\Devart\dbForge SQL Complete\ExecutedQueries.
Note that this file does not store your connection passwords.
Filter Editor
1. To create a custom filter, right-click the Query History grid and select Filter Editor.
2. In the window that opens, choose the operators that fit your needs:
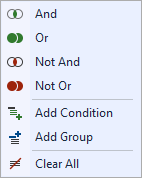
Here, you can also add a condition, a group of conditions, or clear all the previously set ones. An alternative way to add a condition is to click a plus button next to the operator.
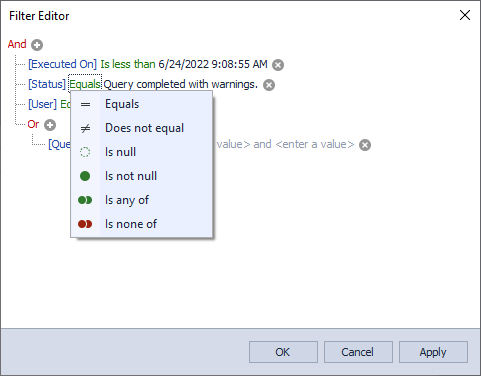
3. By clicking the conditions in blue and green, configure the filter according to your needs.
4. Click Apply.
Query History customization
If you want to remove one or more columns from the Query History grid, use the Customization window.
1. Right-click the Query History grid and select Column Chooser.
2. To customize the layout, clear or select the required checkbox.
Query History enables the following actions:
1. Success verification check
This option allows the user to check whether a SQL statement has been successfully executed. Each query in the table has a field with an icon that displays the result of the execution. It is also possible to sort the table entries by this parameter.
2. Log output range
Query History provides the ability to set the date interval in which the queries were output. It is possible to view the entire list for any period, with any selected time range.
3. Group by column
This option allows grouping the completed statements by any required column in the table. To do this, just drag the selected column to the panel above the list. Query History will display the results immediately.
4. Open in a new SQL window or copy to clipboard
Each user can get access to any SQL statement from the archive to view its code to perform any changes afterward. To do it, right-click a required request and select To New SQL Window or To Clipboard.
5. Sort statements
The feature facilitates various sorting of executed statements. The archive can be sorted by any column that is present in the table. To do it, click the header of the required column.
6. Detailed item info
Query History has a convenient interface for getting all the necessary information about each statement. It is easy to sort information by each parameter field as well as perform customization of the displayed columns. Select the Column Chooser menu item after right-clicking blank space in the grid header and drag the columns.
7. Search filter
This feature allows filtering executed statements by the text key entry. This option will be very useful for DBAs who often have to work with a large number of requests. Enter the required characters in the Search field, and Query History will display the results immediately.
8. Export to CSV
The Query History can also be exported to the CSV file format.
9. Copy from Query History
You can copy from the lower Query Text pane. To do that, select the text and press Ctrl+C.
In case you wish to copy from the Query History grid, right-click the desired cell and select either To New SQL Window or To Clipboard.
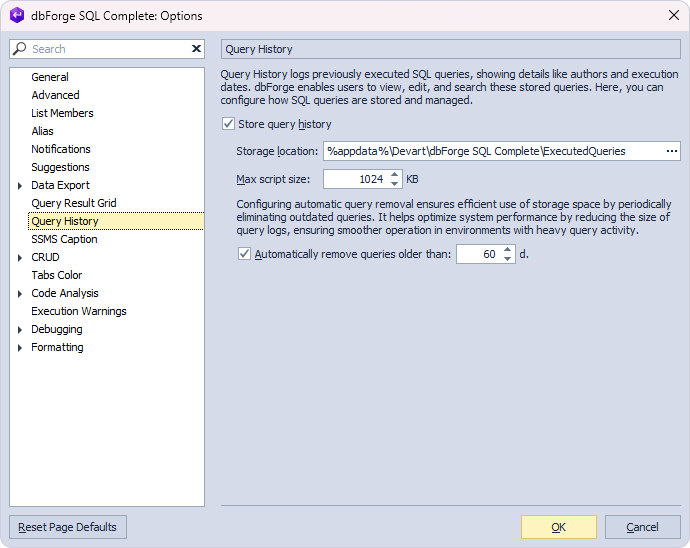
Query History options
To set up the Query History options, go to the SQL Complete menu and select Options. These include:
- Checkbox to turn on/turn off the Query History tracking
- Storage location: Here you can specify the path to the folder where executed queries will be stored
- Max script size: The option allows you to specify the maximum script size to store. 1024 KB is set as default
- Automatically remove queries older than: With this option, you can set the number of days after which the history of executed queries will be deleted
To learn more about configuring options available for Query History, see Query History.
Note
In the Express Edition of SQL Complete, Query History is stored for the last 3 days only.
Execution warnings
There is always a risk of losing data and objects (whether accidentally or not) because of untested code, unwanted commands, various code leftovers, and errors that can damage data irreparably.
This is where execution warnings come into play. SQL Complete analyzes the script to be executed for the DELETE, DROP, TRUNCATE, and UPDATE statements, and produces a blocking message if the statements are used in certain types of environments. For instance, the message will be prompted if the user tries to execute a DELETE statement against a production database.
To configure the behavior of execution warnings:
- Go to Options on the SQL Complete menu.
- In the left pane of the Options window, click Execution Warnings.
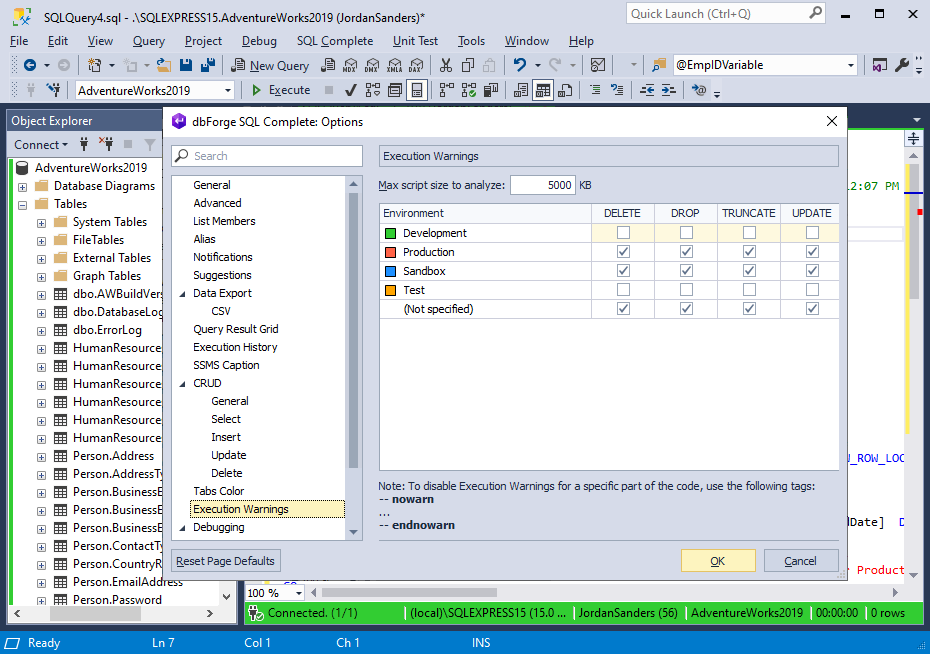
In the Execution Warnings window, it is possible to specify the maximum script size to analyze and enable execution warnings for the required environments.
For more information on adjusting the Execution Warnings options, see Execution Warnings.
Note
SQL Complete analyzes every USE statement and prompts an execution warning if the statement refers to a database of the environment for which the execution warning is set.
To disable execution warnings for a certain piece of the code, use the following tags:
--nowarn
--endnowarn

Execution notifications
Execution notifications allow you to get informed about the query execution result.
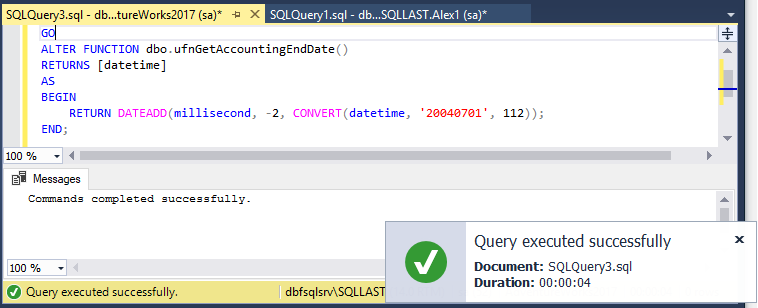
The notification contains the following information:
-
The name of the document
-
The duration of a query
-
Query execution status:
- Query completed with errors
- Query executed successfully
- Query canceled
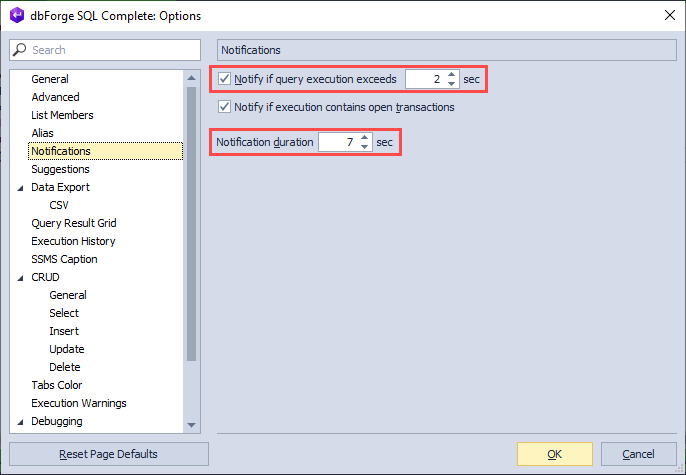
You can enable notifications and change settings on the Notifications tab of the Options menu. You can also set a query execution time limit to get notified about queries that exceed it. By default, notifications are on and the notification duration time is 7 seconds.
To explore more about configuring the Notifications options, see Notifications.
Note
If a query is running longer than 23:59:59 hours, days are added to the time in the Notification.
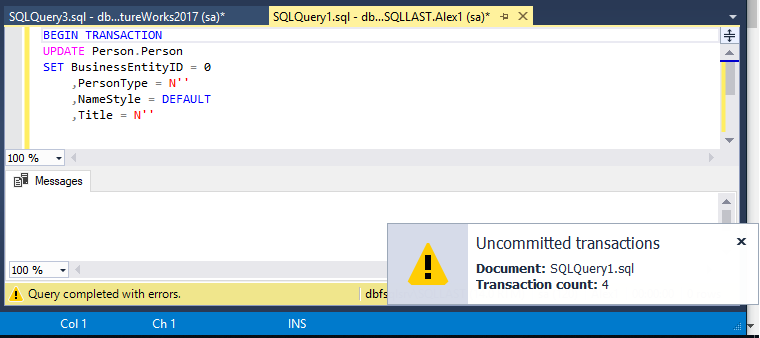
Transaction reminders
With this feature enabled, whenever there are open transactions during the query execution, a reminder will pop-up informing you about the number of uncommitted transactions.
The Transaction Reminder window contains the following information: a document name and a number of open transactions.
By default, notifications are on. To disable notifications, clear the Notify if execution contains open transactions check box on the Notifications tab of the Options menu.

Note
The VIEW DATABASE STATE permission is required in the database for the feature to work properly.
To explore more about configuring the Notifications options, see Notifications.