Sorting, grouping, and filtering PostgreSQL data in grid
Sorting data in grid
By default, dbForge Schema Compare for PostgreSQL retrieves unsorted data from tables if the Retrieve Data option was used. If data was retrieved after executing an SQL statement, it will be sorted according to the operators used in this statement (in case operators are sorting-related, e.g. ORDER BY).
To sort data
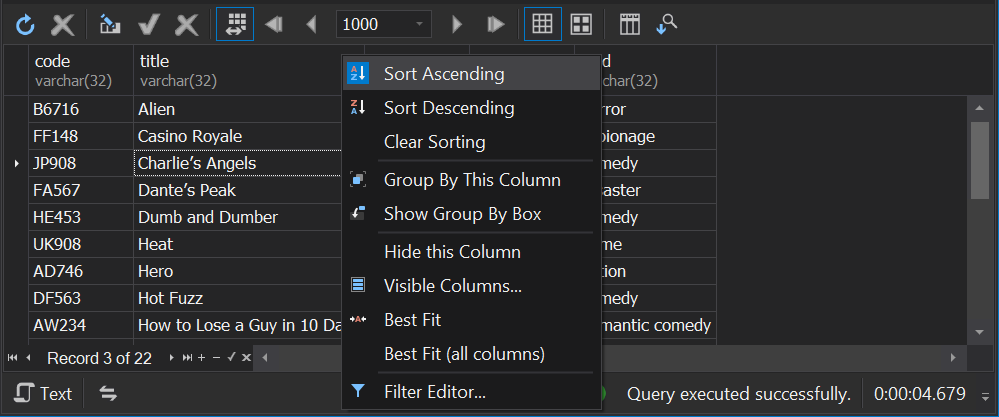
To sort data in the grid or to change the sort order, right-click a column header and then select Sort Ascending or Sort Descending on the shortcut menu.
To assign a secondary sorting, right-click another column header and then select Sort Ascending or Sort Descending. You can set as many sorting columns as you need. To stop sorting on a certain column, click it while holding the CTRL key.
To clear column sorting, click the Clear Sorting option on the table shortcut menu.
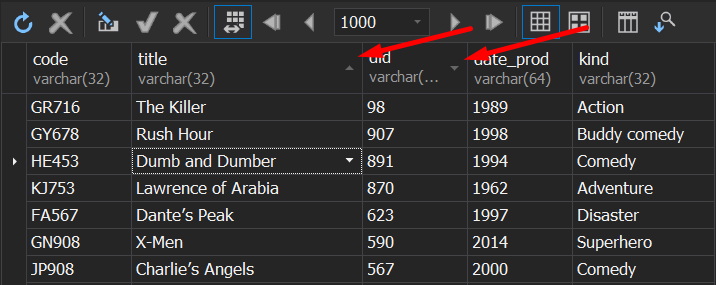
The current sort order of a column is indicated by the sort glyph (a small arrow displayed at the column header’s right edge). If data is sorted in ascending order, the sort glyph represents an up-arrow. When sorting in descending order, the sort glyph is displayed as a down-arrow. If the column isn’t sorted, the sort glyph is hidden.
Grouping Data in Grid
To group data by column, click Show Group by Box button  on the Data editor toolbar. The Group by Box pane will appear above the grid. Drag a column header you want the data to be grouped by to the pane.
Alternatively, right-click the required column header and click Group By This Column on the shortcut menu. The data is automatically displayed in groups marked with collapsed nodes. The column header is moved to the Group By Box pane.
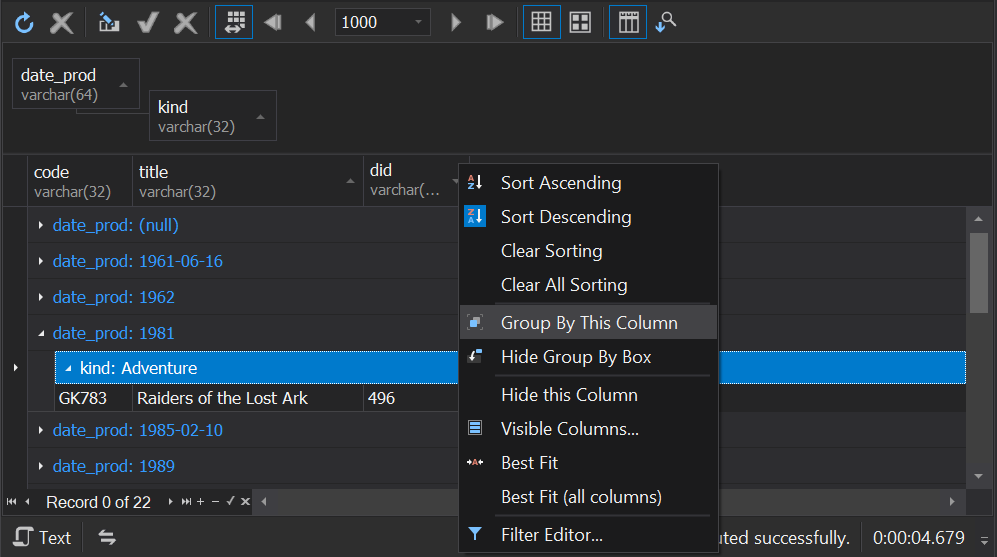
Group By Box is the area above the data grid where you can see the grouping order and perform further grouping-related operations. Drag a column header to Group By Box to group the data by that column. You can group the data by multiple columns. In this case, the grid will display a tree of nested groups that you can expand or collapse if required.
To expand or collapse all groups at once, right-click Group By Box pane, and then click Full Expand or Full Collapse on the shortcut menu.
To cancel grouping by column, drag-and-drop the column header from the Group By Box pane to the grid or right-click the column header, and then click Ungroup on the shortcut menu.
Filtering data in grid
Hiding data of a column
1. Right-click the required column and then click Visible Columns on the shortcut menu. The Visible Columns dialog box opens.
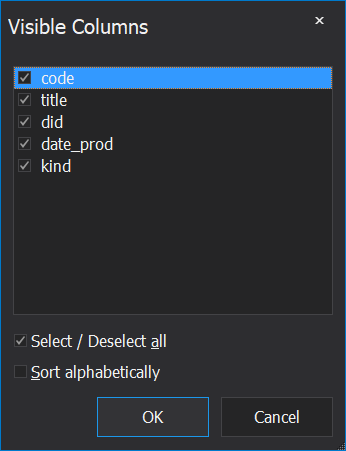
2. Clear the checkbox next to the column you want to hide in the grid.
3. Click OK to close the dialog box and apply the filter condition.
Filtering data by column
-
On a column header, click the Filter button. Select the filter value from the drop-down list box. The box includes a lot of values encountered in the column and the universal items such as All, Custom, Blanks, and Non Blanks.
-
Right-click a column and select Quick Filter on the shortcut menu, and then click to select the required filtering condition.
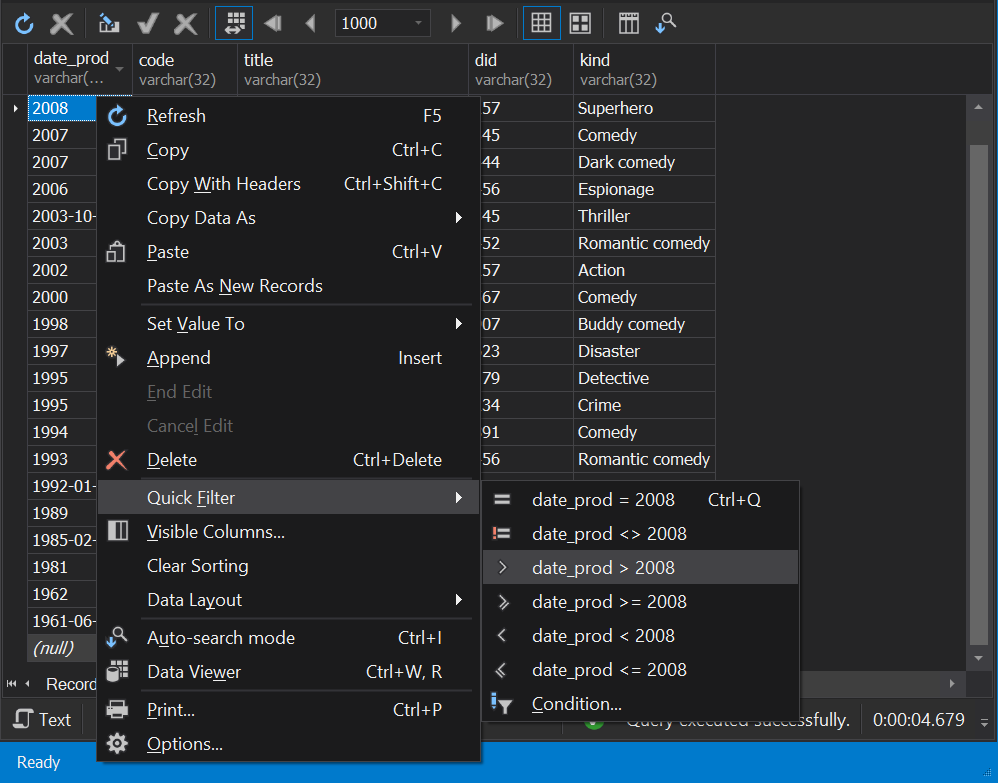
When the data is filtered, the column Filter button will be changed to the active filter to indicate the applied filter. The filter condition appears at the bottom of the grid providing you one-click quick access to the filter condition parameters. You can manage them in the following ways:
- To remove a filter condition, right-click the header of a corresponding column and click Clear Filter on the shortcut menu.
Alternatively, click Edit filter at the bottom of the grid and cancel the necessary filters in the Filter Editor that will be displayed. Click Apply after that.
Or right-click the column header and select Filter Editor and cancel the necessary filters in the Filter Editor that will be displayed. Click Apply after that.
- To edit the filter condition, click Edit filter at the bottom of the grid. The Filter Editor dialog box opens.
Applying a custom filter condition to a column
1. Right-click the required column and select Condition option from the Quick Filter menu. The Filter Editor dialog box opens.
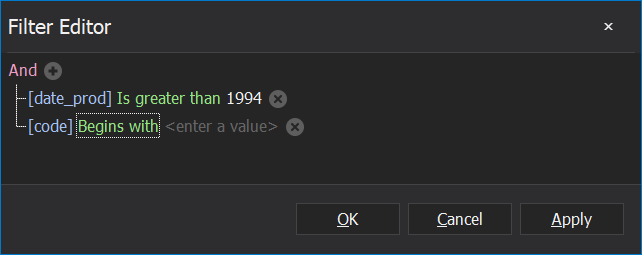
2. Configure the existing or add new conditions to build a filter.
Filter conditions in the Filter Editor dialog box are displayed as a tree with the condition and group nodes. A group consists of several conditions or subgroups, united with a logical operator. To change a group logical operator, click it and select another one from the menu. To navigate between conditions and groups, use keyboard arrow keys.
To remove a condition, click the cross icon or navigate to the condition and press the DELETE or MINUS SIGN key. To remove a group, click its logical operator and select Remove Group from the appeared menu. You can copy, cut, and paste conditions and groups with CTRL+C, CTRL+X, and CTRL+V keys.
3. Click Apply to apply the filter condition to the data in the grid.