Setting up Schema Comparison
In dbForge Schema Compare, you can compare two data sources: database schemas, snapshots, and versioned snapshots. The databases can be located on different servers. After you select data sources, you can customize the comparison process by specifying additional schema comparison options to suit your requirements.
After the comparison is complete, the Schema Comparison document opens with two main sections:
- Upper grid: Displays all database objects selected for synchronization.
- Text Compare: Highlights differences in object definitions (for example, DDL or DML) and their corresponding scripts (spaces, comments, line order, etc.).
Comparing Two Schemas
1. Open the New Schema Comparison wizard by using one of the following options:
- On the Start Page, select New Schema Comparison.
- On the toolbar, select New Schema Comparison.
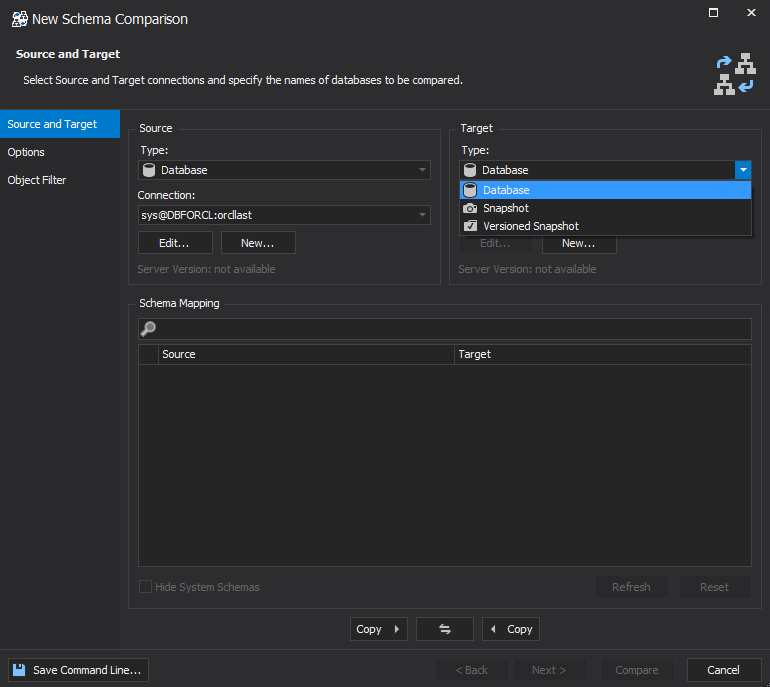
2. On the Source and Target page of the wizard that opens, select the source and target type: a database, a snapshot, or a versioned snapshot.
Note
The details required will vary based on the selected type.
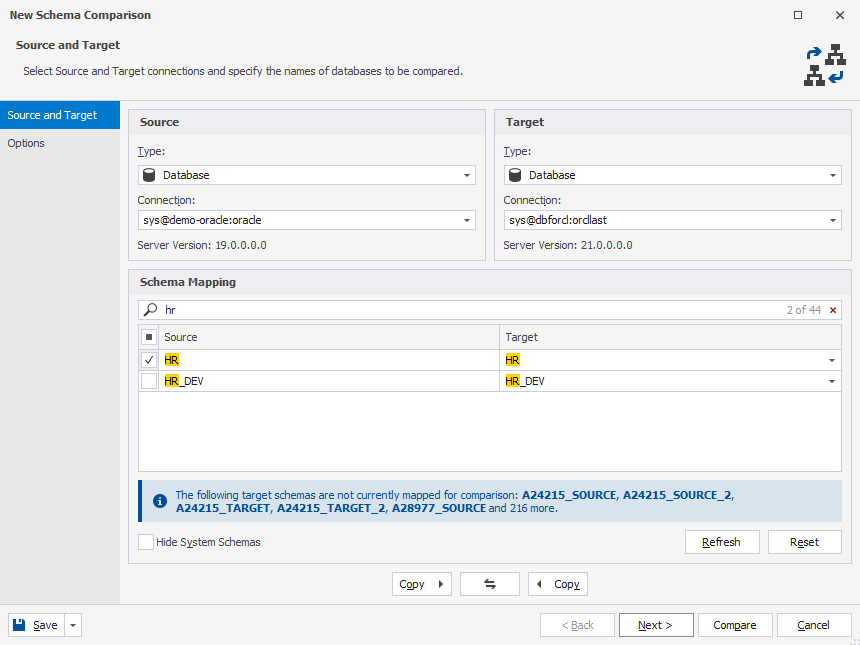
3. Under Schema Mapping, select the checkbox next to the schema you want to compare.
4. Optional: On the Options page, select the options to tailor the comparison process to your needs.
5. To run the schema comparison, select Compare.
Tips & Tricks
- Under Schema Mapping, enter the search text in the Search box to search for a specific schema:
- The list of schemas will be filtered to display only those containing the search text.
- The search is case-insensitive. For example, the search text arrow will highlight all schemas containing the text, regardless of capitalization.
- The number of matching schemas will be displayed in the Search box.
- To remove the search text and restore the full list of schemas, select
 Clear Filter in the Search box.
- Clear the Hide System Schemas checkbox to display all schemas, including system schemas.
- On the Source and Target page, you can do the following:
- Select Copy Source Settings to Target
 to apply the schema comparison settings from the source to the target database.
 - Select Copy Target Settings to Source
 to apply the schema comparison settings from the target to the source database.
 - Select Swap Source and Target settings
 to exchange the source and target databases.
- Select Copy Source Settings to Target
- Select Cancel to close the wizard and stop the schema comparison process.
Database
When you select Database from the Type list, perform the following steps:
1. In the Connection box, select an Oracle server connection on which a database is located.
Note
If you want to add a new connection or edit the existing one, do the following:
- In the Connection box, select Manage.
- In the Connection Manager that opens, select Add to create a new connection or Edit to modify the existing one.
- To save the changes, select OK.
2. Under Schema Mapping, select the checkbox next to the schema you want to compare.
Snapshot
When you select Snapshot from the Type list, perform the following steps:
1. In the Snapshot box, do either of the following options:
- Select a snapshot from the list.
- Select Browse to open an existing snapshot.
- Select New to create a new snapshot. In the Create Scripts Folder or Snapshot dialog that opens, create a new snapshot. For more information, see Creating a New Snapshot in Schema Compare.
2. Under Schema Mapping, select the checkbox next to the schema you want to compare.
Versioned Snapshot
Note
The Versioned Snapshot functionality is now available only for TFS and SVN. If you select any other version control system, the Snapshot box will display a notification - ‘Specified Version Control System is not supported’.
When you select Versioned Snapshot from the Type list, perform the following steps:
1. In the Repository box, do either of the following options:
- Select a source control repository from the list.
- Select Browse to open the Source Control Repository Properties dialog to modify an existing repository.
- Select New to open the Source Control Repository Properties dialog to create a new source control repository.
Note
If you want to create a new repository or edit an existing one, do the following:
- In the Repository box, select Manage.
- In the Repository Manager that opens, select New to create a new repository, Edit to modify an existing one, or Delete to remove the selected repository.
- To save the changes, select OK.
2. In the Snapshot box, select a snapshot you want to compare.
3. In the Revision box, select a revision you want to compare. The latest (head) revision is selected by default.