Mapping Tables and Views
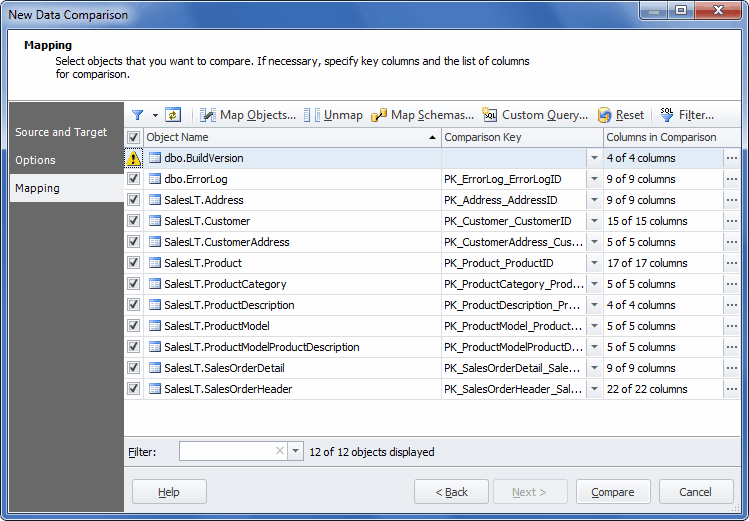
By default, when you move to the Mapping tab of the Data Comparison wizard, dbForge Fusion for SQL Server automatically maps all available objects of the selected databases.
Note
To remap already mapped objects, unmap them first. See the How to unmap an object section below.
Note
After objects are mapped for comparison and synchronization, you may encounter mapping warnings, displayed as icons. For more information about mapping warnings, see the Mapping Warnings topic.
How to unmap an object:
-
Switch to the Mapping page of the Data Comparison wizard.
-
In the grid, select database objects to unmap. To find a mapped database object quickly, use the Filter box. Type the string in this box to view only the objects, containing this string in their names. Click the arrow button to select a recent search. To clear the Filter box, click the x button.
-
Click the Unmap button on the toolbar. The unmapped objects disappear from the grid, but will be listed in the Object Mapping dialog.
How to map an object:
- Switch to the Mapping page of the Data Comparison wizard.
-
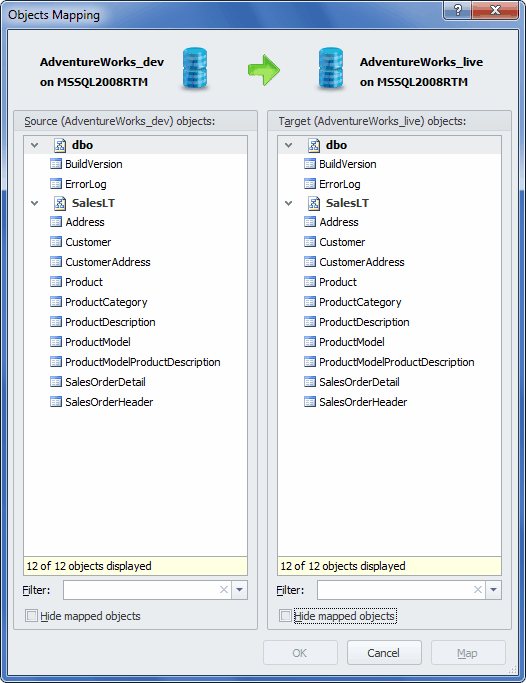
Click the Map Objects button on the toolbar. The Objects Mapping dialog will appear.
Note
Actual document look may slightly vary from the above image depending on the product you use.
- Select source and target objects in the corresponding boxes.
- Click the Map button and the mapped objects disappear from the Objects Mapping dialog and will be shown in the Mapping tab grid.
- Repeat steps 3-4 until you map all the objects you need. Click OK to close the dialog.
How to map an object using custom queries
You can use this option to compare custom results received after query execution instead of comparing whole tables or views. For this, you should:
-
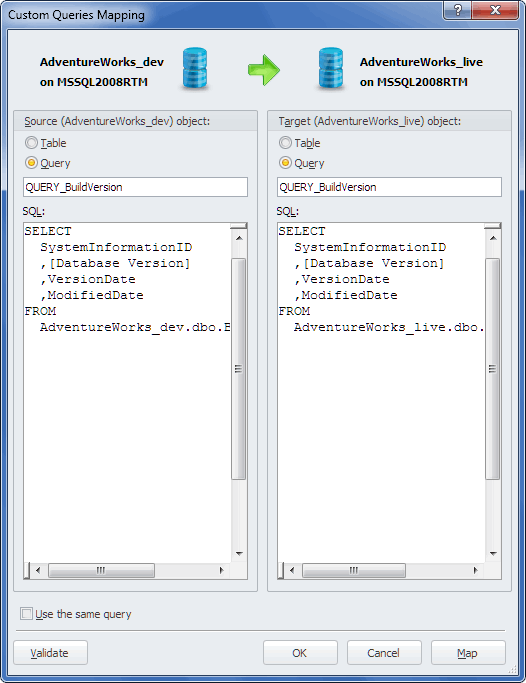
Click the Custom Query button on the Mapping page of the wizard. The Custom Queries Mapping dialog box will open.
Note
Actual document look may slightly vary from the above image depending on the product you use.
- Select the Query or Table radio buttons for Source and Target.
- If you selected Table for both, refer to the How to map an object section of this topic. If you selected Query for Source, Target or both, write a query name in the field (if the name assigned by default is not appropriate).
- Type the needed query in the SQL field.
- Click Validate to validate your queries, if necessary.
- Click Map.
- Click OK to close the dialog box.
Tips:
Click the Cancel button to close the dialog and discard mapping.
Click the Reset button to restore the automatic mapping of objects.