Restore a differential backup
Restoring a differential backup recovers a database to the state it was in when the differential backup was created. Unlike a full backup, which includes the entire database, a differential backup contains only the changes made since the last full backup.
To restore a differential backup, you must first restore its corresponding full backup with the NORECOVERY option. This keeps the database in a state where additional backups can be applied. After that, you can restore the differential backup to return the database to the state captured by that backup.
Prerequisites
-
Connect to the required SQL Server instance.
-
Create a full database backup and a differential backup for the database. For more information, see Back up a database.
Important
The created backup files with a
.bakextension must be located on the server where the SQL Server instance is installed. If the backup files are stored on your local machine, copy them to the server before restoring the database.
- Restore the full backup using the
NORECOVERYoption. For more information, see Restore a full backup.
To restore a differential backup
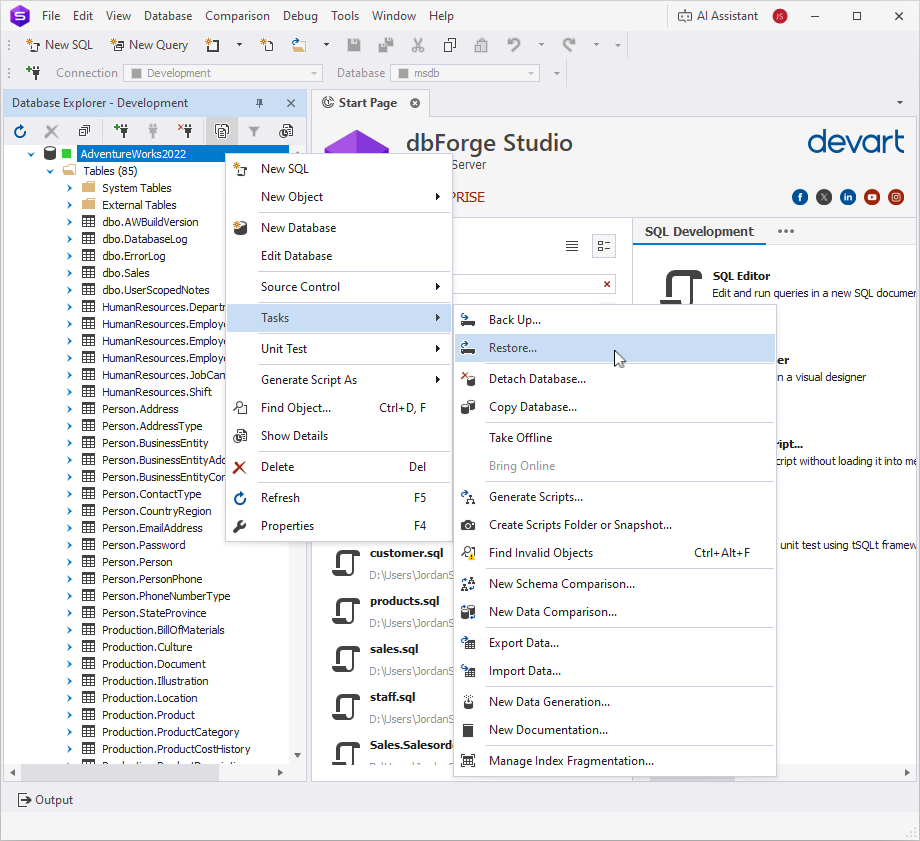
1. In Database Explorer, right-click the database you want to restore, and select Tasks > Restore.
2. On the Source and Target page, under Source for restore, specify the source of the backup to restore:
-
Database: Select the database from the list to restore from the SQL Server backup history. Use this option if the backup was created on the same SQL Server instance — SQL Server will use backup metadata from the
msdbsystem database to locate the available backups. -
Files: Specify the path to a
.bakfile stored on the SQL Server machine and the name of the database that the backup file contains. Use this option to restore directly from a backup file, for example, if the file was copied to the server and is not included in the backup history.
3. Under Destination to restore, in Database, select the database that you want to restore the differential backup to.
4. Optional: For a point-in-time restore, in Restore to, specify the point in time to which the database needs to be restored:
-
To restore the database to the most recent available state, keep the default To the last backup taken option.
-
To restore the database to a specific point in time, select the desired date and time in the picker.
-
To view all backups required to restore the database as close as possible to the current time in the Backup set to restore grid, click Now in the Restore to date and time picker, and then click OK.
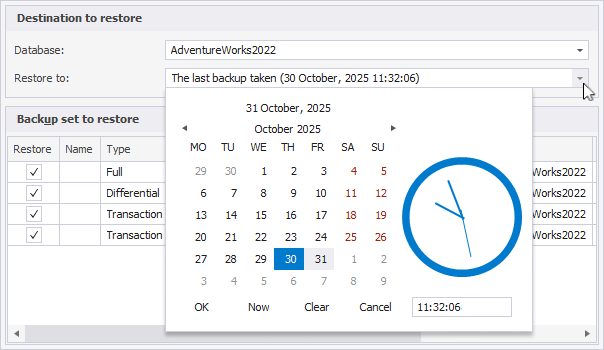
The list of backups in the Backup set to restore grid automatically updates based on the selected date and time.
Note:
Restore to is available only when backup metadata is accessible—for example, when restoring from backup history or from backup files in the SQL Server default backup directory. If this option is unavailable, the database is restored to the end of the selected backup.
5. In the Backup set to restore grid, review the available backups and select the differential backup you want to restore:
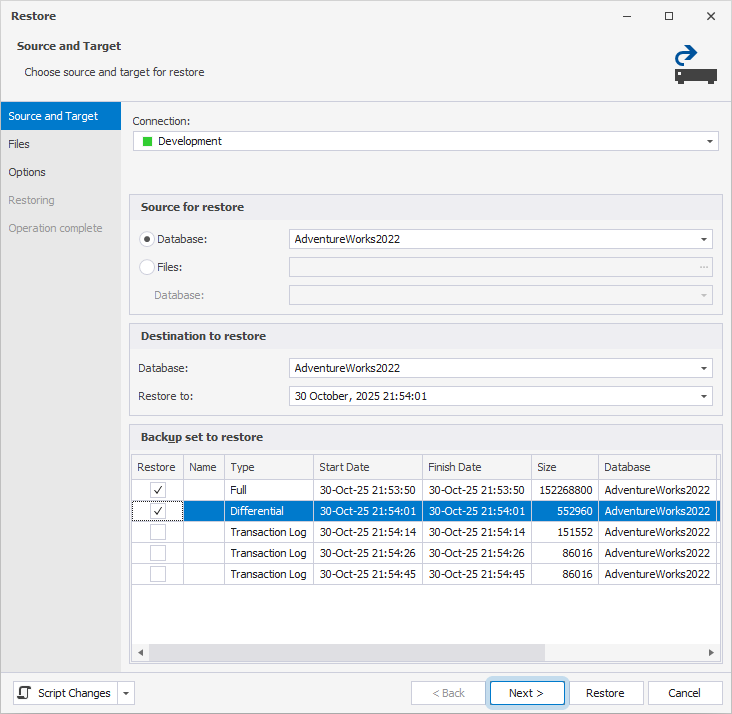
When you select a differential backup, the full backup it depends on is automatically selected.
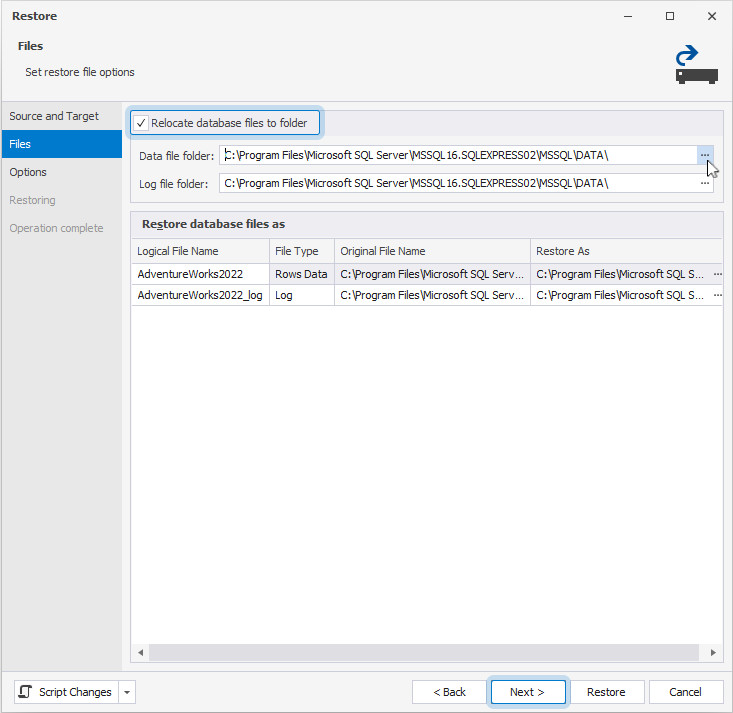
6. On the Files page, verify that the file locations match those used in the full backup restore.
Note
You must use the same file locations for the differential backup as for the full backup restore. The differential backup applies changes to the existing database files created during the full backup restore.
You can change the default file locations in one of the following ways:
-
To relocate all files to specific folders, select Relocate database files to folder, then specify the Data file folder for the data file and Log file folder for the log file.
-
To specify a new location for each file, in the Restore database files as grid, modify the path in the Restore As column for each file.
7. On the Options page, in Recovery state, select the recovery state for the restored database:
-
RESTORE WITH RECOVERY – The database is fully restored and ready for use immediately. Uncommitted transactions are rolled back, and no additional backups can be applied. Use this option when the differential backup is the final backup in your restore sequence and you want to make the database operational.
-
RESTORE WITH NORECOVERY – The database remains non-operational, and uncommitted transactions are not rolled back. Additional differential or transaction log backups can be applied. The database cannot be used until it is recovered. Use this option when you plan to apply transaction log backups after the differential backup.
-
RESTORE WITH STANDBY – The database is left in read-only mode, allowing queries while additional restores are pending. Uncommitted transactions are undone and saved in a standby file, allowing recovery effects to be reverted. Requires specifying a Standby file path.
8. To prevent restore failures caused by active connections, select Close existing connections to destination database to close all connections to the target database.
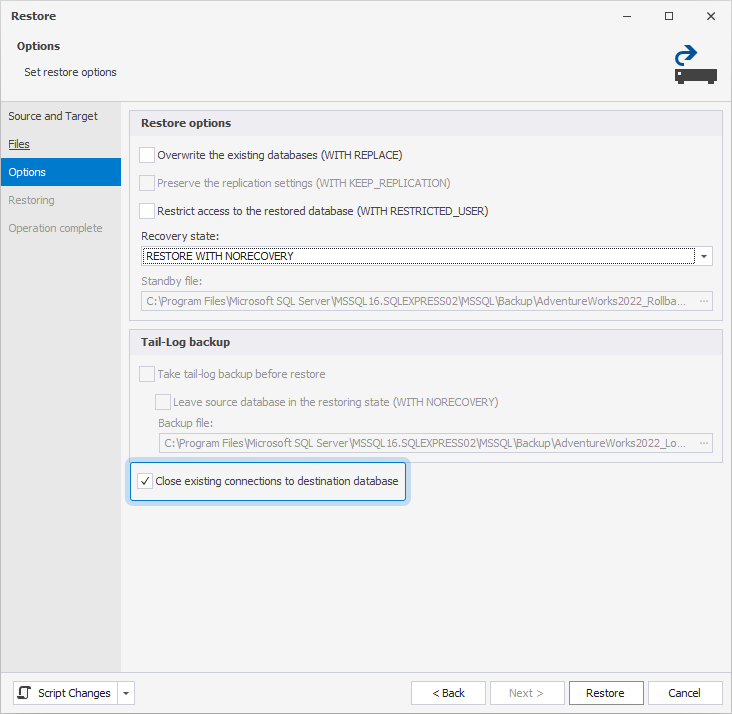
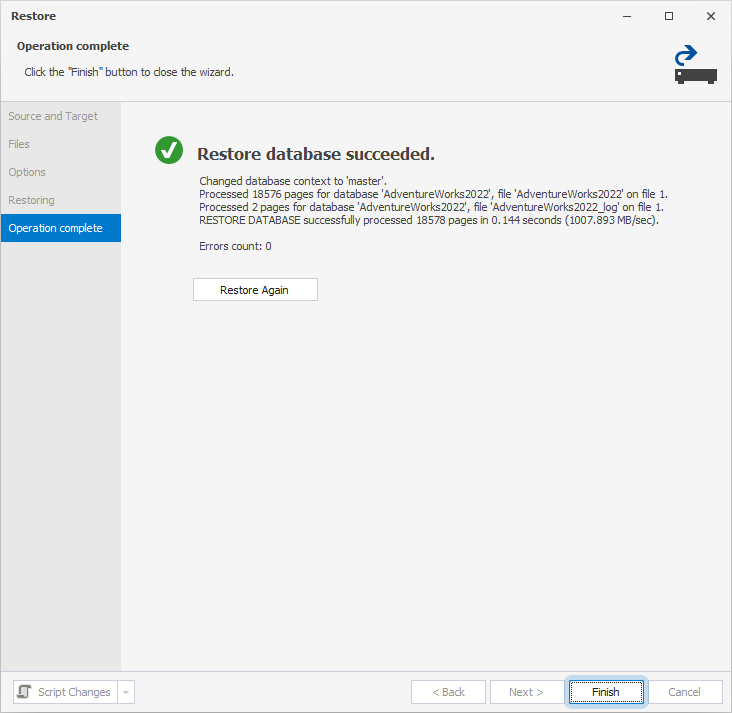
9. Click Restore.
After the differential backup is restored successfully, if you used the NORECOVERY option and have transaction log backups to apply, you can proceed with restoring them in sequence.
Note
You can use a backup file to restore the entire database or only selected objects and data with the Schema Compare or Data Compare features of dbForge Studio. For more information, see:
- Schema Compare: Compare and synchronize backup files
- Data Compare: Compare and synchronize backup files