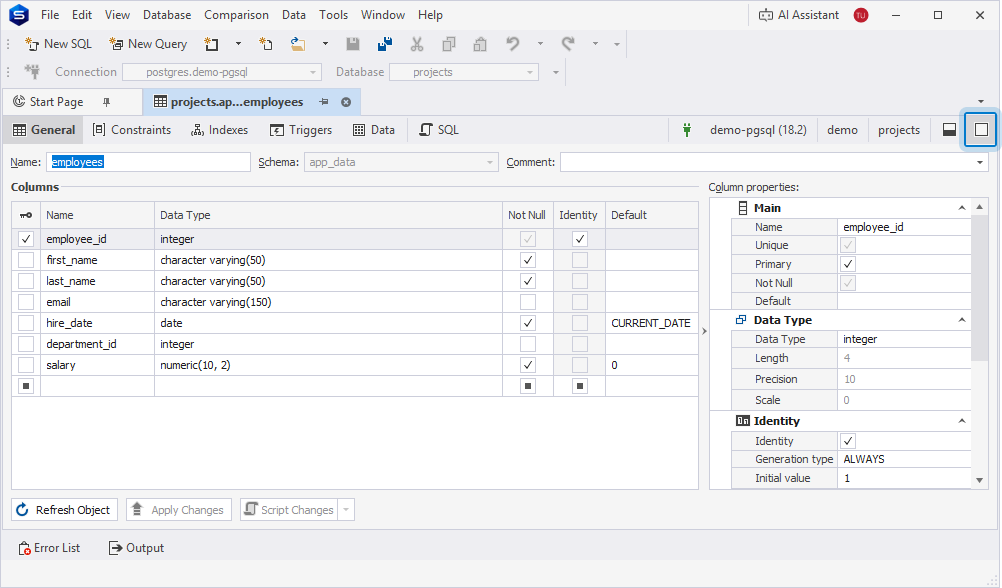
Table Editor overview
The Table Editor in dbForge Studio for PostgreSQL provides a visual interface for working with tables. You can use it to create and modify tables, columns, constraints, indexes, and triggers without manually writing DDL statements.
The editor generates the corresponding CREATE or ALTER script based on your changes. You can review the script before applying the changes.
Open the Table Editor
Open the Table Editor in one of these ways:
- In Database Explorer, right-click a table or the Tables node and select New Table.
- In Database Explorer, right-click a database and select New Object > Table.
- In the top menu, select Database > New Database Object > Table > Create.
- On the standard toolbar, click the arrow next to
 , then select Table.
 - On the Start Page, select Database Design > New Database Object > Table > Create.
Note
To open the Table Editor for an existing table, in Database Explorer, right-click the table and select Open Editor.
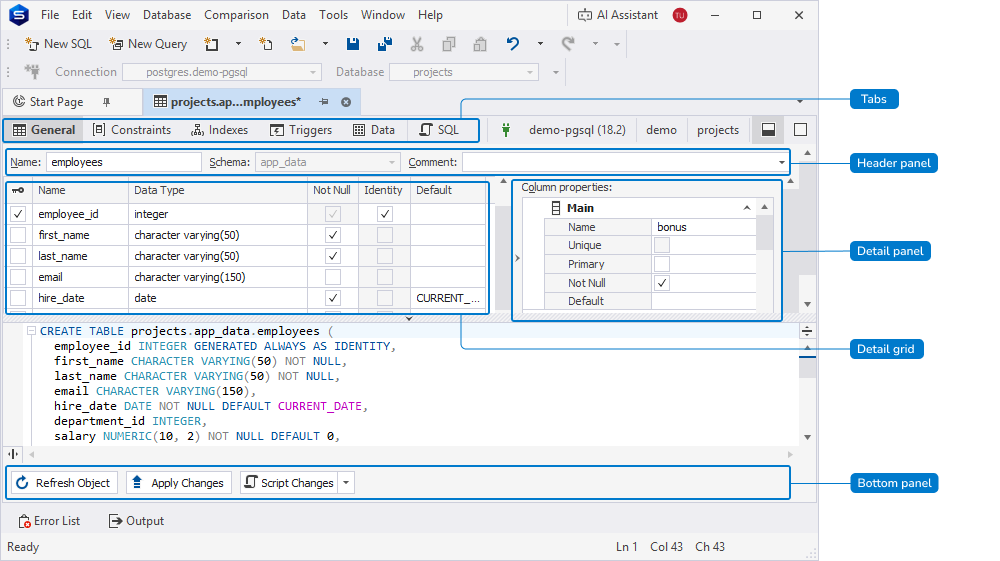
Tabs
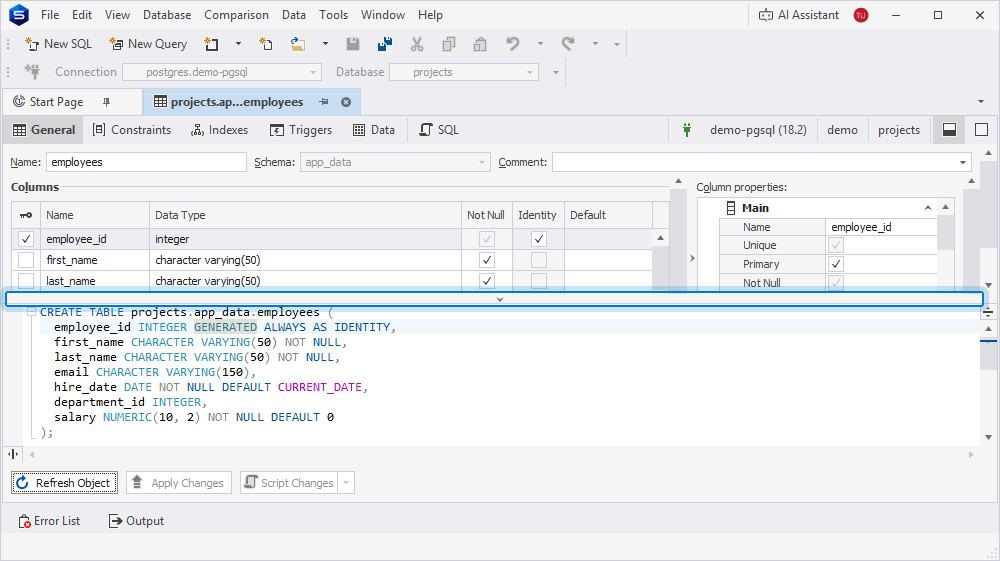
The Table Editor includes the following tabs:
- General – Displays the column structure of the table.
- Constraints – Displays check, foreign key, primary key, and unique constraints defined on the table.
- Indexes – Displays unique and non-unique indexes defined on the table.
- Triggers – Displays triggers defined on the table.
- Data – Displays table data.
- SQL – Displays the generated
CREATE TABLEorALTER TABLEstatement based on your changes.
Header panel
You can add or edit the following table details:
- Name (required) – Specify a table name. The default table name is
table1. If a table with this name already exists, dbForge Studio assigns the next available name, such astable2,table3, and so on. - Schema (required) – Click the Schema list and select the schema to which you want to assign the table. The default schema is
public. - Description – Enter an optional description. To save the description, click OK. To discard the change, click Cancel.
Note
If you’re editing an existing table, you can’t change the schema.
Detail grid
You can use the detail grid to add and manage columns, indexes, constraints, and triggers.
Detail panel
You can use the detail panel to configure additional properties for columns, indexes, and constraints.
Bottom panel
You can use the bottom panel to refresh the object, apply changes, or generate a script for review before execution.
Refresh an object
Click Refresh Object to load the latest object definition from the server. If no changes are detected, the editor remains unchanged.
Save changes
An asterisk (*) on the tab title indicates that there are unsaved changes. To save and apply them, select Apply Changes.
Generate a script
Click Script Changes to view the generated script in a new SQL document. This script shows the changes that will be applied when you click Apply Changes.
You can also click the arrow next to Script Changes and select one of the following options:
- To New SQL Window (Shift+Alt+C) – Opens the script in a new SQL document.
- To Clipboard – Copies the script to the clipboard.
Note
Apply Changes and Script Changes are available only after you make changes to the table.
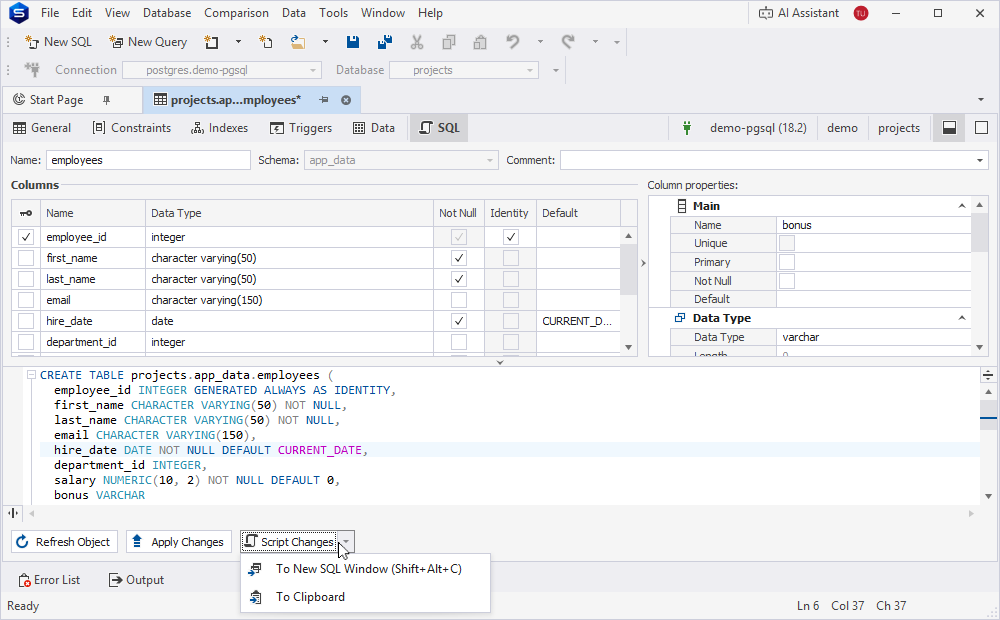
Table Editor layout
The Table Editor supports two layouts: split and combined.
Split layout
By default, the Table Editor opens in the split layout.
To switch from the combined layout to the split layout, in the upper-right corner of Table Editor, click  .
.
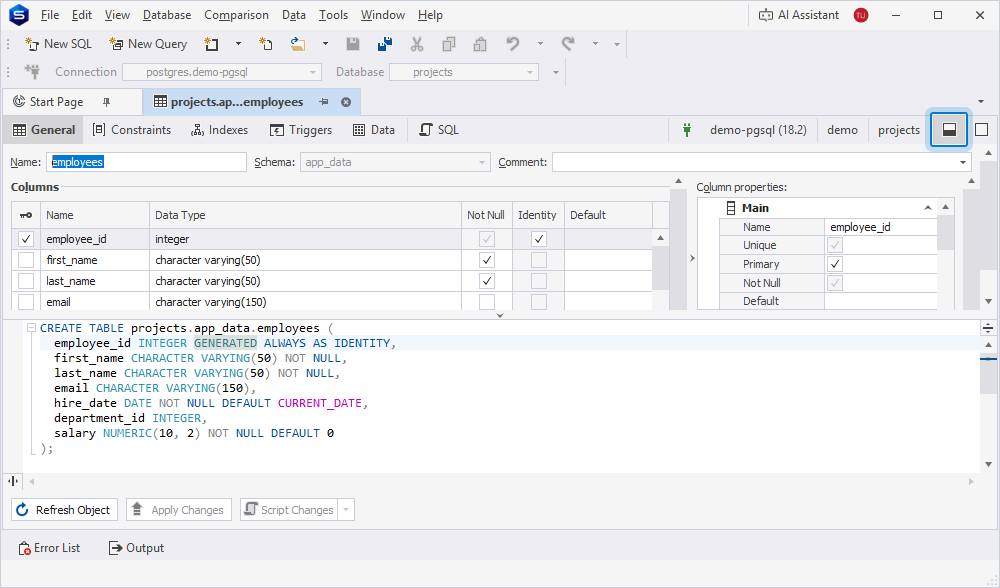
You can also hide the SQL Editor by clicking the horizontal splitter or dragging it down.
Combined layout
To switch to the combined layout, in the upper-right corner of Table Editor, click  .
In the combined layout, only one view is displayed at a time.
.
In the combined layout, only one view is displayed at a time.