Text Import
This topic describes how to import data from a TXT file.
Note
Data Import Wizard pages can slightly differ due to the product you have been using.
1. Decide what table to import the data to:
For a new table:
- On the Database menu, click Import Data. The Data Import wizard opens.
For an existing table:
- In Database Explorer, right-click a table and select Import Data on the shortcut menu. The Data Import wizard opens with predefined parameters: a PostgreSQL connection, a database, a shema, and a table to import the data to.
- Alternatively, on the Database menu, click Import Data and select a required table on the Destination table wizard page.
2. Select Text import format, specify a location of Source data, and click Next.
3. Specify a PostgreSQL connection, a database, a schema, and a table to import the data to. If you selected a table in Database Explorer before opening the Data Import wizard, the wizard will open with the predefined connection parameters of the selected table. To create or edit PostgreSQL connections, click the corresponding buttons and then click Next.
4. Select how you want to split the Source data into columns:
- Manual - for manual splitting. In the Preview section, double-click desired positions to set column ranges. The markers will appear. You can move them forward or backward to change the columns length. To remove the markers, double-click them.
- Fixed width - to split into columns with fixed width. Specify a width value and see how the Source columns are splitted in the Preview section.
- Text Separator - requires you to specify a column separator. See the result in the Preview section.
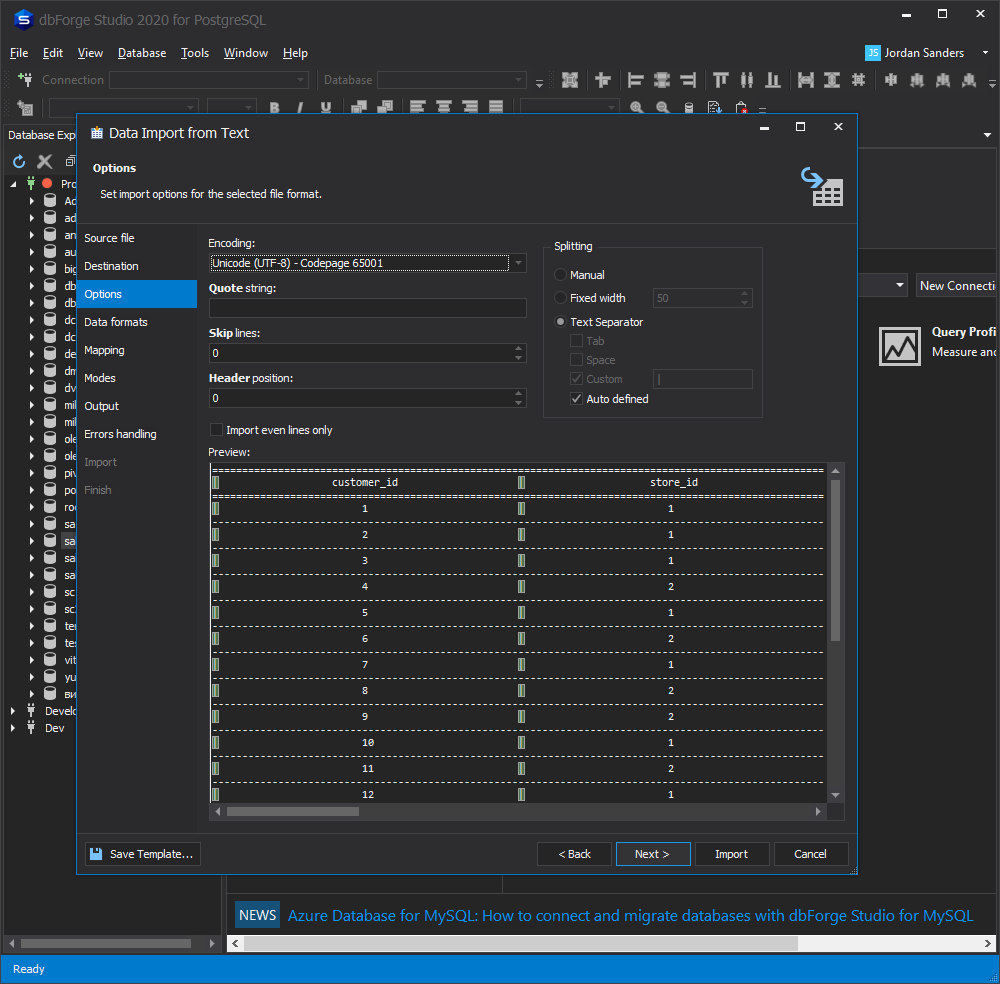
5. Specify additional options to customize the import. For more information, refer to the Text Options, Data Import Wizard topic. Click Next.
6. Specify data formats for the Source data and click Next.
7. Map the Source columns to the Target ones. If you are importing the data into a new table, dbForge Studio will automatically create and map all the columns. If you are importing into an existing table, only columns with the same names will be mapped, the rest should be mapped manually. (If no columns with the same name are found, they are mapped in succession - the 1st column in Source with the 1st column in Target, etc.)
See the Target columns in the top and the Source columns at the bottom of the wizard page. To change automatic mapping, do the following:
- (for columns split with a text separator) Click the Source column fields in the top grid and select required columns from the drop-down list.
- (for columns with fixed width or manual splitting) Select the Target column in the top grid and click Unmap. To map it to a Source column, click a required one in the bottom grid and click Map. The length and starting position values of the Source column will appear in the corresponding fields in the top grid. If required, you can change these values manually. (For more information about mapping, go to the Mapping for Text Data, Data Import Wizard topic.)
Note
To cancel mapping of all the columns, click Clear Mappings on the toolbar. To restore it, click Fill Mapping.
8. If you are importing to a new table, you can edit the Target column properties by double-clicking them in the top grid. Select the Key checkbox for a column with a primary key and click Next. Note that you should select at least one column with a primary key, otherwise, some of import modes on the Modes wizard page will be disabled.
9. Select an import mode to define how dbForge Studio should import the data and then click Next.
10. Select how dbForge Studio should handle errors during import and whether you want to get a log file with details about the import session.
11. Click Import and see the import progress. dbForge Studio will notify you whether the import completed successfully or failed. To open the log file, click Show log file.
12. To finish the import and close the wizard, click Finish.
Note
You can save the import settings as a template for future uses. To save the selected settings, on any wizard page, click Save Template. Next time you should only select a template and specify a location of the Source data - all the settings will be already set. For more information, go to Saving and Using Templates.