How to install dbForge Studio
dbForge tools can be installed using the installation wizard or from the command line.
Install dbForge Studio using the installation wizard
Note
If you want to work with a 32-bit Oracle client on 64-bit Windows, you can install the 32-bit version of dbForge Studio for Oracle by selecting the corresponding option during the installation. This feature is available starting from dbForge Studio for Oracle v6.0. Please note that the 32-bit version of the Studio cannot be installed independently - only alongside the 64-bit version.
To install the Studio:
1. Run dbforgeoracle.exe to begin the installation.
2. On the Welcome to dbForge Studio for Oracle page, select Install.
3. On the Select Destination page, do the following:
- Specify the folder where dbForge Studio for Oracle will be installed. The default installation path is
C:\Program Files\Devart\dbForge Studio for Oracle. To change it, select Browse. - Select the Install 32-bit executable modules checkbox to install the 32-bit version of the Studio. If the checkbox is not selected, only the 64-bit version is installed.
- Optional: To learn the End-User Agreement for dbForge Studio for Oracle, select the Licence Agreement link.
- Optional: To learn what information is collected to improve the product, select the Improvement program link. To return to the Select Destination page, select Close.
To proceed, select Next. By doing so, you accept the Devart dbForge Studio for Oracle License Terms and agree to participate in the improvement program.
Note
To reset to the default directory, select Restore default location.
By default, a desktop shortcut for the tool is created during the installation. To skip creating the shortcut, clear the Create a desktop shortcut checkbox.
4. On the File Associations page, all file extensions for association with the Studio are selected by default. To exclude specific file extensions, clear the corresponding checkboxes. To proceed, select Next.
5. On the Startup Optimization page, select the startup optimization option and then select Next to run the installation:
- Generate images for all assemblies during the installation (recommended): When the option is selected, it speeds up application startup but increases installation time.
- Generate images for all assemblies in the background: When the option is selected, it allows faster installation, but the application may start slower until the optimization process completes in the background.
- Do not generate images: When the option is selected, no optimization is applied, which may result in slower application startup. It is recommended to use this option only if the other methods cause issues.
6. The Installing page opens displaying the installation progress. You may stop the installation by selecting Cancel.
7. On the final page, select Finish to close the installation wizard. By default, the Launch dbForge Studio for Oracle checkbox is selected. If you do not want to start the application immediately after installation, clear the checkbox.
Install dbForge Studio using Chocolatey
You can download and install 64- or 32-bit versions of dbForge Studio for Oracle using Chocolatey, a package manager for Windows.
Prerequisites
Before you begin, ensure that Chocolatey is downloaded and installed on your machine.
To install the Studio using Chocolatey:
1. Open the Windows PowerShell ISE as Administrator.
2. Ensure that Get-ExecutionPolicy is not restricted by running the following command:
Get-ExecutionPolicy
If it returns Restricted, run the following commands:
Set-ExecutionPolicy AllSigned
or
Set-ExecutionPolicy Bypass -Scope Process
This command allows PowerShell to run scripts for the current session.
3. Initiate the installation of the Studio by running the following command:
choco install dbforge-ora-studio
Note
You can install the 32-bit version of dbForge Studio for Oracle using the settings file. Before you begin, save the following predefined settings in the .txt file.
[InstallSettings]
install32bitModules = 1
NGenInstallationMode = 0
where:
install32bitModules = 1ensures that the 32-bit version of dbForge Studio for Oracle will be installed.NGenInstallationMode = 0means that native images will not be generated for .NET assemblies during installation or in the background.After the file is created, run the following command to install the 32-bit version of the Studio:
choco install dbforge-ora-studio --install-arguments="'/settings=D:\Settings.txt'"where:
/settingsis the parameter that specifies a settings file to be used.D:\Settings.txtis the full path to the .txt file with the predefined settings.
4. Agree to run the script by pressing Y or A.
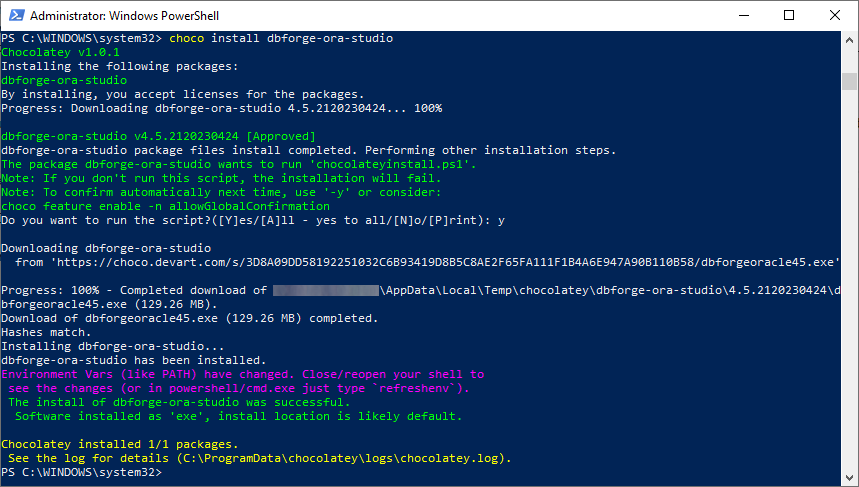
5. Wait for installation to complete. Chocolatey will download the dbForge Studio for Oracle package and install it on your computer.
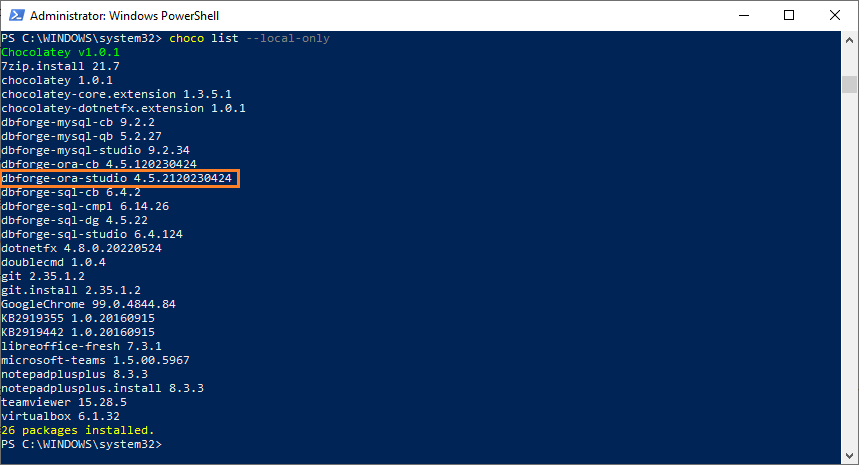
6. After the installation is finished, confirm the installation by running the following command:
choco list --local-only
This command will list all the packages installed on your computer through Chocolatey. If the installation is successful, dbforge-ora-studio will be displayed in this list.
Create a portable version of dbForge Studio for Oracle
A portable version of an application is a self-contained build that runs without installation. All program files and settings are stored in a single directory, which allows you to run the application from any location, including a USB drive or an external disk.
dbForge Studio for Oracle does not include an official portable version. However, you can create one manually by extracting the installer with a third-party tool.
Prerequisites
- Download the dbForge Studio for Oracle installer file (dbforgeoracle.exe).
- Download the innoextract utility.
Create a portable version
1. Open Command Prompt.
2. Navigate to the directory where you want to create a portable version of dbForge Studio for Oracle. For example:
cd D:\PortableApps
3. Run the extraction command. For example:
D:\innoextract\innoextract.exe D:\Downloads\dbforgeoracle.exe
The extraction creates new folders that contain all program files.
Tip
You can use the
-doption to specify the output directory. For example:D:\innoextract\innoextract.exe -d D:\PortableApps\ D:\Downloads\dbforgeoracle.exeWhen you use the
-doption, you do not need to change directories first.
Run and activate the application
To start dbForge Studio for Oracle, run the executable file from the extracted folder.
Before using the application, you need to activate the Studio by following the standard installation procedure.