Developer’s Installation of Review Assistant Client
This topic describes how to install Review Assistant Client for developing needs, assuming that Microsoft Visual Studio is already installed on a computer. Please note, that here we describe only those steps of installation that require special attention. The rest of the steps are quite self-explanatory.
How to Install Review Assistant Client on a Machine with Visual Studio
Before installation, make sure that your system meets the requirements.
-
Download and run the Review Assistant installer. The Install Wizard will appear and guide you through the installation.
-
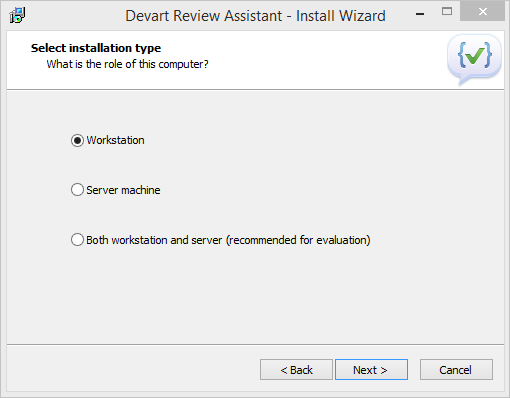
In the Select installation type page, select Workstation.
-
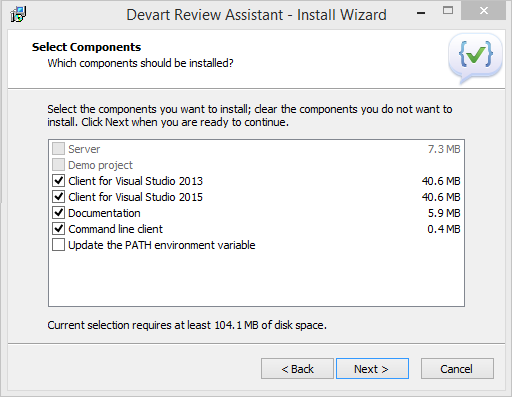
Review Assistant automatically suggests you the relevant components to be installed. The following components are required for the successful installation for the Review Assistant Client:
- Client for Visual Studio
- Command line client
-
After selecting the components for installation, click Next to launch the installation process.
-
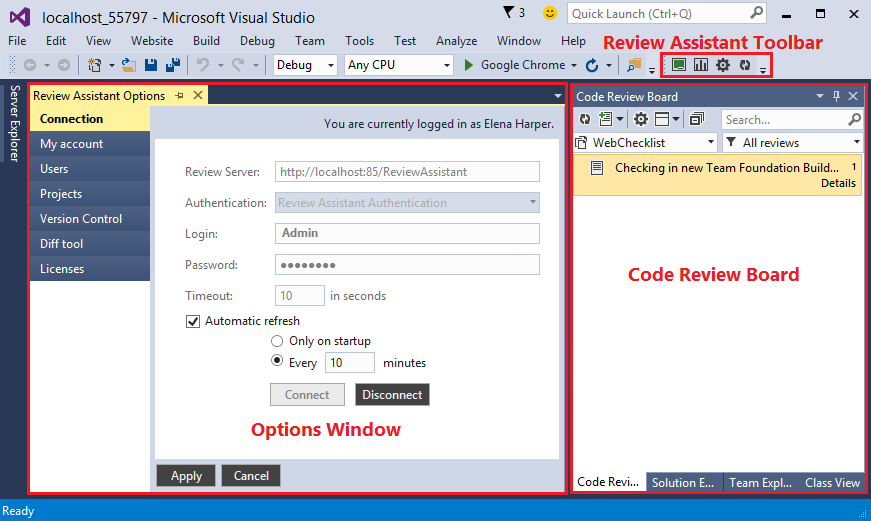
When installation is complete, you will be prompted to start Visual Studio, where you can use Review Assistant Toolbar to invoke the following control components: