Creating Master-Detail Report
This topic will guide you through the process of creating a master-detail report with dbForge Fusion.
Note that it is recommended that you review the Creating Simple Data-Aware Report topic first. It will help you learn how to bind report to data with dbForge Fusion.
-
Open the report definition created in the Creating Simple Data-Aware Report topic. For this, in the File menu, click Open File.
-
To create a master-detail report, add the DEPARTMENTS table to the report. To add the detail table, drag it from Database Explorer to the Data Source window.
-
Make the master table active by right-clicking the table name in the Data Source window and selecting Set Active Item from the shortcut menu.
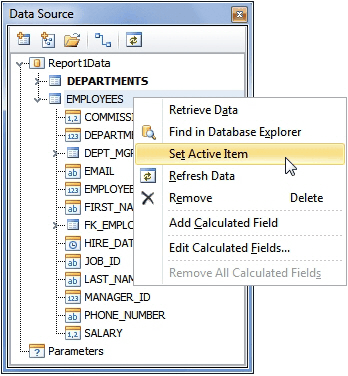
Note, that in the Data Source tree the FK_EMPLOYEES_DEPARTMENTS node should be available. If it is not, refresh data in the Data Source tree by clicking the Refresh Data button on the Data Source toolbar.
-
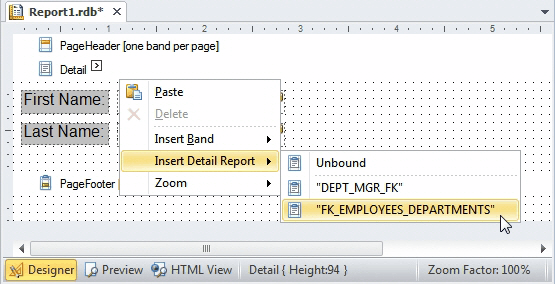
Right-click your report in the document area to invoke the shortcut menu. In the menu, point to Insert Detail Report, and then click the FK_EMPLOYEES_DEPARTMENTS option to add a new detail report. A Detail Report band appears:
-
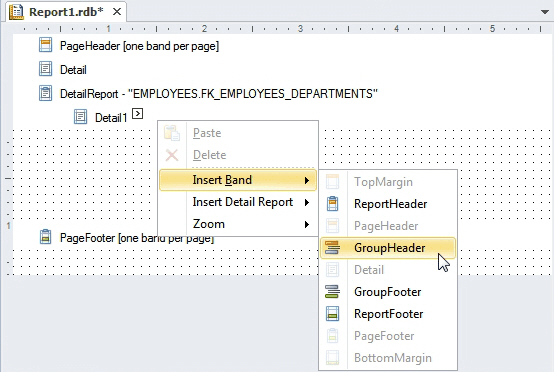
Right-click the detail report and point to Insert Band, and then click Group Header in the shortcut menu. This will add the GroupHeaderBand to the detail report:
You can add the Label control to the added GroupHeader band and change text in it to “Department details”.
-
Add the DEPARTMENT_NAME field from the FK_EMPLOYEES_DEPARTMENTS node of Data Source tree to the Detail Report band of the report. Near each label with the bound field add labels with the text changed to “Department name:”.
-
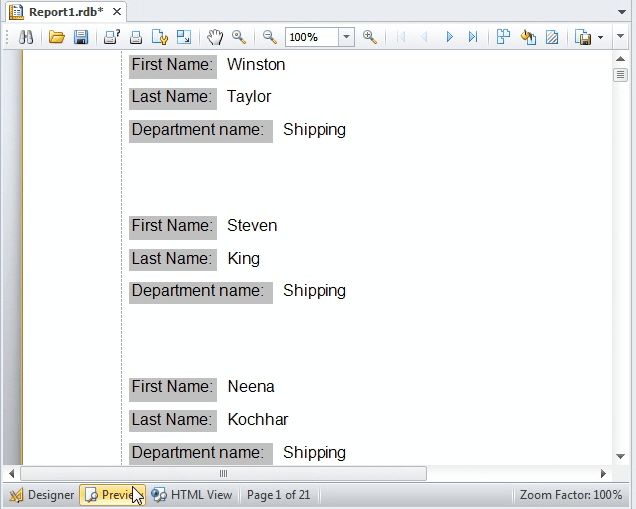
Now switch to the Preview tab at the bottom of the Document area: