Defining Table Structure
A table contains columns and indexes. Besides, a table has options such as table type, row format and so on. Defining a table structure means setting up all these elements.
To define table structure, create the table or open existing one from Database Explorer. There are 7 tabs in Table editor: Main, Constraints, Indexes, Options, Partitioning, SQL, and Data. The Partitioning tab appears only when creating a table and when editing partitioned tables. Working with partitioned tables is described in the Partitioned Tables section.
Defining Columns
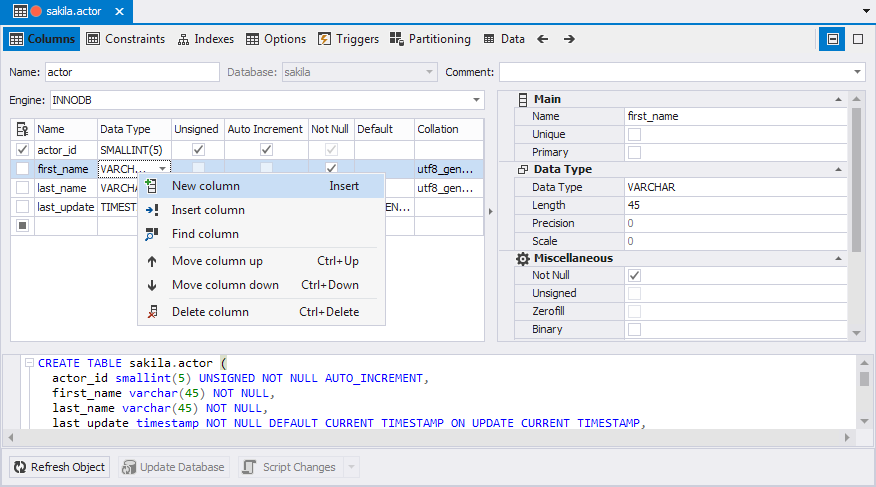
Switch to the Columns tab of Table editor to define columns and its properties or rename the table.
To add a column to table, right-click on the grid and select New Column on the shortcut menu. Alternatively, press the INSERT key.
To edit an existing column, double-click a column row.
To remove a column, right-click it and select Delete Column on the shortcut menu.
Defining Constraints
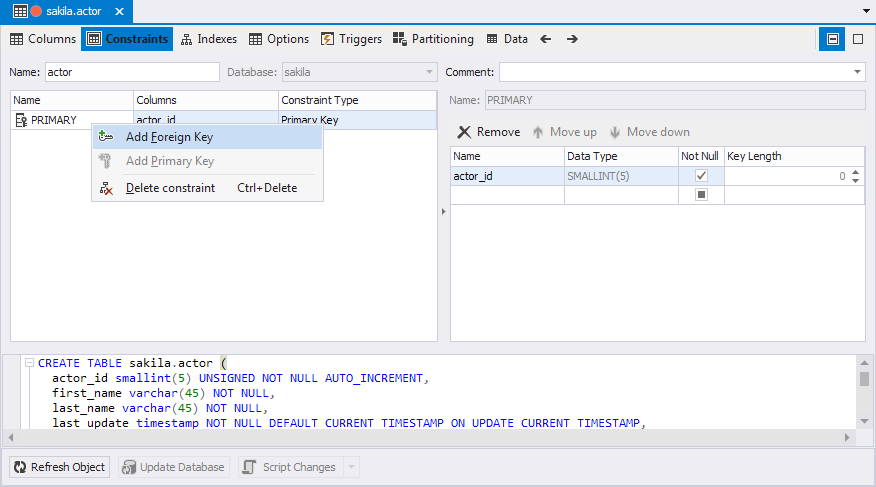
Switch to the Constraints tab of Table editor to add or alter foreign and primary keys and their properties.
To add a key to table, right-click the tab and select New Foreign Key or New Primary Key on the shortcut menu, then choose the type of key you want to create.
To edit an existing key and its properties, double-click a key row to accomplish this task.
To remove a key, right-click it and select Delete Constraint on the shortcut menu.
Defining Indexes
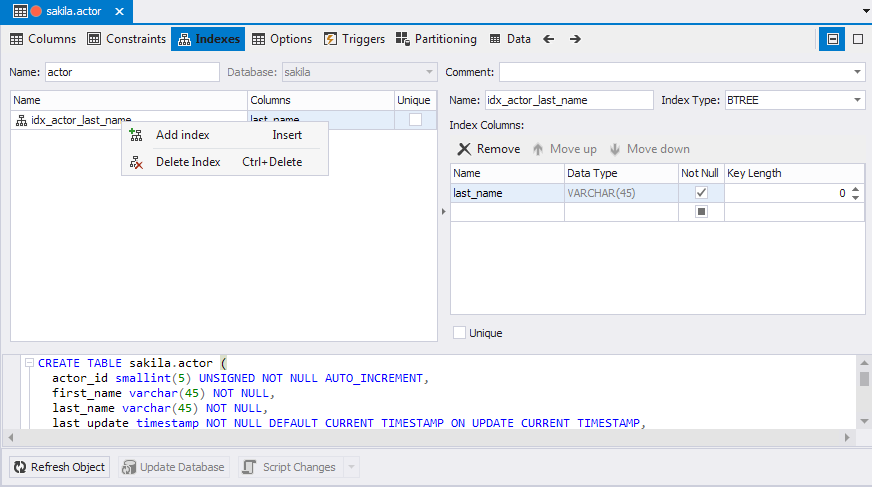
Switch to the Indexes tab of Table editor to define indexes. Generally, it is similar to defining columns.
To add an index to table, right-click the tab and choose New Index on the shortcut menu. Another way to do it is to press the INSERT key.
To edit an existing index, right-click it and choose Edit Index on the shortcut menu. You can also double-click on an index row to accomplish this task.
To remove an index, right-click it and choose Delete Index on the shortcut menu.
When you add a new index or edit existing one, the Index Properties dialog box appears. To learn more about properties listed in the dialog, see Index Properties.
Defining Options
Tune up specific options according to your plans for the table in the Options tab of the Table editor. For more information, see Options, Table Editor.
Defining Triggers
Switch to the Triggers tab of Table editor to add or configure triggers and their properties.
To add an index to table, right-click the tab and choose New Trigger on the shortcut menu. Another way to do this is to press the INSERT key.
To edit an existing index, right-click it and choose Edit Trigger on the shortcut menu. You can also double-click on an index row to accomplish this task.
To remove an index, right-click it and choose Delete Index on the shortcut menu.
When you add a new trigger or edit an existing one, the Trigger Editor dialog box appears. To learn more about properties listed in the dialog, see Trigger Editor.
Defining Partitioning
Switch to the Partitioning tab of Table editor to add partitions or subpartitions.
To select a partition (subpartition) type, select the required one from the drop-down list.
To add a partitioning (subpartition) expression, enter the required one into the corresponding field.
To add a partition, click the Add button or right-click in the field under the Add button and select Add partition. Then, specify the properties of the partition. For more information on how to add partitions, see Adding or Removing Partitions or Subpartitions topic.
Removing Partitioning
To remove a partition, select one from the list and click the Remove button or right-click the partition and select Remove.