Creating Partitioned Tables
Manipulate table partitions and subpartitions on the Partitioning tab of table editor.
Current table partitions and subpartitions are shown in the Partitions tree.
To remove a partition or subpartition, select its node in the tree and click the Remove button or select Remove on its shortcut menu.
To change a partition name, select the partition in the tree and edit its name in the Name box.
Adding Partitions
To add a partition, do the following depending on the partitioning type:
Hash and Key Partitioning
Click the Add button.
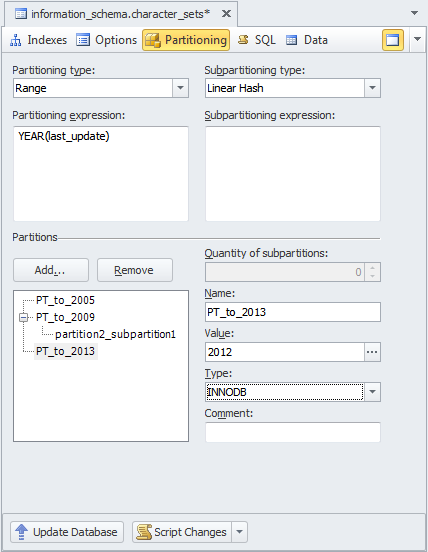
Range Partitioning
Click the Add button. Range boundaries values must be set for partitions. To set the partition boundary value, select it in the Partitions tree and specify the value. When using range partitioning, records, having partitioning expression values up to the first partition’s values inclusive maps to the first partition. Record maps to n-th partition if record has partitioning expression value more than (n-1)-th partition border value and less or equal than n-th partition border value. Values of different partitions cannot be equal, so the value of the current partition must be greater than the value of the previous partition. When adding a new partition to an existing partitioned table this rule must be observed too. MAXVALUE keyword can be used for the partitions to set its boundaries to the maximum possible value of the corresponding partitioning key column type.
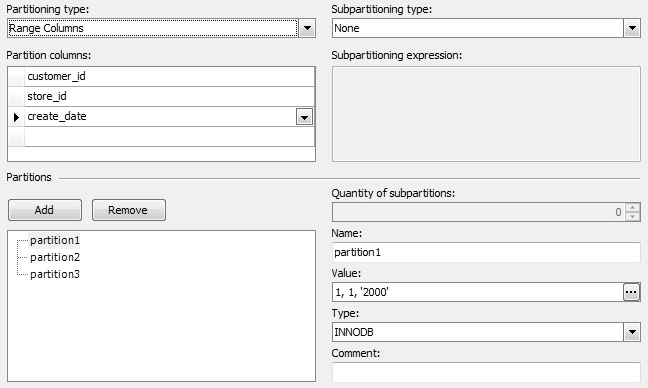
Range Columns Partitioning
A similar procedure applies to the range column partitioning, however in comparison with Partitioning expression section, that was in range partitioning, Partition columns section may contain multiple columns. A value list must be supplied for each partition definition in the Value field, and each value list must have the same number of values as the Partitioning expression has columns. The elements in the partitioning column list and in the value list defining each partition must occur in the same order. In addition, each element in the value list must be of the same data type as the corresponding element in the column list. However, the order of the column names in the partitioning column list and the value lists does not have to be the same as the order of the table column definitions.
List Partitioning
Click the Add button. Value list should be set for each partition. To edit values for the partition, select it in the tree and click the button in the Value box. The Values Editor dialog box will appear. To add an item to the list, type a value in the box and click Add. To delete item select it in the list and click Delete. Click OK to apply changes. Value list must contain values for the partitioning expression. Record will be stored in the partition, having the value of the partitioning key in the list.
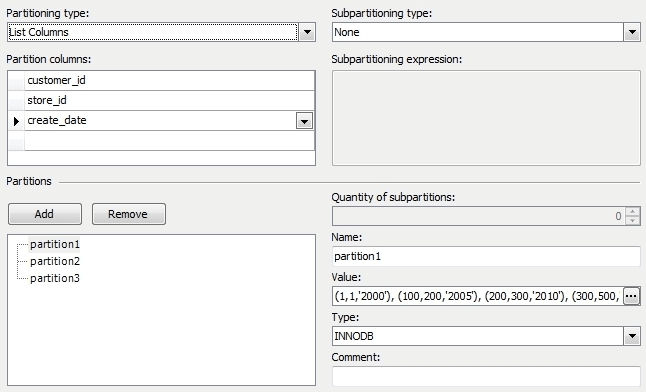
List Columns Partitioning
A similar procedure applies to column list partitioning, however in comparison with the Partitioning expression section, that was in range partitioning, the Partition columns section may contain multiple columns. A list of value sets must be supplied for each partition definition in the Value field, and each set of values must have the same number of values as the Partitioning expression has columns. The elements in the partitioning column list and in the sets of values must occur in the same order. In addition, each element in the sets of values must be of the same data type as the corresponding element in the column list. However, the order of the column names in the partitioning column list and the sets of values does not have to be the same as the order of the table column definitions.
Composite Partitioning
Click the Add button and select Add partition on the shortcut menu or right-click the Partitions tree and select Add partition on the shortcut menu. Range boundaries or value list for partitions should be set just like when using range or list partitioning.
To add a subpartition, right-click the partition in the Partitions tree and select Add subpartition on the shortcut menu or do the following:
- Select a partition in the Partitions tree.
- Click the Add button.
- Select Add subpartition on the shortcut menu.
Note
All partitions must have the same number of subpartitions. In MySQL 5.1.7 and earlier, names of subpartitions must be unique within each partition, but do not have to be unique within the whole table. In MySQL 5.1.8 and higher they must be unique within the entire table.
You can also set subpartition quantity without setting all the subpartitions manually.
Removing Partitions and Subpartitions
To remove a subpartition, select it in the tree and click the Remove button, or right-click the subpartition and select Remove on the shortcut menu. Note that you should keep the same subpartition number for each partition, otherwise, you will get an error when saving the table.
If you remove an existing subpartition from the table, when saving the table, a dialog appears asking whether to remove a partition and lose all its data or to repartition the entire table without losing data. Click Remove to remove a partition with its data, or Repartition to repartition the table and keep the partition data, or Cancel to cancel partitioning changes. But if you have changed the partitioning or subpartitioning type or expression before saving the table, it will be repartitioned without a confirmation dialog.