Creating Partitioned Tables
This topic describes creating of partitioned tables of the following types supported in MySQL:
- Range-partitioned
- Range column-partitioned
- Hash-partitioned
- List-partitioned
- List columns-partitioned
- Key-partitioned
- Composite partitioned
To learn more about working with partitioned tables and their types in MySQL, see Working with Partitioned Tables.
Creating a Range-Partitioned Table
- Click the Create New Database Object button and select type Table from the list.
- Input the table name.
- Click Create and, if the specified name is unique, the table will appear in Database Explorer.
- Add required table columns to the table and set table type and required parameters.
- Optionally, you can alter the name or change database (owner) in which the new table will be created.
- Switch to the Partitioning tab.
- Select the partitioning type Range.
- Specify the Partitioning expression.
-
Add required partitions and set values for partitions’ bounds for all partition columns.
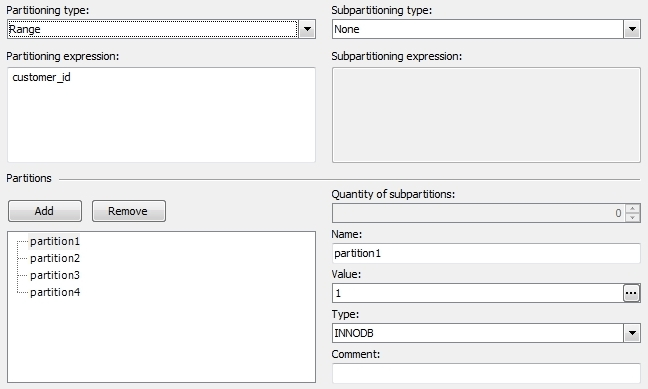
- Set other parameters (Comment, Storage engine) for partitions if necessary.
- Save the document.
Creating a Range Column-Partitioned Table
- Click the Create New Database Object button and select type Table from the list.
- Input the table name.
- Click Create and, if the specified name is unique, the table will appear in Database Explorer.
- Add required table columns to the table and set table type and required parameters.
- Optionally, alter the name or change database (owner) in which the new table will be created.
- Switch to the Partitioning tab.
- Select the partitioning type Range Columns.
- Specify the Partitioning columns.
-
Add required partitions and set values for partitions’ bounds for all partition columns.
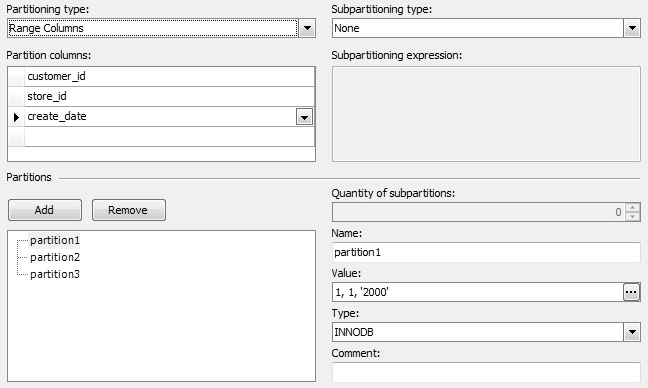
- Set other parameters (Comment, Storage engine) for partitions if necessary.
- Save the document.
Creating a Hash-Partitioned Table
- Click the Create New Database Object button and select type Table from the list.
-
or -
In Database Explorer, right-click the Tables node and select New Table.
- Input the table name.
- Click Create and, if specified name is unique, the table will appear in Database Explorer.
- Add required table columns to the table and set table type and parameters.
- Optionally, alter the name or change database (owner) in which the new table will be created.
- Switch to the Partitioning tab.
- Select the partitioning type Hash (Linear Hash).
- Specify the Partitioning expression. If the table has a primary key or unique key with NOT NULL columns, you should use only the columns of this key.
- Add required partitions.
- Set other parameters (Comment, Storage engine) for partitions if necessary.
- Save the document.
Creating a List-Partitioned Table
- Click the Create New Database Object button and select type Table from the list.
-
or -
In Database Explorer, right-click the Tables node and select New Table.
- Input the table name.
- Click Create and, if specified name is unique, the table will appear in Database Explorer.
- Add required table columns to the table and set table type and required parameters.
- Optionally, alter the name or change database (owner) in which the new table will be created.
- Switch to the Partitioning tab.
- Select the partitioning type List.
- Specify the Partitioning expression.
-
Add required partitions and set list values for partitions.
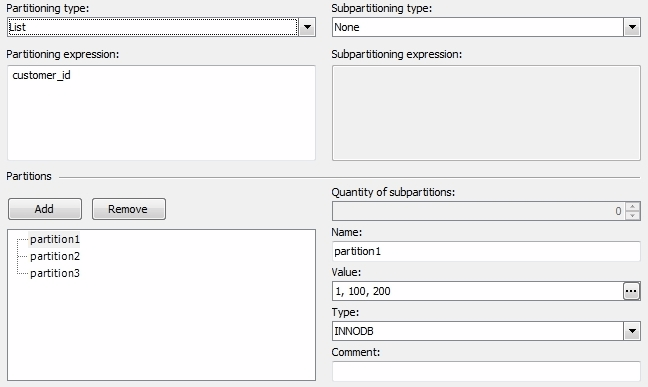
- Set other parameters (Comment, Storage engine) for partitions if necessary.
- Save the document.
Creating a List Columns-Partitioned Table
- Click the Create New Database Object button and select type Table from the list.
-
or -
In Database Explorer, right-click the Tables node and select New Table.
- Input the table name.
- Click Create and, if specified name is unique, the table will appear in Database Explorer.
- Add required table columns to the table and set table type and required parameters.
- Optionally, alter the name or change database (owner) in which the new table will be created.
- Switch to the Partitioning tab.
- Select the partitioning type List Columns.
- Specify the Partitioning columns.
-
Add required partitions and set list values for partitions.
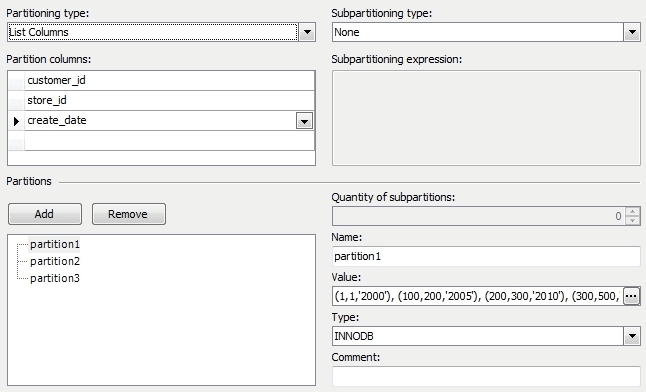
- Set other parameters (Comment, Storage engine) for partitions if necessary.
- Save the document.
Creating a Key-Partitioned Table
-
Click the Create New Database Object button and select type Table from the list.
- or -
In Database Explorer, right-click the Tables node and select New Table.
- Input the table name.
- Click Create and, if specified name is unique, the table will appear in Database Explorer.
- Add required table columns to the table and set table type and parameters you need.
- Optionally, alter the name or change database (owner) in which the new table will be created.
- Switch to the Partitioning tab.
- Select partitioning type Key.
- Select Partitioning columns. If the table has a primary key or unique key with NOT NULL columns, you should use only the columns of this key.
- Add required partitions.
- Set other parameters (Comment, Storage engine) for partitions if necessary.
- Save the document.
Note
Linear hash and linear key partitioned tables can be created in the same way as hash and key partitioned tables respectively. Just select Linear hash instead of Hash or Linear key instead of Key in the Partitioning type drop-down list.
In a composite partitioned table, partitions are divided into subpartitions. Subpartitions can be set individually for each partition.
Creating a Composite Partitioned Table
- Click the Create New Database Object button and select type Table from the list.
- Input the table name.
- Click Create and, if specified name is unique, the table will appear in Database Explorer.
- Add required table columns to the table and set table type and parameters you need.
- Optionally, alter the name or change database (owner) in which the new table will be created.
- Switch to the Partitioning tab.
- Select partitioning type Range, Range Columns, List or List Columns.
- Select subpartitioning type.
- Specify the Partitioning expression.
- Select Subpartitioning columns for the key subpartitioning or specify the Subpartitioning expression for hash subpartitioning. If the table has a primary key or unique key with NOT NULL columns, you should use only the columns of this key. For key partitioning, you may skip the Subpartitioning columns setting, the key columns will be used in that case.
- Add required partitions and set values for partitions’ bounds for all partition columns.
-
Add subpartitions manually if required or set their quantity for partitions. Each partition must have the same number of subpartitions.
Note
In MySQL 5.1.8 and higher subpartition names must be unique across the entire table.
- Set tablespace names for partitions and subpartitions if required.
- Save the document.
Note
Linear hash and linear key subpartitioned tables can be created in the same way as hash and key subpartitioned tables respectively. Just choose Linear hash instead of Hash or Linear key instead of Key in the Subpartitioning type drop-down list.