Generate comparison reports in CSV, Excel, or HTML
Data Compare for SQL Server allows viewing and exporting the results of data comparison in the form of a report. You may need that, for example, to produce a detailed report, or to keep a record of the comparison results.
Generate a report
To export the full comparison results, or a subset of the results, to a collection of comma-separated value (CSV) files:
1. Click Comparison on the main menu bar and then select Generate Comparison Report.
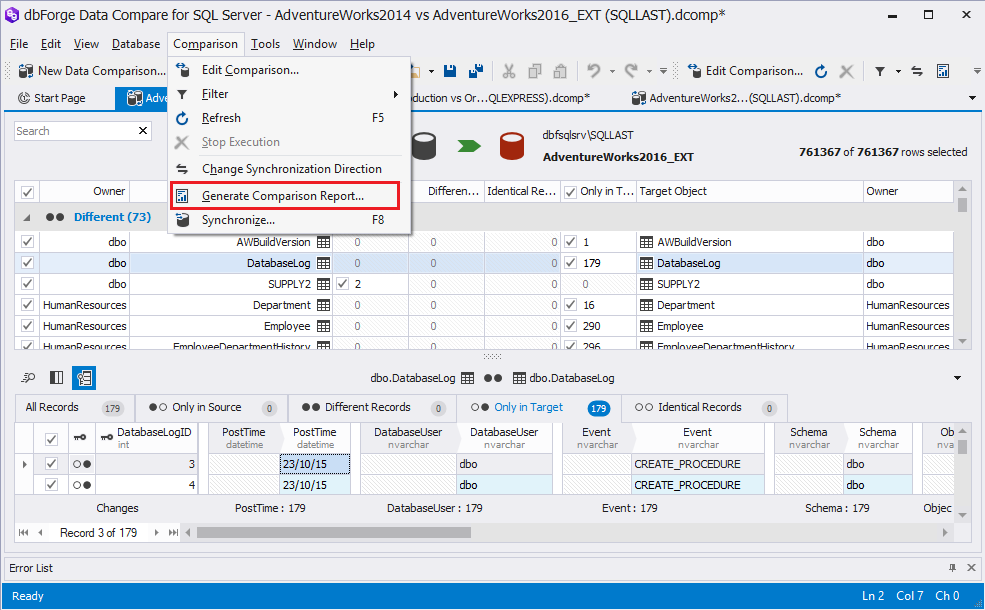
2. In the Generate Comparison Report dialog window that appears select a report format (CSV, Excel, or HTML), its location and objects you want to report.
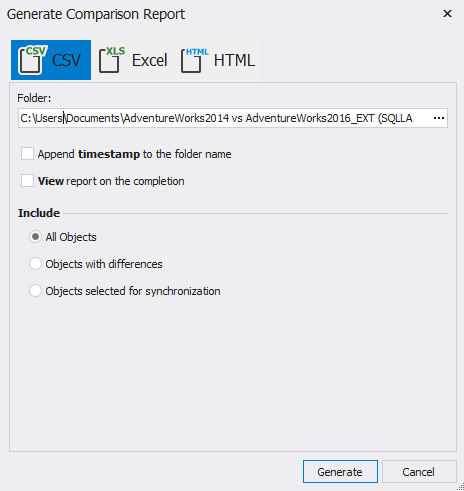
3. Click Generate.
You can create a report in one of three formats:
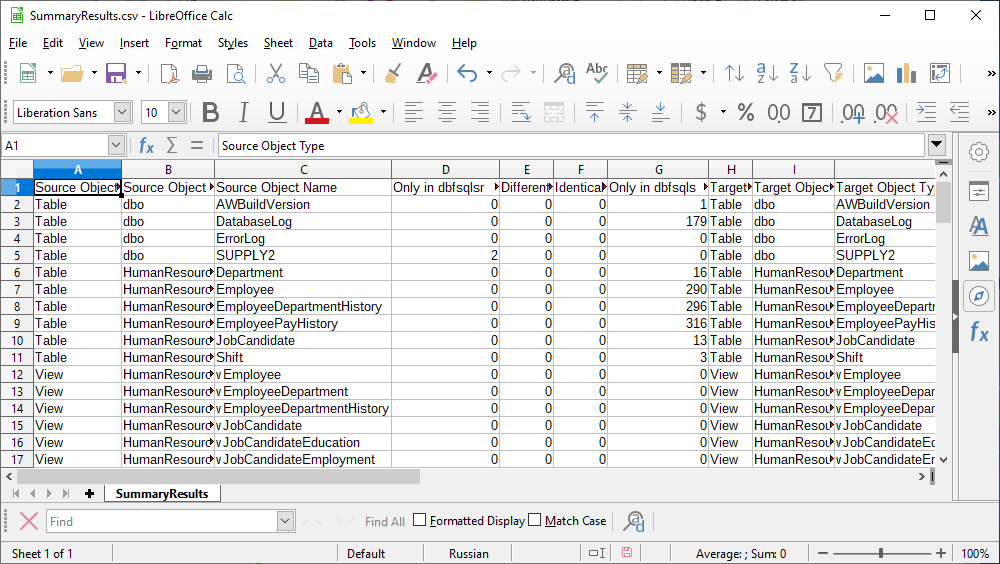
CSV reports
A Comma Separated Values (CSV) file is a plain text file that contains a list of data. These files are often used for exchanging data between different applications.
For each selected table or view and for each of the row types that you selected to include into synchronization, Data Compare for SQL Server creates a separate CSV file.
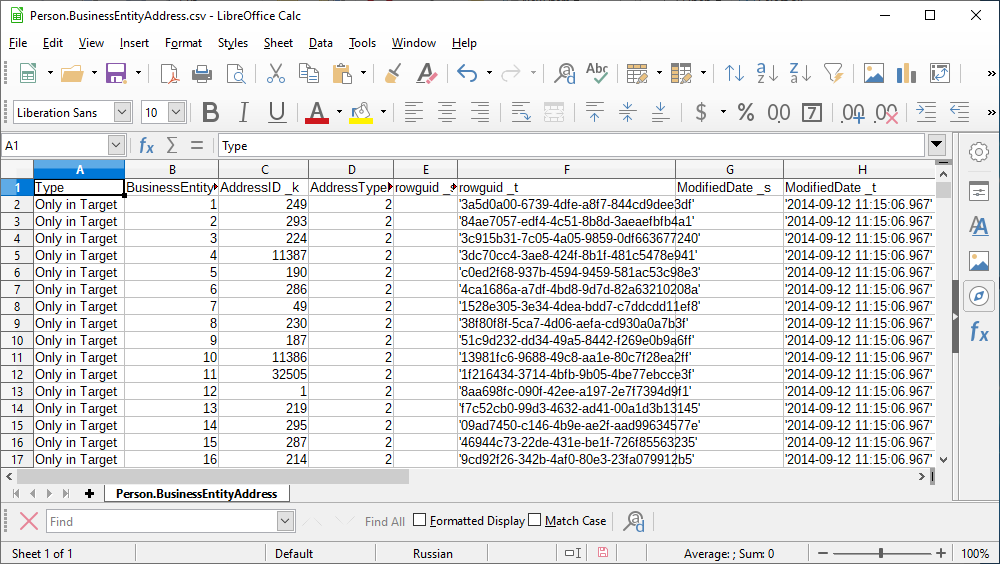
Data Compare for SQL Server also creates a SummaryResults file.
Excel reports
When configuring Excel report generation, you can select to show the number of differences per column and include actual data records for different objects.
The report has the following view.

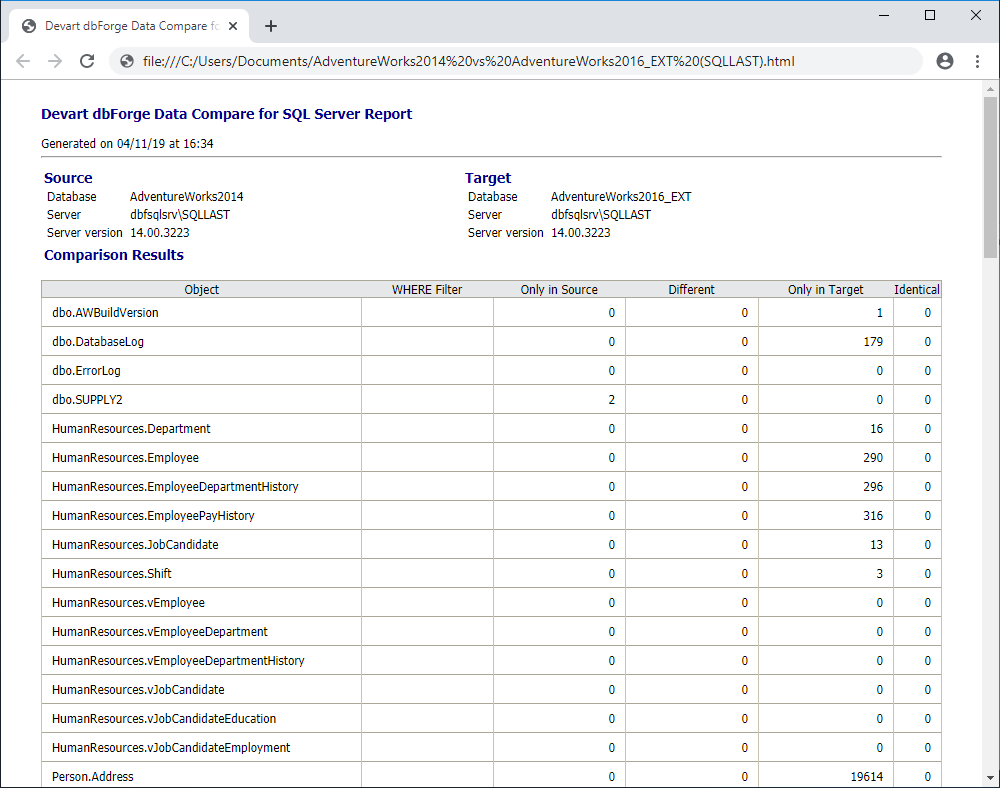
HTML reports
When configuring HTML report generation, you can select to show the number of differences per column, include actual data records for different objects, and include comparison settings.
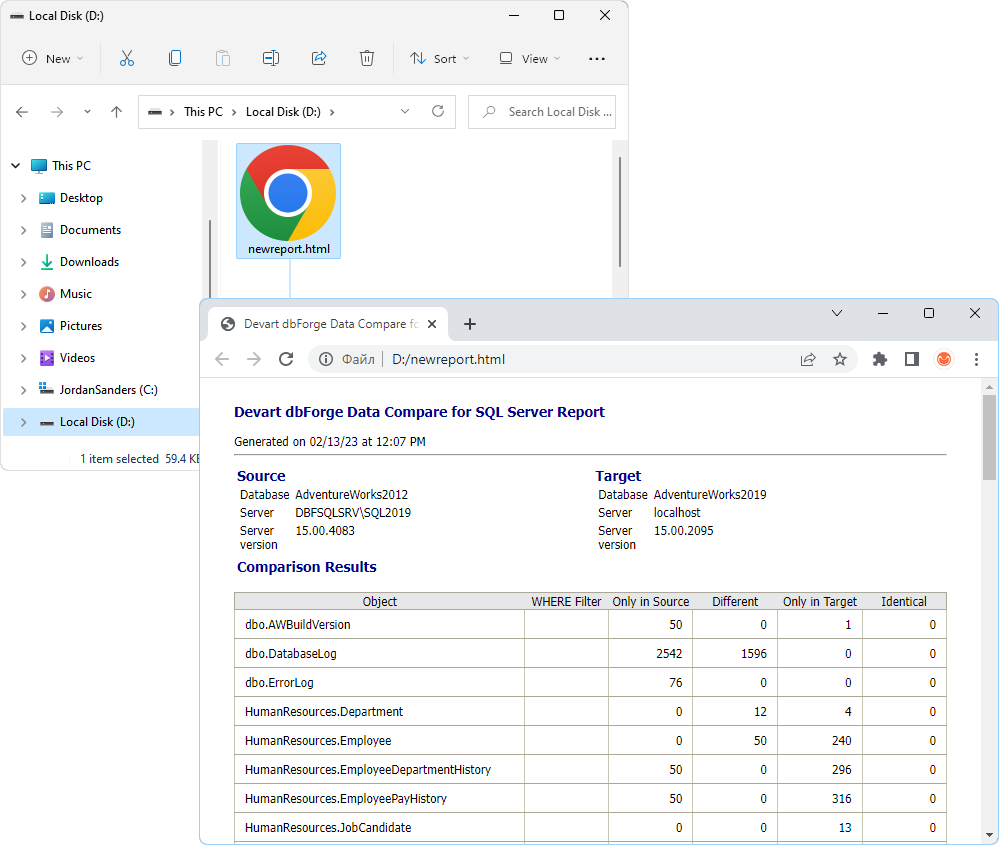
The report has the following view.
Generate reports using the command line
You can also generate a comparison report using a command line:
1. Click Start.
2. Type cmd in the Search programs and files text box and press the ENTER button.
3. In the Command Prompt window that opens, type in the command, that will compare the data, synchronize it, and create a comparison report:
"C:\Program Files\Devart\dbForge SQL Tools Professional\dbForge Data Compare for SQL Server\datacompare.com" /datacompare
/source connection:"Data Source=HostName;Initial Catalog=DatabaseName;Integrated Security=False;User ID=yourusername;"
/target connection:"Data Source=HostName;Initial Catalog=DatabaseName;Integrated Security=False;User ID=yourusername;"
/sync:"D:\newsync.sql" /log:"D:\newlog.log" /report:"D:\newreport.html" /reportformat:HTML
In this example the following part specifies the location of the dbforgesql.com file, located on your PC:
"C:\Program Files\Devart\dbForge SQL Tools Professional\dbForge Data Compare for SQL Server\datacompare.com"
… launches data comparison:
/datacompare
… determines Source and Target connections. Before running the script, make sure to replace HostName, DatabaseName, and UserName with your hostname, database, and username, respectively:
/source connection:"Data Source=HostName;Initial Catalog=DatabaseName;Integrated Security=False;User ID=yourusername;"
/target connection:"Data Source=HostName;Initial Catalog=DatabaseName;Integrated Security=False;User ID=yourusername;"
… synchronizes data directly into Target and generates a synchronization script file:
/sync:"D:\newsync.sql"
… generates a comparison and synchronization protocol into a file:
/log:"D:\newlog.log"
… composes a comparison report:
/report:"D:\newreport.html"
… specifies the report format. You can choose from CSV, Excel, or HTML:
/reportformat:HTML
4. Once the script is ready, press ENTER to run the process.
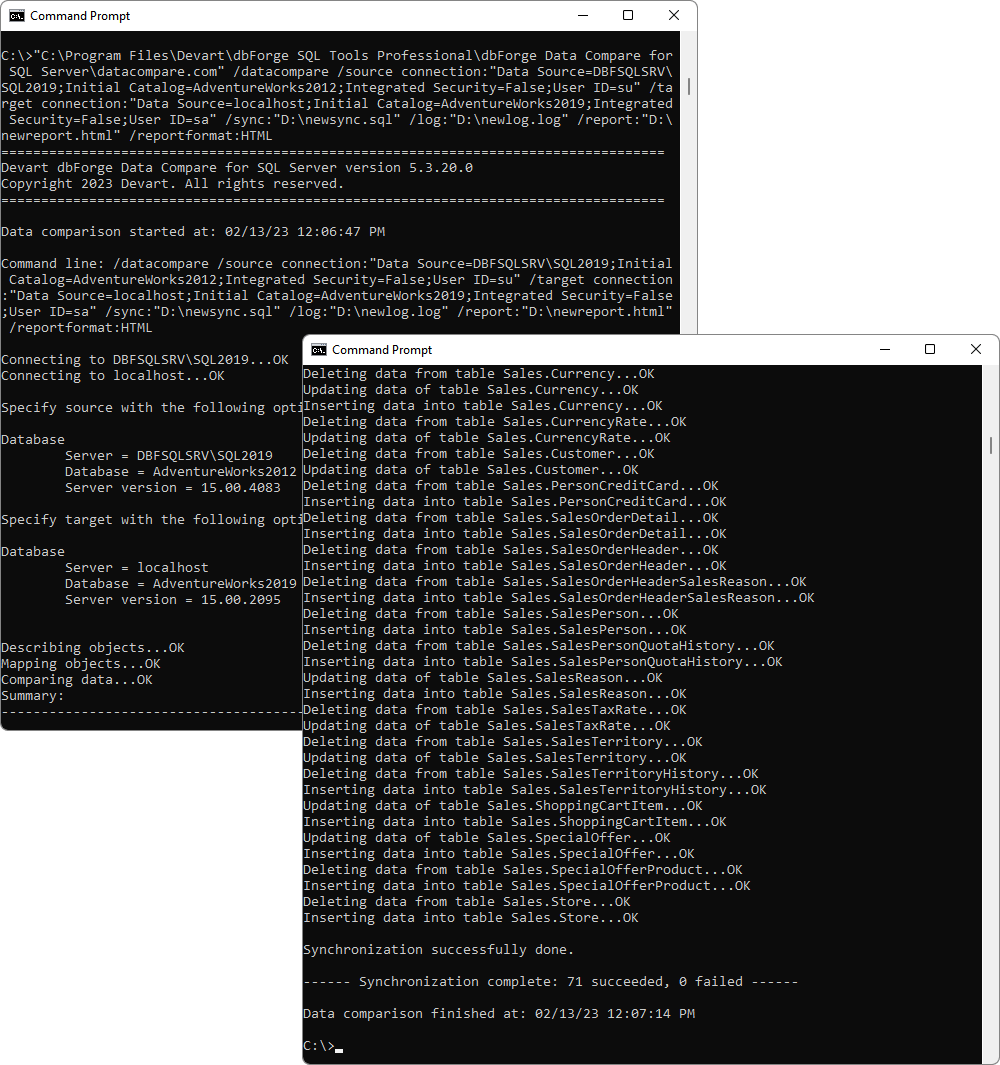
5. As a result, newreport.html was generated.