Install and set up an embedded MySQL server
dbForge Data Compare for MySQL allows simple and convenient installation and setup of embedded servers.
Embedded server is an easily installed server that is used by applications that do not require multi-user operations.
Constraints
The following known constraints of embedded MySQL servers are caused by the servers themselves, and not by dbForge products. For troubleshooting tips, please refer to MySQL documentation.
- Simultaneous usage of several copies of an embedded MySQL server on the same machine can cause unexpected errors.
- Running an embedded and a common MySQL server on the same machine can cause issues. Simultaneous access to the same data from different MySQL server instances (for example, from a common MySQL server and an embedded MySQL server) can cause data loss.
- Switching between an embedded MySQL server and a common MySQL server can cause unexpected issues if you are using InnoDB.
- Your application may suddenly shut down if the configuration of your embedded server is invalid. This also may happen due to an error inside the server.
To install an embedded MySQL server
1. Download the MySQL server installation package from the MySQL website.
2. Install the server.
3. Create a basedir directory for your embedded MySQL server.
4. Make sure you have libmysqld.dll available via the PATH environment variable; for example, place it in your Windows\System32 directory, or place it in the directory where Data Compare is installed.
5. Copy the share directory from the MySQL server installation directory to basedir.
6. Create a datadir folder for the data contained in basedir. Copy the mysql directory from your server installation directory to datadir.
Now you can configure and use your embedded MySQL server.
To configure an embedded MySQL server
You can use either of the following ways to configure your embedded MySQL Server:
- Use the my.ini file
- Specify data as parameters in the connection string
To use the my.ini file, you have to create it in the root Windows directory and configure the following sections:
[Server] - common settings for both common and embedded MySQL servers

[Embedded] - embedded server-specific settings
Note
You can learn more about the list of settings in the MySQL Reference Manual.
This is what the simplest content for my.ini looks like:
[embedded]
basedir=c:/servers/embedded/
datadir=c:/servers/embedded/data/
According to this configuration, the contents of the share directory can be found in C:\servers\embedded\share\, while the data is located in C:\servers\embedded\data. Note the use of forward slashes instead of backslashes.
To connect to an embedded MySQL server
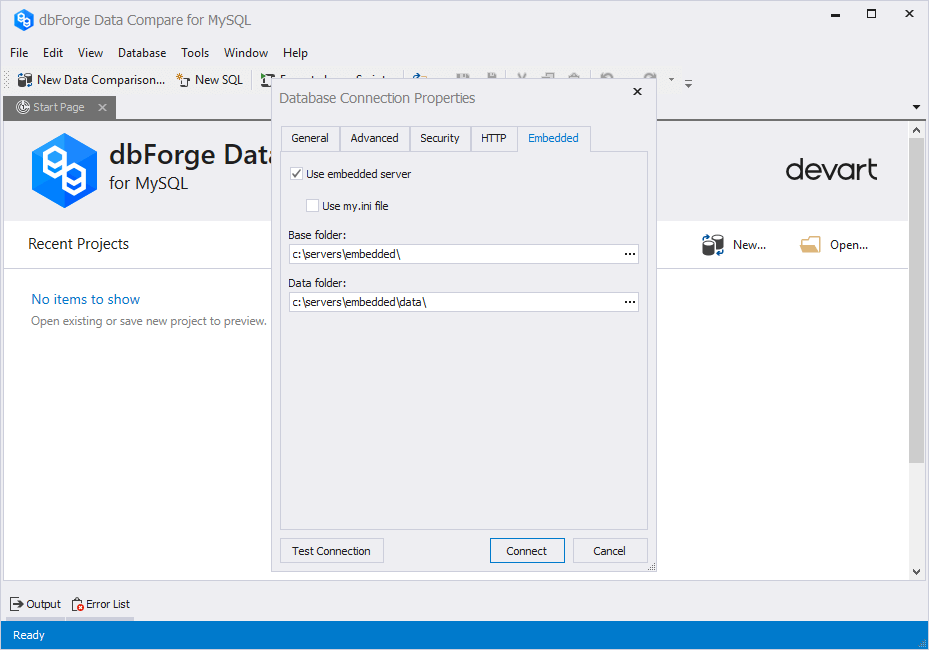
1. In the Database menu, select New Connection to open the Database Connection Properties dialog.
2. Go to the Embedded tab.
3. Select the Use embedded server checkbox.
4. Clear the Use my.ini file checkbox and fill in the Base folder and Data folder fields if you want to set these directories manually without using the my.ini file.

5. Click Connect to establish the connection.