How to connect to Amazon RDS MySQL database
Amazon RDS (Relational Database Service) is a cloud-based database service provided by Amazon Web Services (AWS). RDS makes it easier to set up, operate, and scale a relational database in the cloud. MySQL is one of the database engines supported by Amazon RDS.
With Amazon RDS for MySQL databases, you can:
- Create, manage and scale MySQL databases in the cloud
- Store and monitor database instances with a few clicks
- Streamline database management
- Manage backup and recovery with ease
- Monitor and optimize performance
Step 1: Create an Amazon MySQL instance
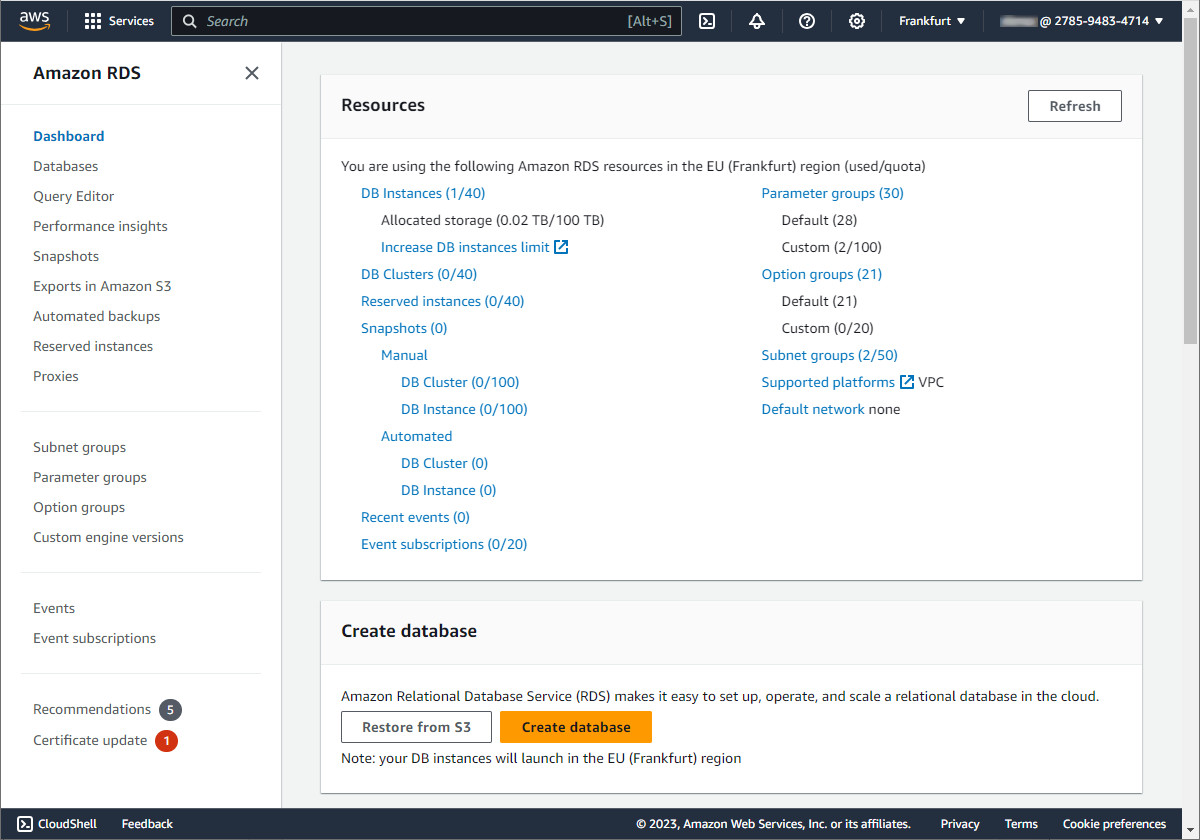
To begin with, sign in to AWS Management Console. Then navigate to RDS Dashboard, choose the AWS region in which you want to create the database, and click Create database.
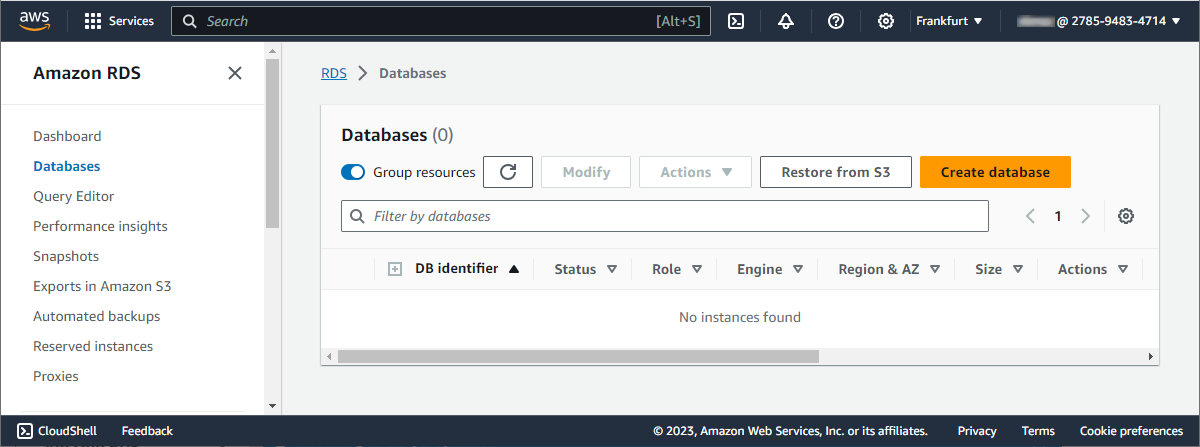
Alternatively, you can create a database from the Databases section.
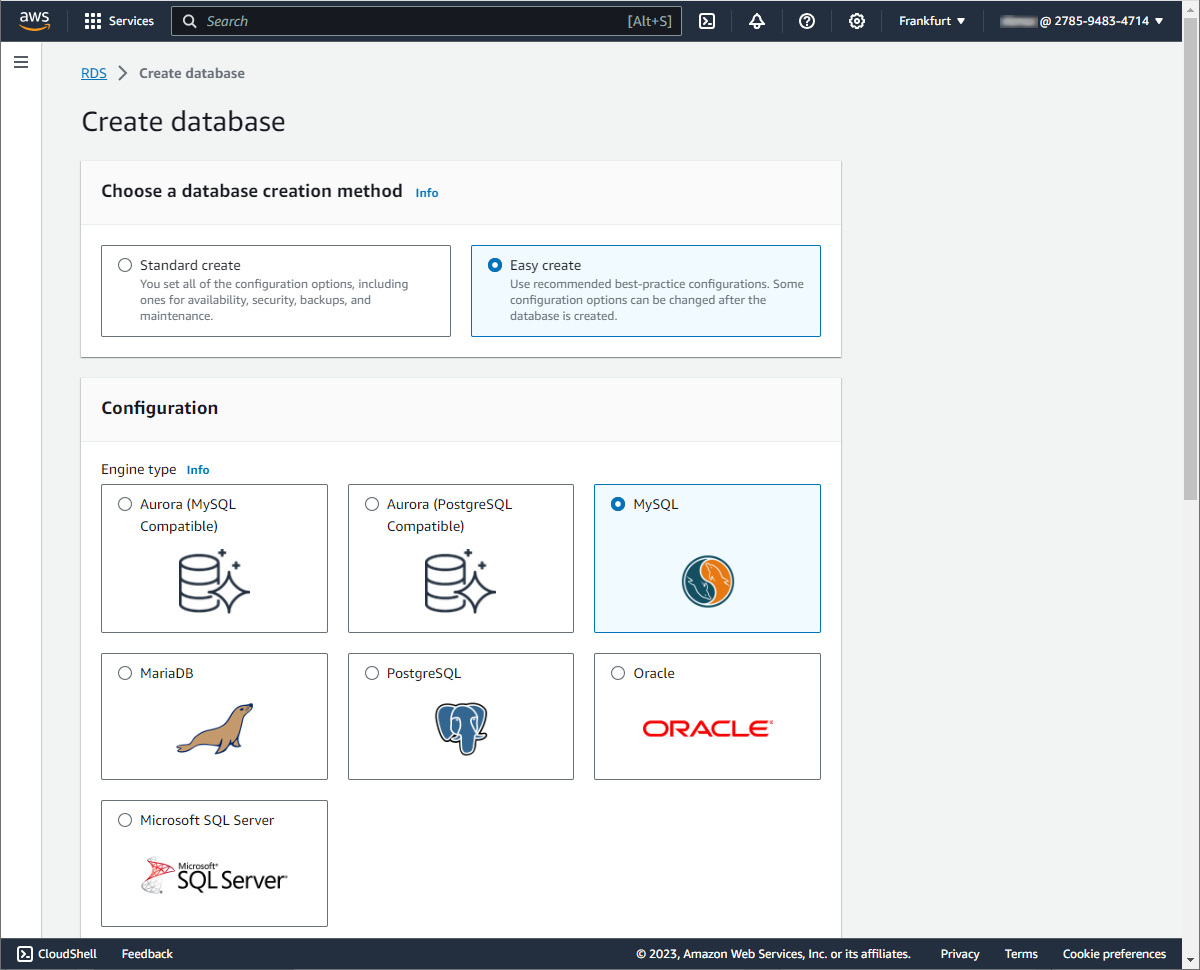
The Create database page opens. Click Easy create and in Configuration, select MySQL.
Next, for DB instance size, select Free tier. For DB instance identifier, enter the desired database identifier. And for Master username, enter a name for the master user, or keep the default name.
For the database to have a master password created automatically, select the Auto generate a password option. If you prefer to set your own master password, ensure that the Auto generate a password option is not selected, then input your chosen password into both the Master password and Confirm master password fields.
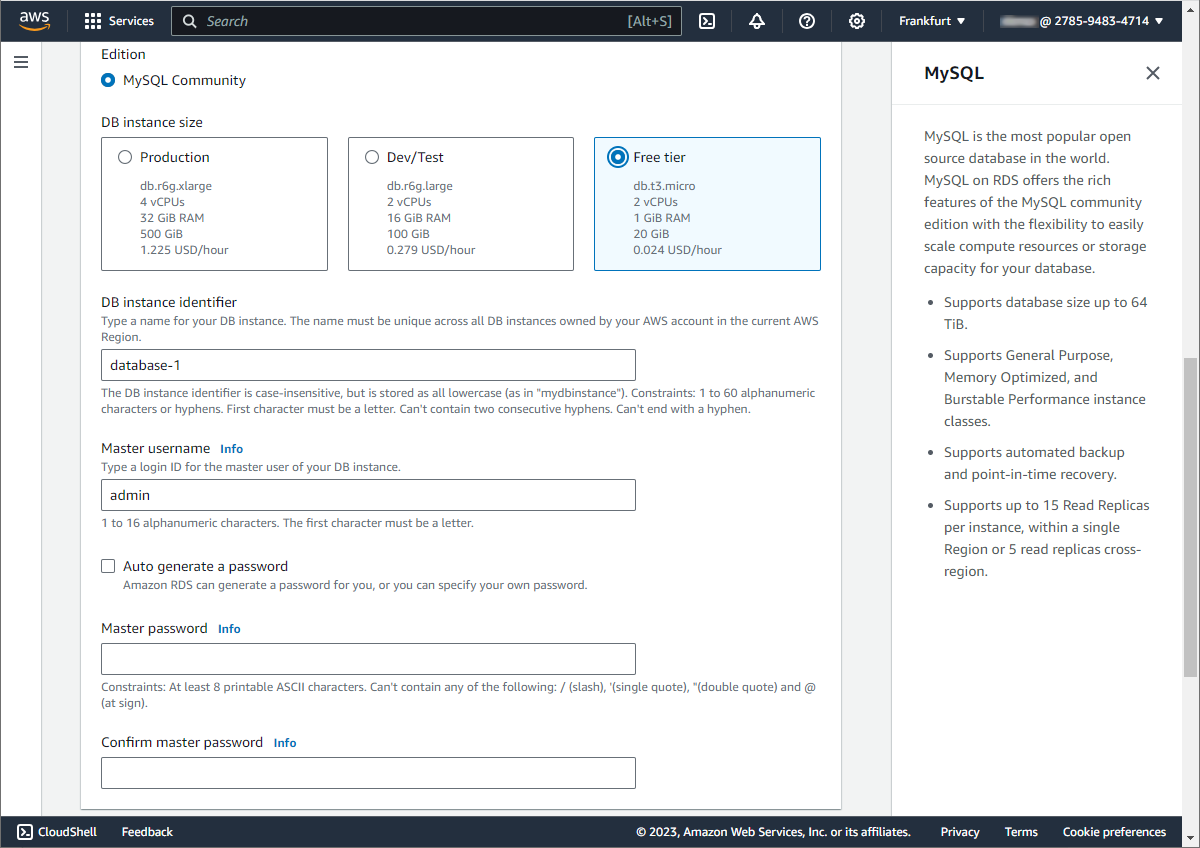
Once done, click Create database. The newly created database will appear on the Databases list. Note that it can take up to 20 minutes before the new database is available.
To view the details of your MySQL instance, click the database instance name.
Step 2: Check connection details
The connection details for a DB instance include its endpoint, port, and a valid database user, often referred to as the master user.
To find the connection information for a DB instance in the AWS Management Console, follow these steps:
1. Sign in to the AWS Management Console.
2. In the left navigation pane, click Databases. This will display a list of your DB instances.
3. Click the name of the MySQL DB instance to display its details.
4. On the Connectivity & security tab, you will find the endpoint and the port number to connect to the DB instance.
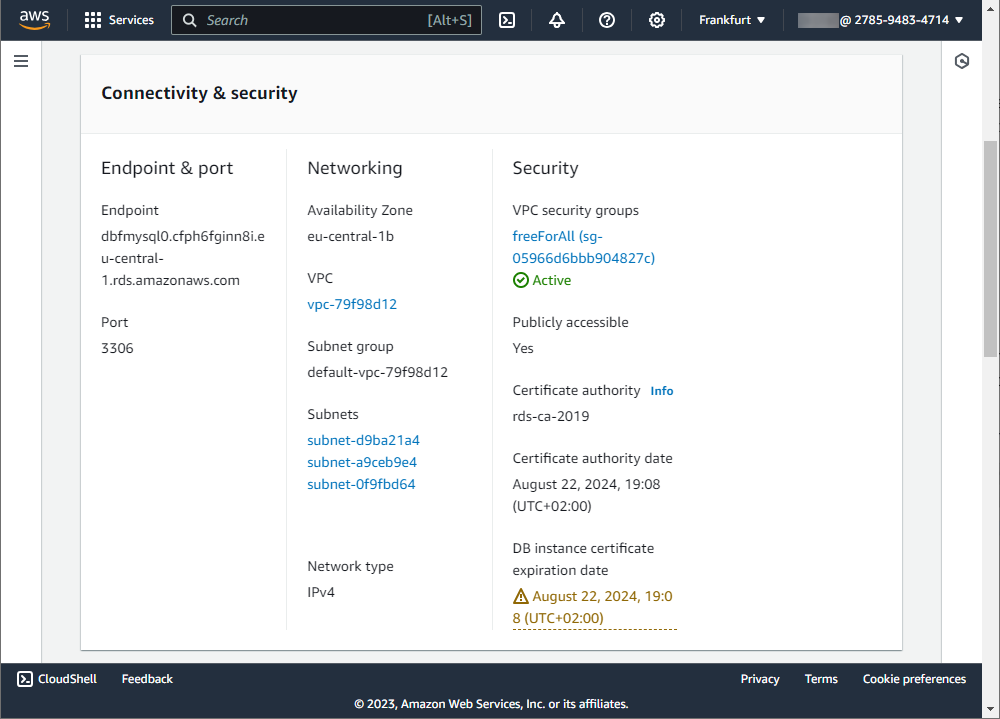
5. You can find the master user name on the Configuration tab under the Availability.
Note
To connect to a DB instance from outside of its Amazon VPC, the DB instance must be publicly accessible and access must be granted using the inbound rules of the DB instance’s security group.
Step 3: Connect to an Amazon RDS MySQL database
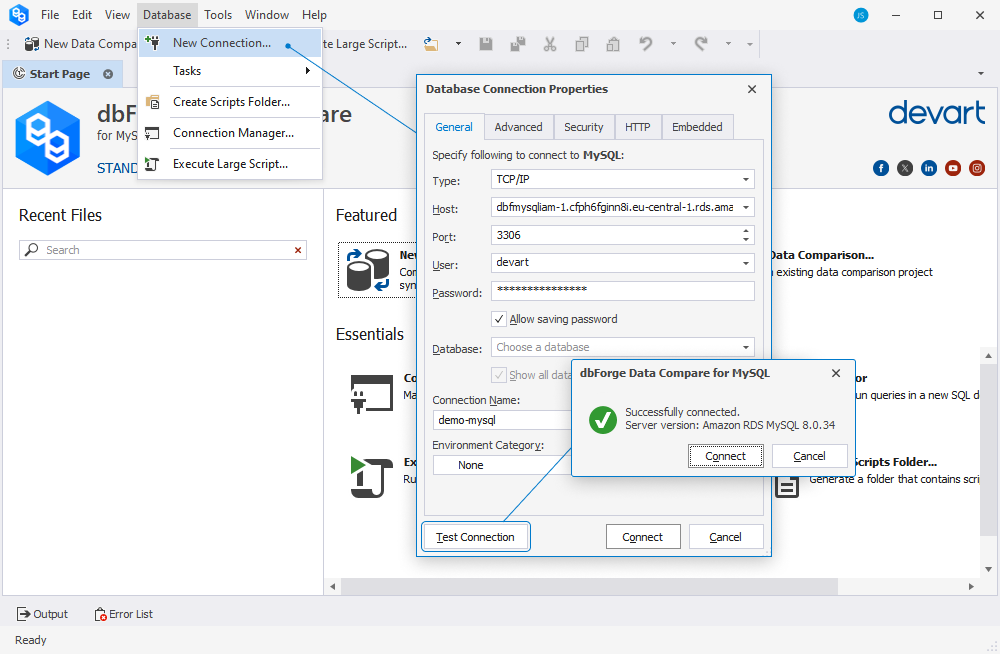
1. Run dbForge Data Compare for MySQL and click New Connection.
2. On the General tab of the Database Connection Properties dialog, enter the host name, the port, the user name, and the password.
3. Optional: Click Test Connection to ensure that your settings are correct.
4. Click Connect.
