Configure column generation settings
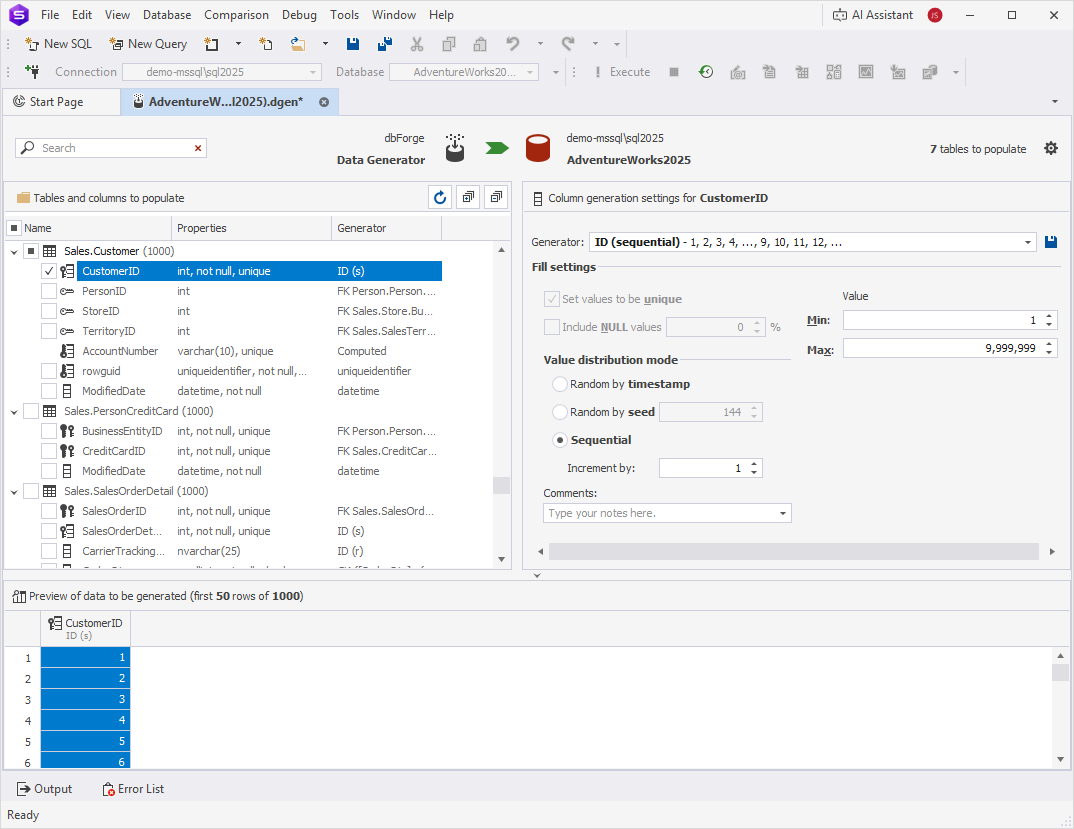
After you set default generation options for your project, you can customize the settings for each column.
To configure column settings:
1. Under Tables and columns to populate, select the column you want to populate.
dbForge Studio automatically selects a generator based on the column name and data type.
Tip
To update the object list in the data generation project, click
.
To expand all tables and columns, click
.
To collapse all tables and columns, click
.
2. Optional: To change the generator, in Generator, select the generator you want to assign for the column.
3. Under Fill Settings, define general rules for how data is generated in the selected column.
| Name | Description |
|---|---|
| Set values to be unique | Specifies whether all generated values in the column are unique.
|
| Include NULL values | Specifies the percentage of generated rows that should contain NULL. |
| Include empty values | Specifies the percentage of empty values to include in the generated data. |
4. Under Value distribution mode, control how generated values are distributed.
| Name | Description |
|---|---|
| Random by timestamp | Generates new random values for each subsequent data generation based on the current timestamp. |
| Random by seed | Generates values based on a specified seed. Repopulating the column generates the same set of values each time. |
| Sequential | Generates values for each subsequent data generation. |
| Repeat each value | Specifies the number of times each generated value should be repeated in a dataset. |
| Loop data | Repeats a defined dataset in sequence until the required number of rows is reached. |
Note
The column generation settings may vary depending on the selected generator.
The configuration results appear in the Preview area.
5. Optional: To save a configured generator, click  next to the Generator dropdown list. In the Save Custom Generator dialog, specify the generator name and description, then click OK. The generator then appears under User Defined generators.
After you configure column generation settings, you can set up table generation settings.