Saving and Using Templates During Import
A template is a set of import settings stored in a file.
It’s no use wasting your time on selecting the same settings each time you import data. Select once, save multiple settings to a file, and use it to have customized import without efforts.
For example, you need to import data stored in text format into an existing table once a day. You can set up the import options once, and next time all you need to do is to select the Text import format and a location of Source data and click Import. To illustrate the case, let’s import .txt Source file to an existing table create a template, and then use it.
Creating Template
To create a template, do the following:
- Open the Data Import wizard, select the Text import format and a path to a .txt Source file, and click Next.
- On the Data Import > Destination tab, select a target Oracle connection, a database, and a table from the drop-down list.
-
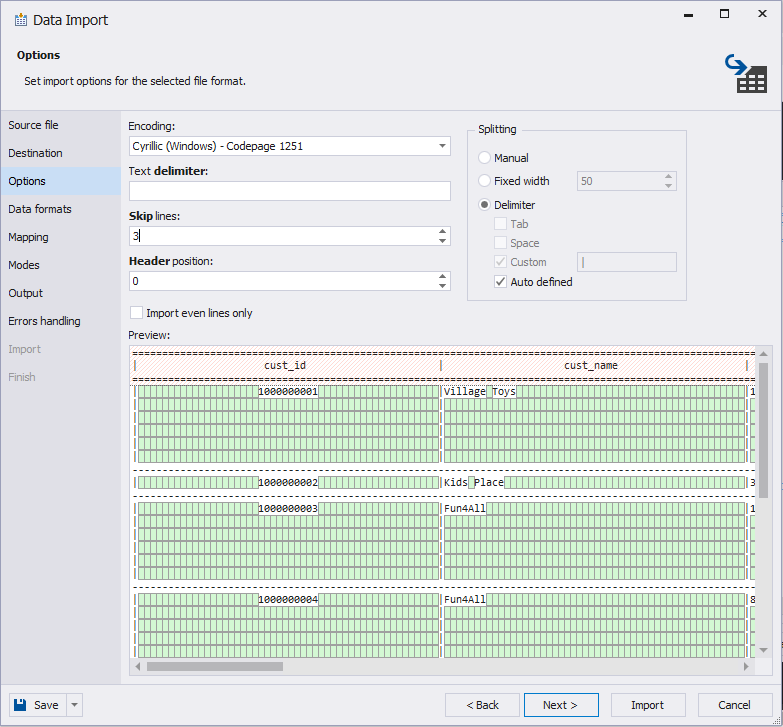
On the Data Import > Options tab, in the Skip lines field, enter 3 to start importing the Source data from the 4th line.
As there is a header in the Source with column names, specify its position, otherwise the imported columns will get default names - column1, column2. Enter 2 in the corresponding field. Select to import only even lines and Fixed width type of splitting for the Source data.
- On the Data Import > Mapping tab, you can see that dbForge Studio has mapped all the Source and Target columns, as all of them have the same names.
- On the Data Import > Data formats tab, clear the Autodetect Date and Time format check box and select the Universal sortable date\time format for the Source data from the drop-down list.
- To start importing the data, click Import.
- On the progress page, click Save at the bottom and specify a name and a location of a template file in the Save As dialog box, for example _txt_template. This template will appear in the User templates section.
Loading Template:
To load a template, do the following:
- On the Data Import > Source file, switch to the Templates categories, double-click the Load Templates folder in the User Templates section, and select the _txt_template template we previously created.
- Select the Text import format and a location of Source data.
- On the Data Import > Destination tab, select the Target connection, database, and a table.
- Switch to the Options wizard tab and see the Skip lines and Header position fields and Fixed width splitting type already selected. The same happens with mapping and a date\time format on the other wizard pages.