Grouping and Filtering Comparison Results
After you have compared the data sources, Schema Compare displays the comparison results in the upper grid of the Schema Comparison document.
To update the comparison results, select Refresh  on the Schema Comparison toolbar or press F5.
To change the comparison settings, select Edit Comparison
  on the Schema Comparison toolbar.
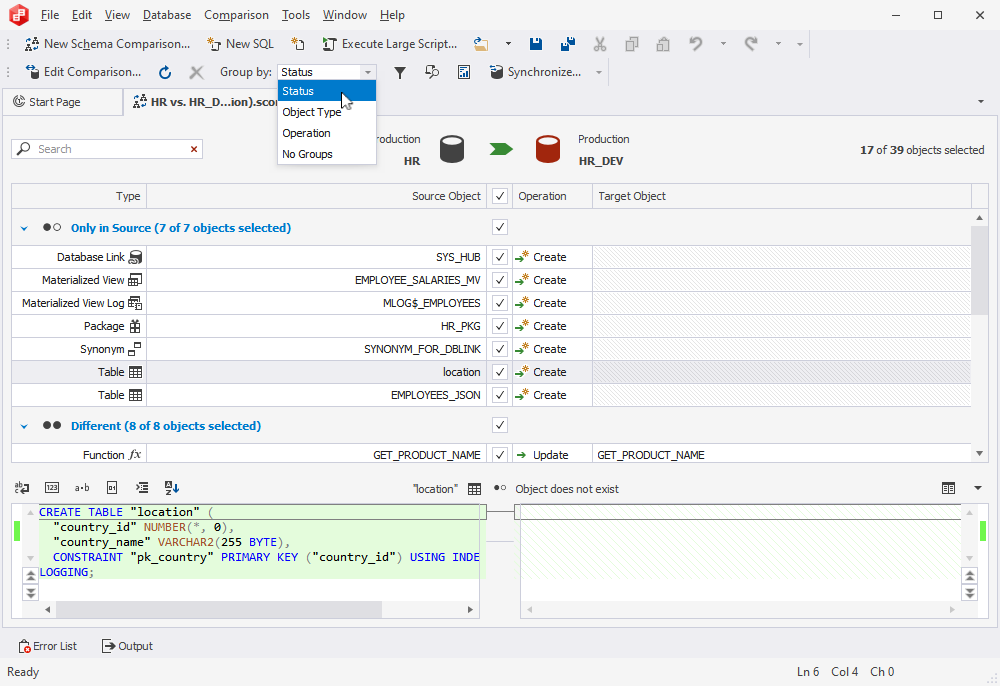
Grouping comparison results
The results can be grouped by:
- Status (default option)
- Object Type
- Operation
To change grouping, use one of the following ways:
- On the toolbar, select the option from the Group By list.
- Right-click anywhere in the Schema Comparison document and select Group By > required option.
To ungroup the results, select No Groups.
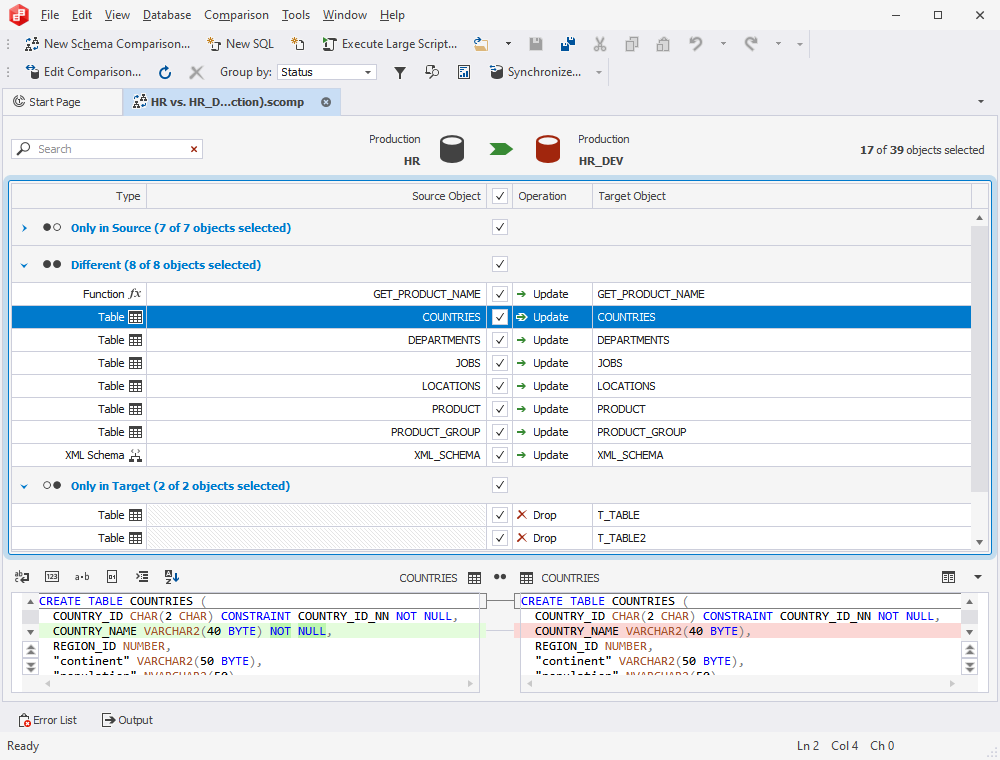
Selecting objects for synchronization
By default, all database objects are selected for synchronization. To exclude any object from synchronization, clear the checkbox next to the required object.
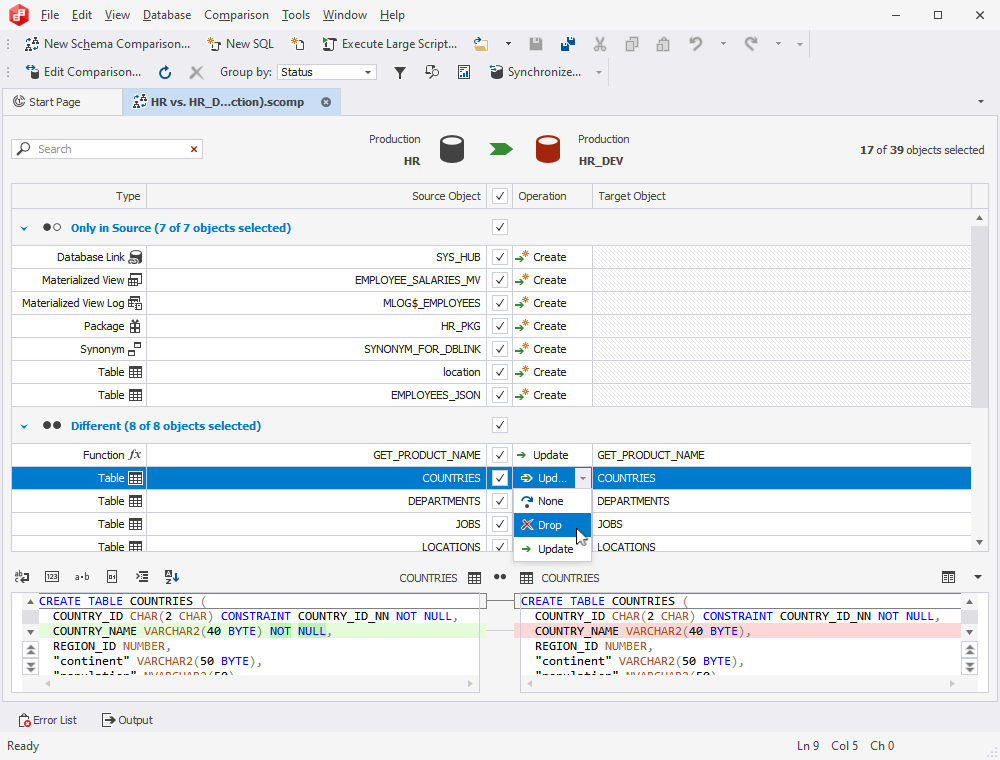
To modify the operation for an object, click the Operation column next to it and select the required operation from the list.
Searching for objects
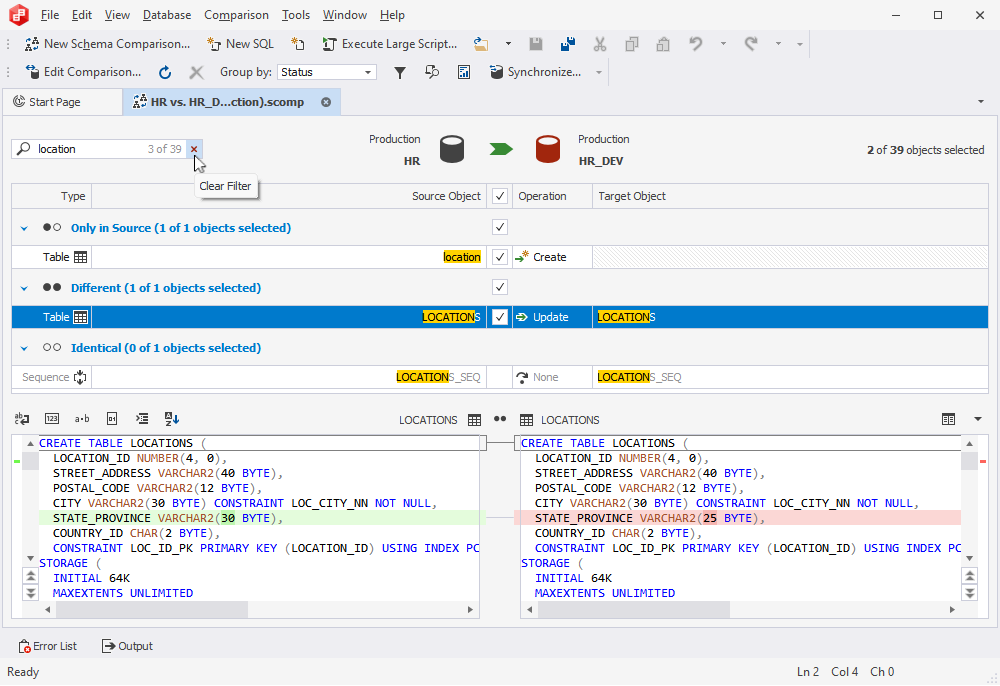
In the Schema Comparison document, you can search for objects by entering the text in the Search box. The list will be filtered to show only objects that match the search query.
By default, the search mode is case-insensitive. It means that the tool highlights the matching text, regardless of whether it is capitalized or lowercase. The number of matching objects will be displayed in the search bar.
To clear the search results, select Clear Filter  in the Search box.
Filtering objects
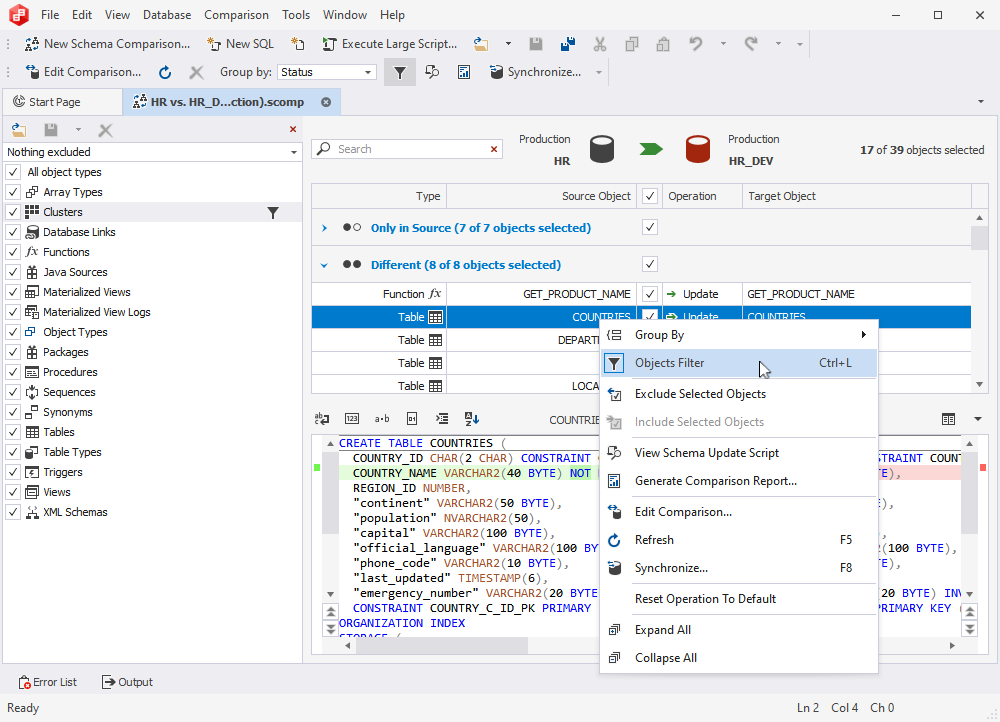
Objects for synchronization can be filtered using the Object Filter window. It allows you to apply multiple filters and create custom filters with Filter Editor.
To open the Object Filter window, use one of the following ways:
- On the toolbar, select Apply a custom filter to the results
 .
. - Right-click anywhere in the Schema Comparison document and select Objects Filter.
- Press Ctrl+L.
By default, all object types are selected in the Objects Filter window, and the filter is set to Nothing Excluded. To exclude specific objects, clear the checkboxes next to the required objects.
When you modify a filter, Custom* will appear in the Filter box. An asterisk next to the filter name will indicate that there are unsaved changes.
To open the Filter Editor, select Edit Filter next to the object for which you want to modify a filter.
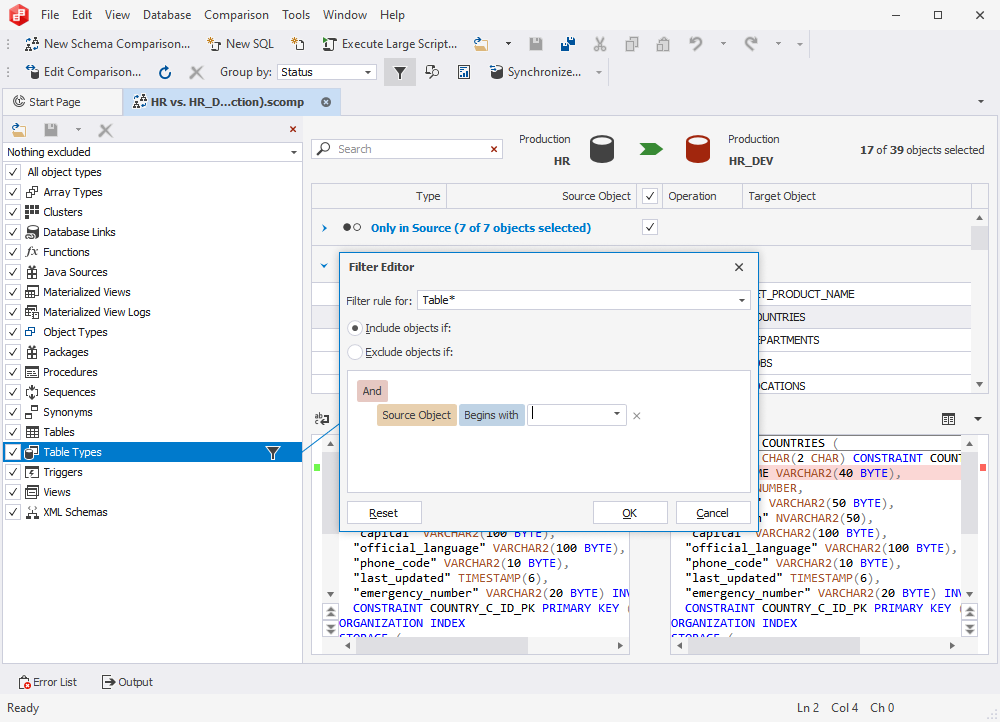
Create filter rules
The Filter Editor allows you to define rules for specific objects.
To create a rule:
1. From the Filter rule for: box, select all or individual object types for which you want to create a rule.
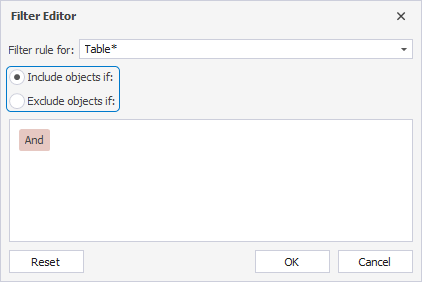
2. Specify which objects a filter should include or exclude.
3. Click the upper-level operator to define how conditions are combined:
- AND: Displays objects only when both conditions are TRUE.
- OR: Displays objects when at least one condition is TRUE.
- NOT (AND/OR): Displays objects that meet the opposite of the specified condition.
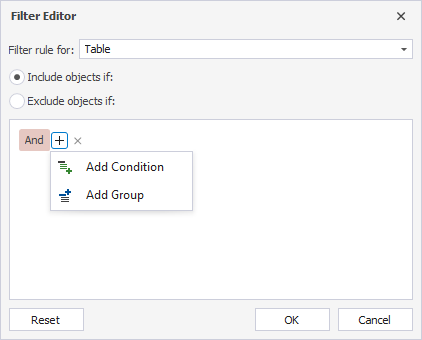
4. Select Use the Insert or Add Key next to the upper-level operator to add a condition or a group.
5. By default, the Source Object column is displayed. To change it, click the column and select a different one from the list:
- Operation: Describes the action performed on a source object during schema synchronization. The operations include None, Drop, Create, or Update.
- Source Object and Target Object: Represent objects in the source and target schemas used for comparison and synchronization.
- Status: Indicates the result of the schema comparison for an object. The statuses include Equal, Different, Only in Source, Only in Target, Unknown, or Inconsistent.
6. Select the comparison or logical operator for the condition.
7. Enter a value.
8. Select OK to apply the filter.
To add a new condition, click the plus icon. To remove a condition, click the cross icon.
To remove the filter, select Clear Filter next to the required one.
To remove all current filter rules, select the Nothing Excluded filter from the Filter box.
Saving filters
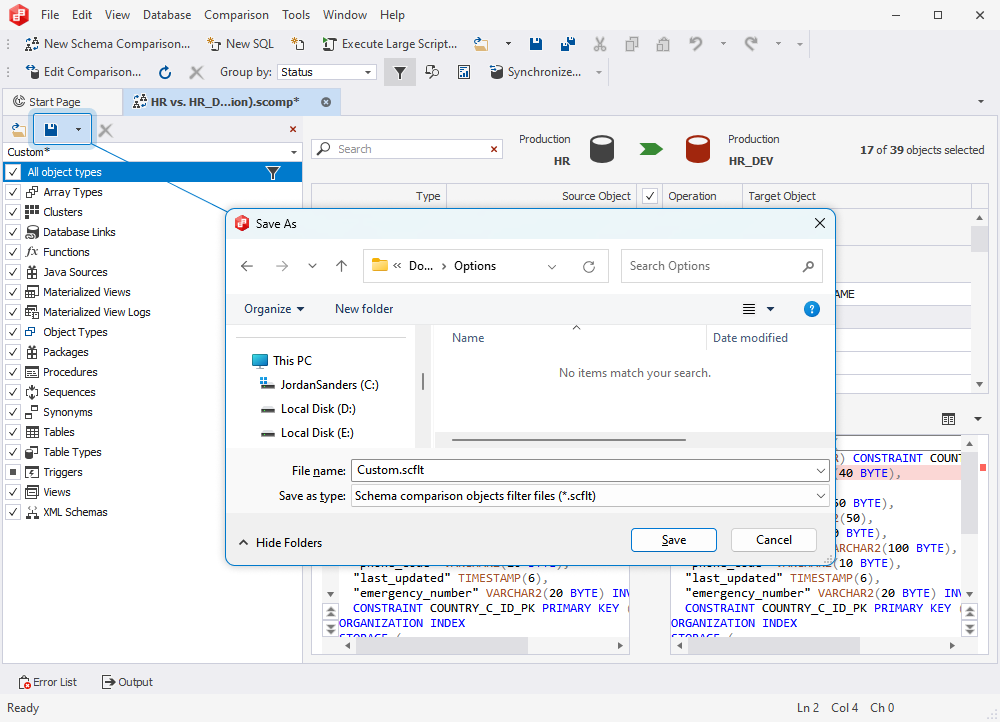
You can save the current filter and use it across multiple projects. To do this, select Save on the Objects Filter toolbar. In the Save As window that opens, specify the filter name and select Save to save the file. It will be saved with the .scflt extension.
Opening custom filters
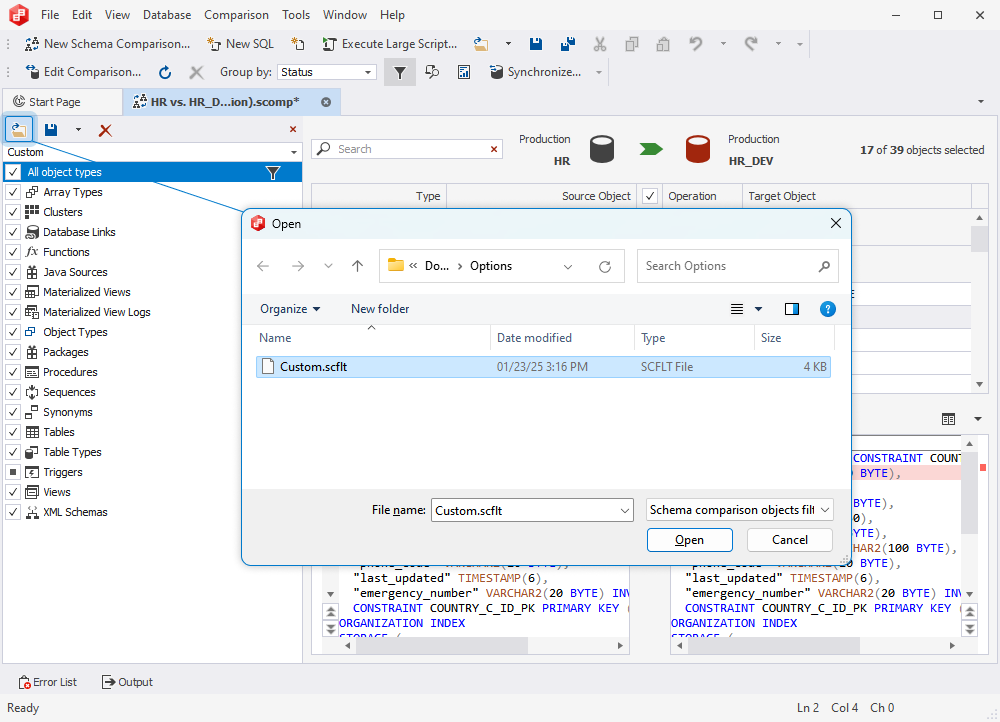
To use a custom filter, select Open an existing filter on the Objects Filter toolbar. In the Open window that appears, select the filter you want to use and then select Open.
When saving an edited filter, you can either save it with the same name to overwrite the existing filter or rename it to create a new filter.
Note
All unsaved changes to a Custom* filter will be lost if you switch to a different filter.
To avoid losing changes to an existing filter, make sure to save your changes before closing the tool.
Saving the comparison options
Schema Compare for Oracle allows you to save comparison and synchronization options for later use, such as automating and/or scheduling database comparison and synchronization tasks. These settings are saved as a .scomp file.
The asterisk next to the .scomp file name on the tab of the Schema Comparison document indicates that the project has not yet been saved.

To save the comparison settings, select Save  or press Ctrl+S.
Note
If you save the .scomp file before configuring the synchronization settings, it will contain the custom comparison settings, while the synchronization settings will remain set to their default values.