How to import data from a text file to SQL Server
TXT files contain human-readable plain text, and can be opened in any text editor on any operating system.
To import data from a text file:
1. In Object Explorer, right-click a database, point to Data Pump, and then click Import Data.
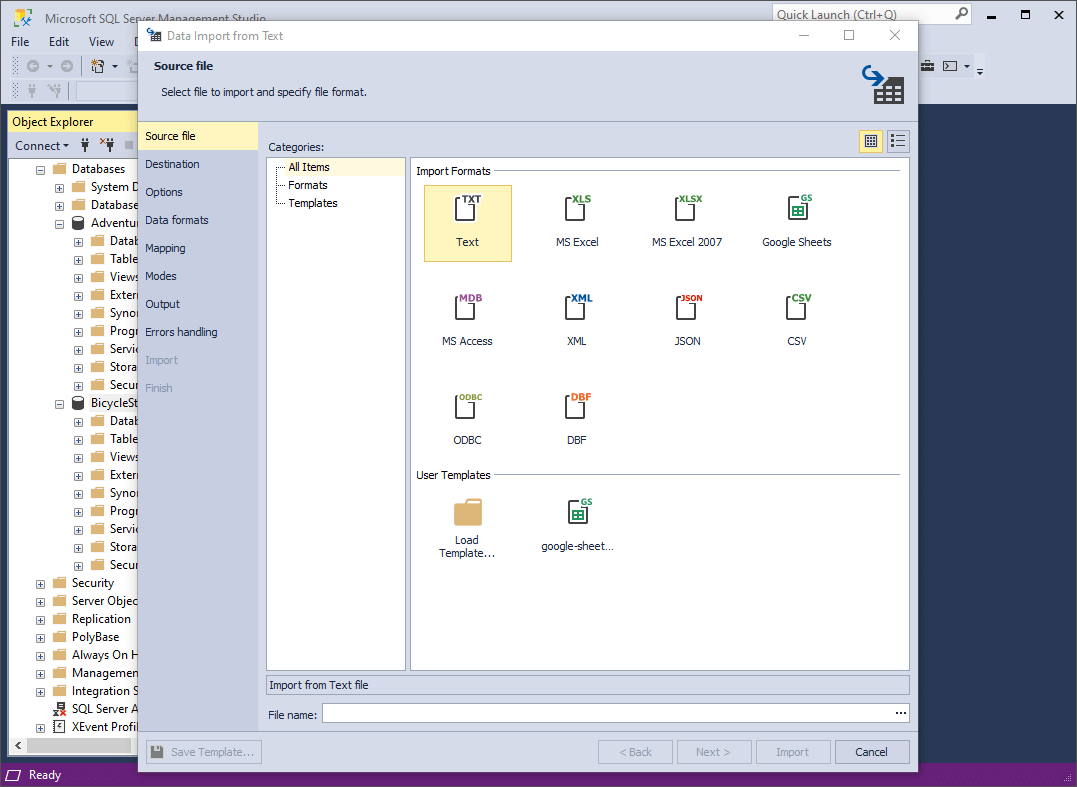
2. On the Source file page, select the Text import format. Load import options from a template file in User Templates if you saved it previously. Specify the path and the name of your source file and click Next.
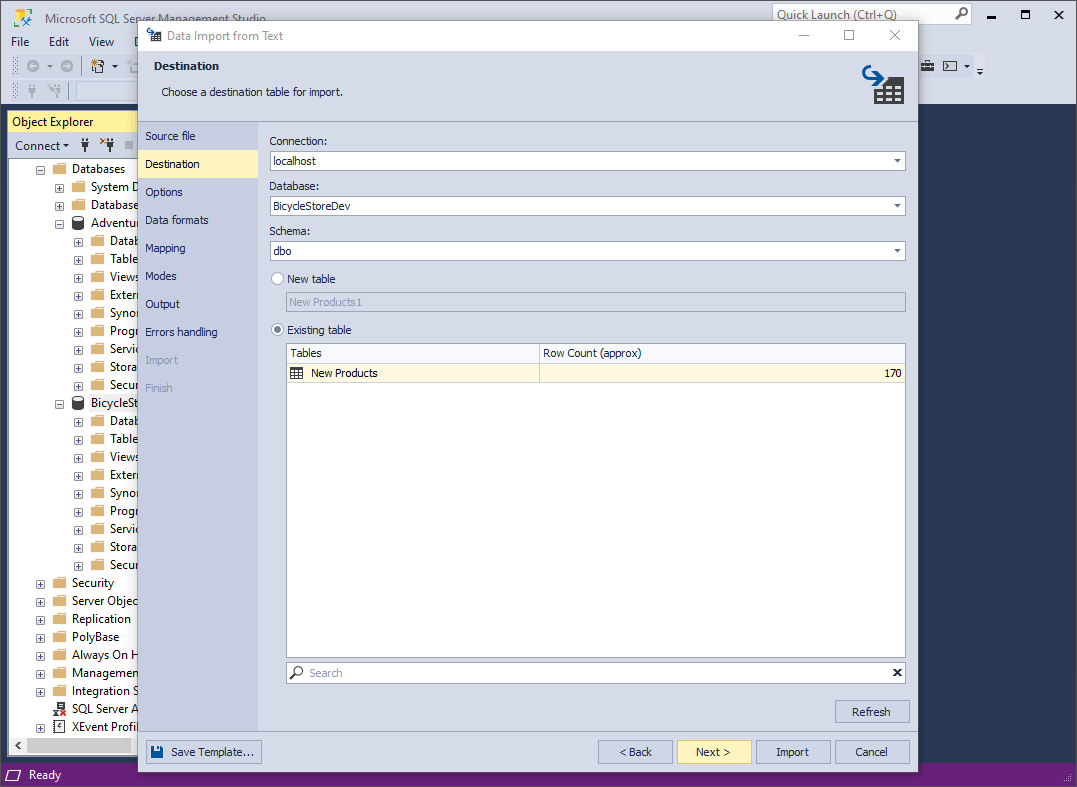
3. On the Destination page, select a server connection, a database and its schema. Then select whether the data will be imported into a New table (in this case, you need to specify its name) or into an Existing table. Click Next.
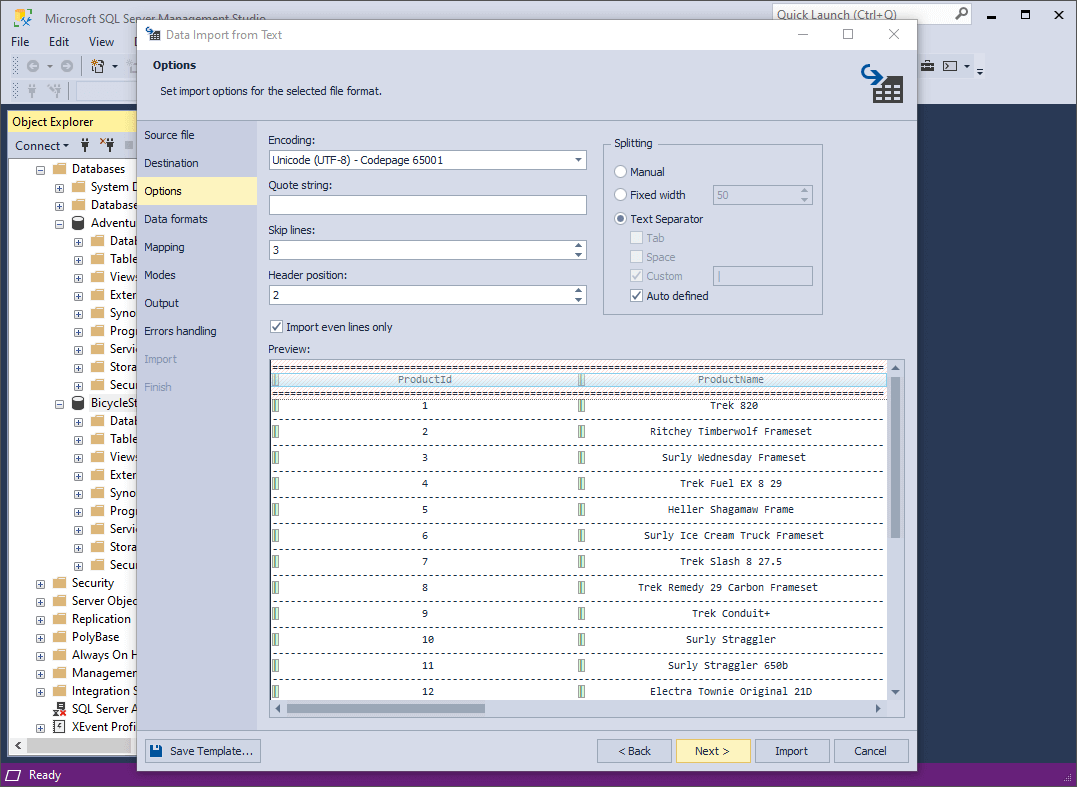
4. On the Options page, you can configure the formatting options for imported data:
-
Check whether the Encoding is set correctly or select another one from the drop-down list.
-
In Quote string, specify the character to be used for string quoting.
-
In Skip lines, specify the quantity of lines to be skipped during import. The lines are counted from the top.
-
Specify the Header position (the required number of lines). It will be highlighted with blue in the Preview section. If you don’t specify the header position, the imported columns will get default names - column1, column2, etc.
-
Optionally, select to Import even lines only.
Additionally, you have the Splitting section with three available options:
-
Manual stands for manual splitting. Go to the Preview section and double-click the required places to set column ranges. The markers will appear. You can move them forward or backward to change the column length. To remove a marker, double-click it.
-
Fixed width is defined by a specified value. Afterwards, you can check Preview to see how the columns are split.
-
Text Separator has 4 options to choose from: Tab, Space, Custom and Auto defined.
Preview the source data and click Next.
5. On the Data formats page, you have two auxiliary tabs. The first one is Common Formats, where you can specify the formats for null strings, thousand and decimal separators, boolean variables, date and time. There is also a check box Autodetect Date and Time format, selected by default.
The second one is Column Settings, where you can configure the format settings for separate columns. You have 4 options here: Null String, Left Quote, Right Quote, and Date and Time. Note that if a format mask is not set, the application will identify date/time values automatically.
6. On the Mapping page, you can map the source columns to the target ones. If you are importing data into a new table, the application will automatically create and map all the columns. You can see the results in the Preview section.

Note
If you are importing into an existing table, only columns with the same names will be mapped, and the rest should be mapped manually. If no columns with the same name are found, they are mapped in succession - the 1st column in Source with the 1st column in Target, etc.
Note
You should select at least one column with a primary key by selecting the corresponding Key check box. Otherwise some of the import modes on the Modes page will be disabled.
You can click View on the toolbar to view column properties, as shown in the screenshot below.
Finally, to clear the mapping of all columns, click Clear Mappings on the toolbar. To restore it, click Fill Mapping.
7. On the Modes page, select an import mode. There are 5 available modes:
- Append - add records to the target table
- Update - update a record in the target table with a matching record from the source
- Append/Update - update a record if it exists in the target table; otherwise, add a record
- Delete - delete records in the target table that match records in the source
- Repopulate - delete all records in the target table and repopulate them from the source
Optionally, you can select the check boxes Use a single transaction and Use bulk insert (the latter of which reduces the quantity of statements and speeds up import, but can affect the error handling mechanism).
8. On the Output page, you have 3 options:
- Open the data import script in the internal editor.
- Save the data import script to a file. To use this option, specify the path and the file name. Additionally, you can select the check boxes to Add timestamp to the file name and Open in the internal editor.
- Import data directly to the database.
9. On the Errors handling page, you can specify the error processing behavior (using one of the three available options: Prompt the user for an action, Ignore all errors, or Abort at the first error) and opt to write reports to a log file with a specified path.
Note
If you want to save your import settings as templates for recurring scenarios, click Save Template.
10. Click Import. When your data import is successfully completed, you can view the log file or click Finish to exit the wizard.