Setting Up Data Generator
This topic describes how to set up Data Generator for Oracle to generate test data.
Before generating data, back up the target database to prevent data loss. If you are unsatisfied with the results, you can adjust the settings and regenerate the data.
Generate data
1. Open the Data Generator Project Properties wizard by doing one of the following:
- On the Start page, select New Data Generation.
- On the toolbar, select New Data Generation.
2. On the Connection page of the wizard that opens, select the connection and schema for data generation.

If you have no available connections, select Manage from the Connection list to create a connection. In the Connection Manager that opens, select New and follow the steps from the Connecting to a Database topic.
Note
Under Schemas, you can search for a specific schema. To do this, enter the search text in the Search box:
- The list of schemas will be filtered to display only those containing the search text.
- The search is case-insensitive. For example, the search text arrow will highlight all schemas containing the text, regardless of capitalization.
- The number of matching schemas will be displayed in the Search box.
To remove the search text and restore the full list of schemas, select
Clear Filter in the Search box.
Clear the Hide System Schemas checkbox to display all schemas, including system schemas.
To refresh a list of schemas, select Refresh.

3. On the Options page, set the data generation options.
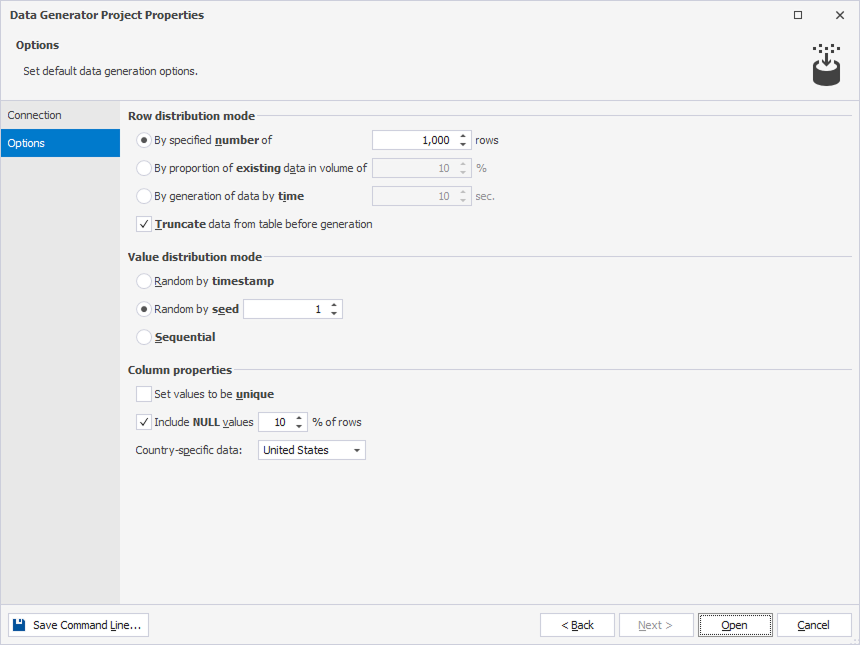
The table describes options in the Data Generator Project Properties wizard.
| Option | Option Group | Description | Default State | Default Value |
|---|---|---|---|---|
| By specified number of | Row distribution mode | Generates the specified number of rows. | Turned on | 1000 rows |
| By proportion of existing data in volume of (%) | Row distribution mode | Uses the specified percentage of existing data for data generation. | Turned Off | 10% |
| By generation of data by time (sec) | Row distribution mode | Generates data within the specified time period in seconds. | Turned off | 10 sec |
| Truncate data from table before generation | Row distribution mode | Deletes all data from the table before generating new data. | Turned on | - |
| Random by timestamp | Value distribution mode | Generates random data using timestamps. | Turned off | - |
| Random by seed | Value distribution mode | Generates values based on the seed value. When you repopulate the column, you will get the same data collection. | Turned off | 1 |
| Sequential | Value distribution mode | Generates values sequentially. | Turned off | - |
| Set values to be unique | Column properties | Generates unique values. | Turned off | - |
| Include NULL values (%) of rows | Column properties | Generates the specified percentage of NULL values. | Turned on | 10 |
| Include empty values (%) of rows | Column properties | Generates the specified percentage of empty values | Turned off | 10 |
| Country-specific data | Column properties | Generates data in the format specific to a given country. | United States |
4. Select Open to open the data generation project with a .dgen extension.
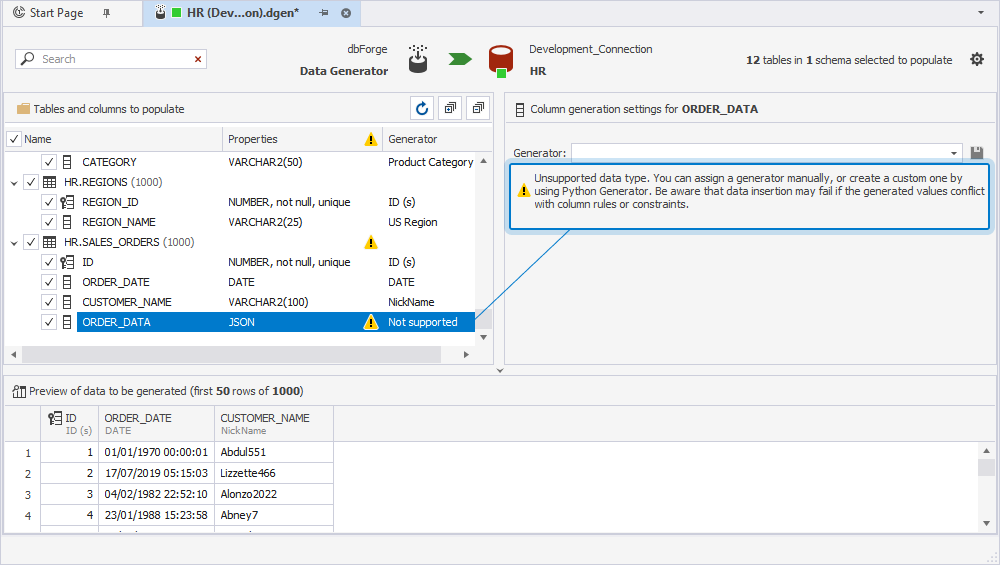
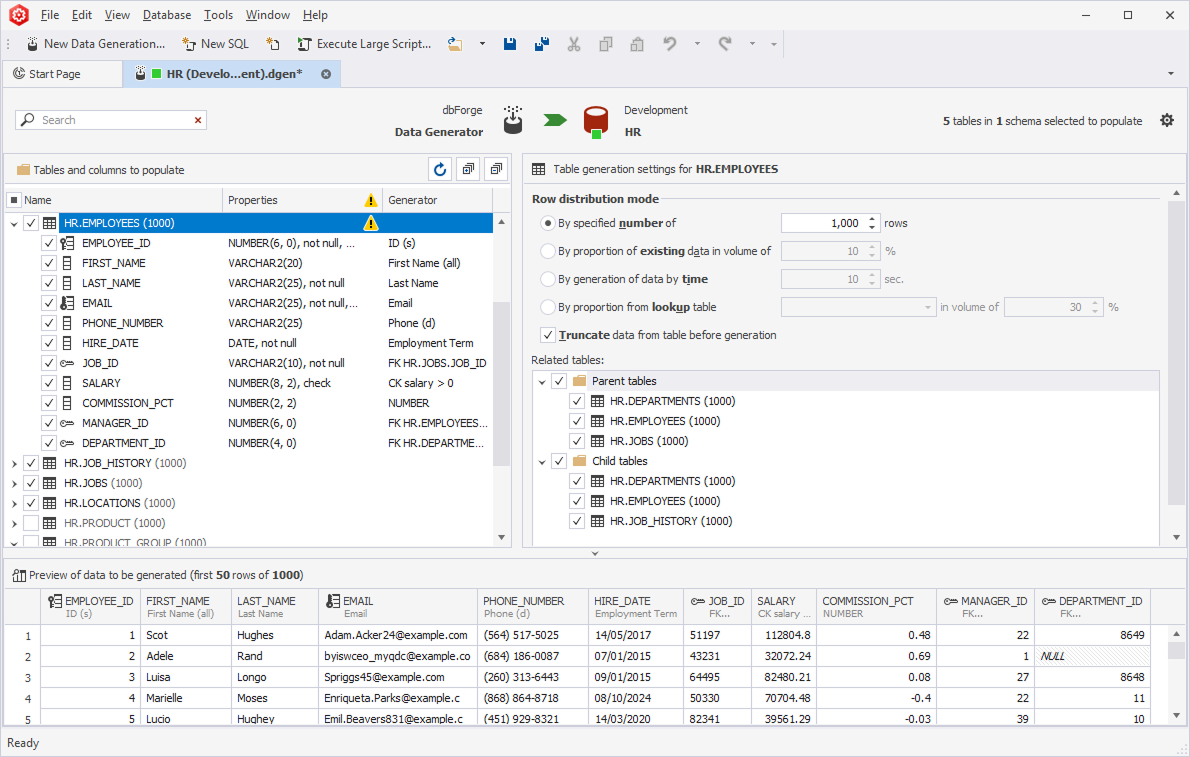
5. In the Tables and columns to populate tree view of the data generation project, select the checkboxes next to the tables and columns you want to populate. Selecting the table or column allows you to adjust the table and column settings in the right-side settings pane. All the changes are displayed in real time.
Note
If dbForge Data Generator for Oracle encounters columns with unsupported data types, it can’t assign a generator to those columns. You’ll see this warning message:
Unsupported data type. You can assign a generator manually, or create a custom one by using Python Generator. Be aware that data insertion may fail if the generated values conflict with column rules or constraints.You can still include columns with unsupported data types in data generation; however, this might cause unpredictable behavior or unexpected results.
Errors may occur during data generation. For example, a column might be a foreign key referencing a table that is not included in the generation. To resolve such issues, go to the Table Generation Settings > Related Tables and adjust the inclusion of parent and child tables as needed.
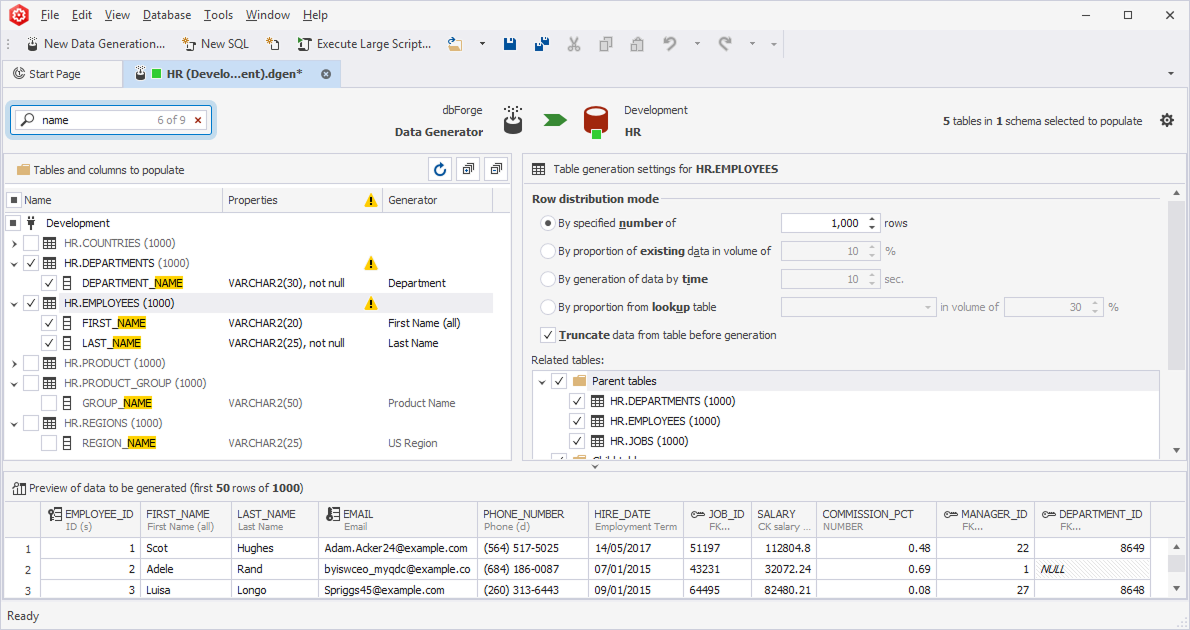
Tip
In the Tables and columns to populate tree view, you can filter database objects by name. The search is case-insensitive by default. For example, searching for name highlights any matches, such as Name or name. As you type in the Search box, matching text is highlighted in the grid, and the total number of matches is displayed in the Search box.
In the Search box, you can use the following keyboard shortcuts:
- Ctrl+A to select all.
- Ctrl+Left Arrow (←) to move the caret to the beginning of the word.
- Ctrl+Right Arrow (→) to move the caret to the end of the word.
- Ctrl+Shift+Left Arrow (←) to select text from the current caret position to the beginning of the current word and move the caret to the beginning of the word.
- Ctrl+Shift+Right Arrow (→) to select text from the current caret position to the end of the current word and move the caret to the end of the word.
- Ctrl+Backspace to delete the word to the left of the cursor.
6. At the top of the data generation project, select Populate data to the target database to populate the database with the generated data.

See also
To learn how to populate a database with test data, see Populating a Database.