Compare the data of two databases in SSMS
Data Compare comes with a free add-in for SQL Server Management Studio that allows you to compare and synchronize databases (including versions from source control) right from Object Explorer of the SQL Server Management Studio.
Note
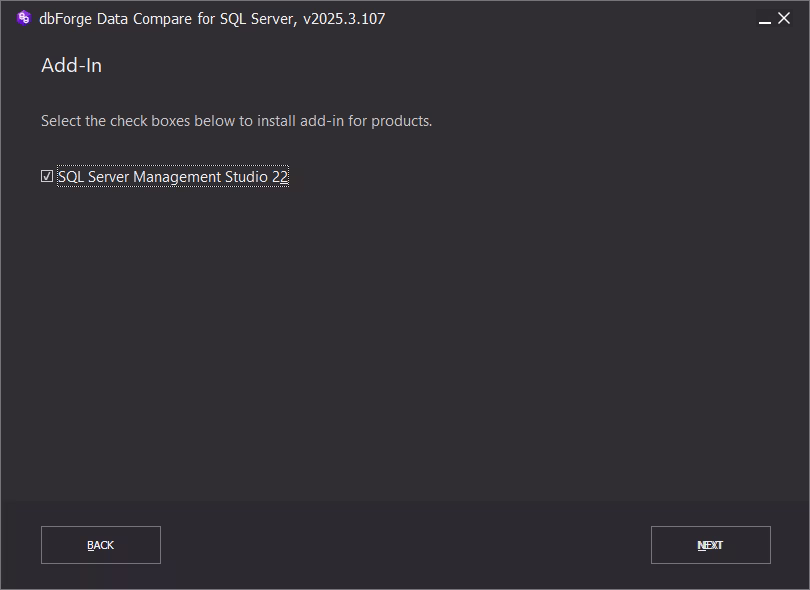
The Data Compare SSMS add-in comes bundled with the standalone Data Compare application. Both are installed simultaneously with the dbForge Compare Bundle or dbForge SQL Tools products. Upon installation, the Data Compare add-in automatically integrates with SQL Server Management Studio (SSMS).
Compare databases
To compare two databases in SSMS:
1. In Object Explorer, right-click the database you want to compare and select Data Compare > Set as Source.
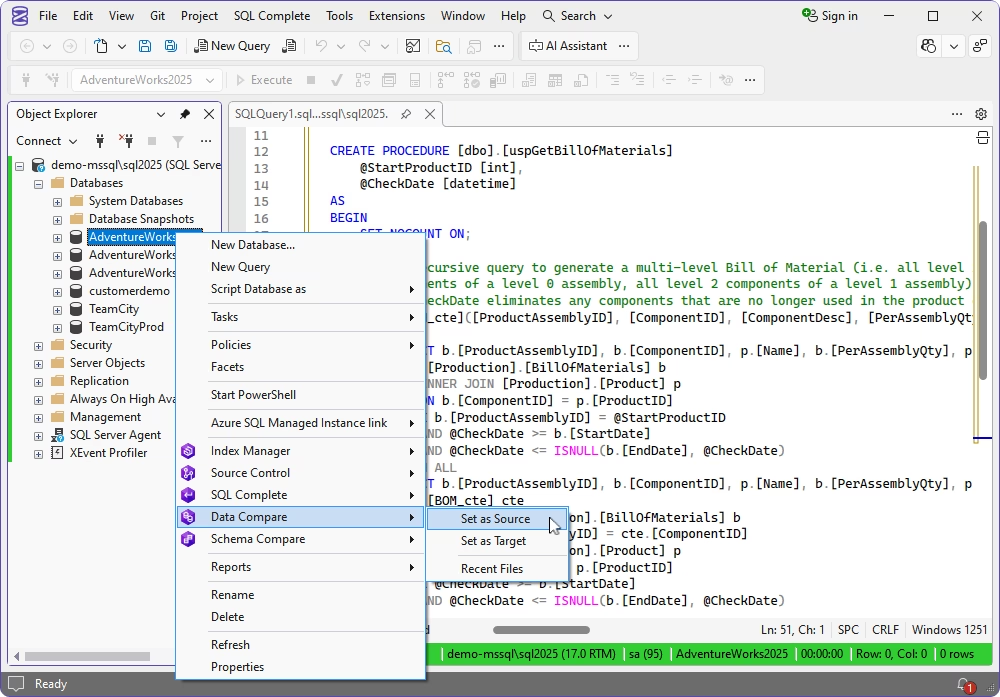
Note
Select Recent Files to restore a previously saved comparison project file with the .dcomp extension. The .dcomp file contains all the data comparison and deployment settings configured earlier.
The dbForge Data Compare tab appears displaying the database you selected as the source in the left pane.

2. To select the target database, use either of the following options:
- In Object Explorer, right-click the database and select Data Compare > Set as Target.
- Drag a database from Object Explorer and drop it to the Target pane of the dbForge Data Compare tab.
To swap the source and target databases, click  Swap Source and Target Settings.
3. To start the comparison, click  Start comparison.
Data Compare opens the New Data Comparison window where you can set up data comparison for your project.
Compare scripts folders
Data Compare lets you compare and synchronize scripts folders.
To set a scripts folder as the Source or the Target:
1. On the dbForge Data Compare tab, select Scripts Folder as a type of a source or target for database comparison.
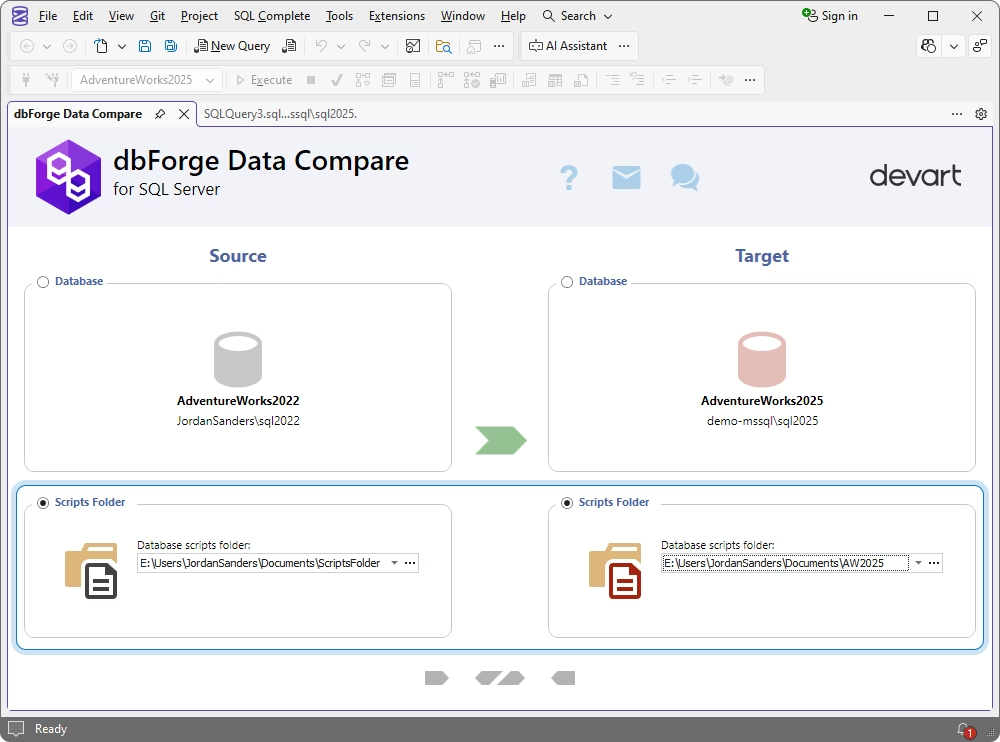
2. Under Database scripts folder, click < Browse > to specify a path to the scripts folder you want to add to the comparison.
3. To start the comparison, click Start comparison.
Data Compare opens the New Data Comparison window where you can set up data comparison for your project.
Configure data comparison options
To set up data comparison:
1. By default, the Source and Target tab display connections and names of the source and target databases. On the Source and Target tab, you can do the following:
-
Modify the source and target connections: Click Edit under the source or target connection respectively. In the Database Connection Properties that opens, change a database connection and click Ok.
-
Create a new source and target connection: Click New under the source or target connection respectively. In the Database Connection Properties that opens, change a database connection, and click Ok.
-
Change the source and target databases to be compared: In the Database field, select the database from the drop-down list.
Alternatively, you can click the drop-down arrow in the Connection field and choose the existing database or click Manage. In this case, the Connection Manager opens where you can create a new connection or modify the existing one.
For more information about how to start a new data comparison project, see Select data sources.
2. On the Options tab, select additional options for data comparison:
- Search for a specific option: Type the search text in the Search box. The list will be filtered to display options containing the highlighted search text.
- Use the options you’ve currently selected as defaults for all new projects: Click Save As My Defaults. To restore your default options after making the changes, click My Defaults.
- Reset all the options to their original settings: Click Devart Defaults.
- When selecting the check box, the corresponding description will be displayed in the Description field.
For more information about options you can set for data comparison, see Configure comparison options.
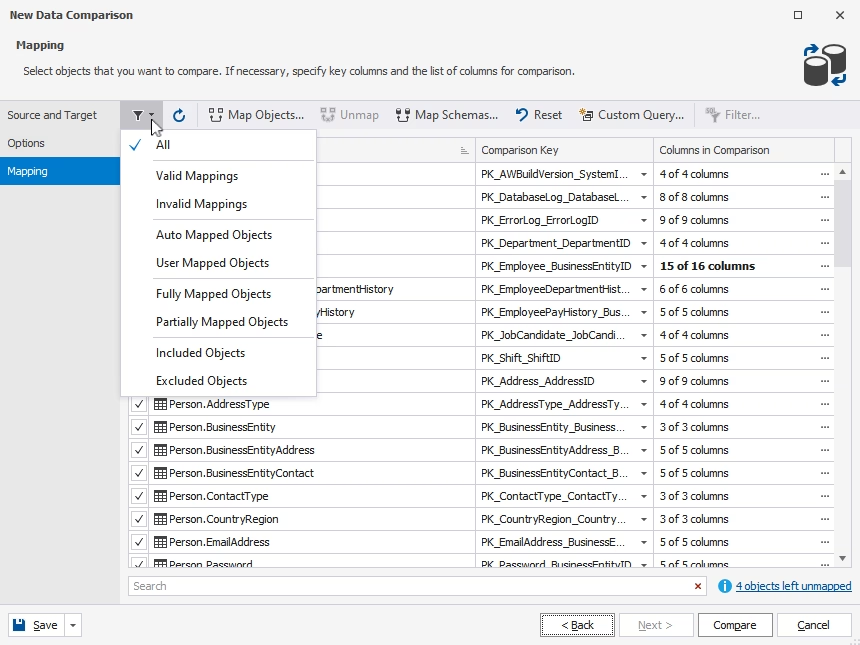
3. On the Mapping tab, select the objects to map columns and perform the following tasks:
-
Filter the list of columns for data comparison by objects.
- Refresh the list of columns to be mapped by clicking
 Refresh or press F5.
 - View or change the unmapped objects by clicking
 Show Objects Mapping Dialog. In the Objects Mapping dialog box that appears, select the tables you want to map and then click Map.
 - Unmap the selected objects by clicking
 Unmap.
 -
View and edit mappings by clicking
 Show Schema Mapping Dialog.
In the Schemas Mapping dialog box that opens, set the correspondence between the source and target schemas.
To change the target schema, click the drop-down arrow, select the schema, and then click Ok.
To reset the mappings to the defaults, click Reset.
To unmap schemas, click the drop-down arrow and select < None >.
- Reset mappings to the default state by clicking
 Reset Mappings to Default State.
 - Manage custom query mappings by clicking
 Show Custom Query Dialog.
 - Set a filtering condition for rows being compared by clicking
 Set a WHERE clause to filter rows being compared.
 - Map and manage column mappings by clicking
 More options next to the column in Columns on Comparison on the grid.
 - Search for a specific option by typing the search text in the Search box. The list will be filtered to display options containing the highlighted search text.
For more information about mapping columns and schemas, see Select tables and views.
4. To compare data, click Compare.