Improve the comparison performance
The speed of Data Compare for MySQL depends mostly on:
- Server load
- Size of the databases
- Network connection speed
- Processor speed of the local PC
- Disk read/write speed of the local PC
- Amount of memory on the local PC
In some cases, Data Compare may take a considerable amount of time to compare and synchronize data sources. To improve performance, consider the following options:
- Change the location of temporary files
- Filter the comparison
- Review comparison options
- Schedule comparison and synchronization
Change the location of temporary files
When performing database comparison, Data Compare for MySQL uses temporary files. You can change the location of these files to avoid running out of disk space.
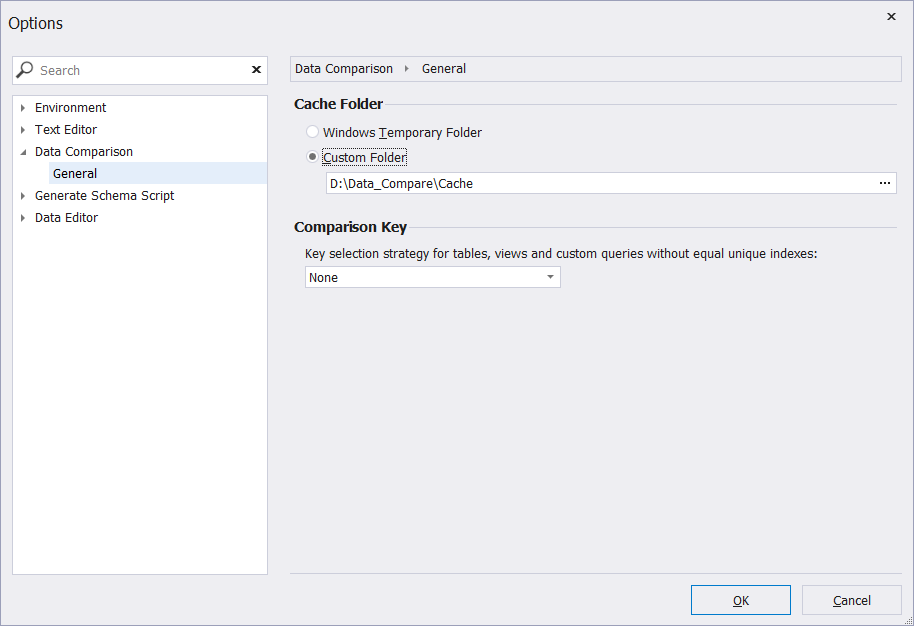
By default, Data Compare stores its cache files in the Windows Temporary Folder. You can select to keep cache in a different folder, on a different hard disk, for instance. To do that:
- On the Tools menu, select Options.
- In the Options dialog that opens, switch to Data Comparison > General.
- Under Cache Folder, select Custom Folder.
- Specify a path to the folder to which you want to store cash files. Alternatively, click
 More and browse for the required cache folder.
 - Click OK to apply the changes.
Filter the comparison
By default, all tables, columns, and rows are selected for comparison. Consequently, all the data that differs in the data sources will be stored temporarily on your computer. However, you can reduce the size of the temporary files by comparing only the data you’re interested in. For this, you need to filter data.
Filter tables and views
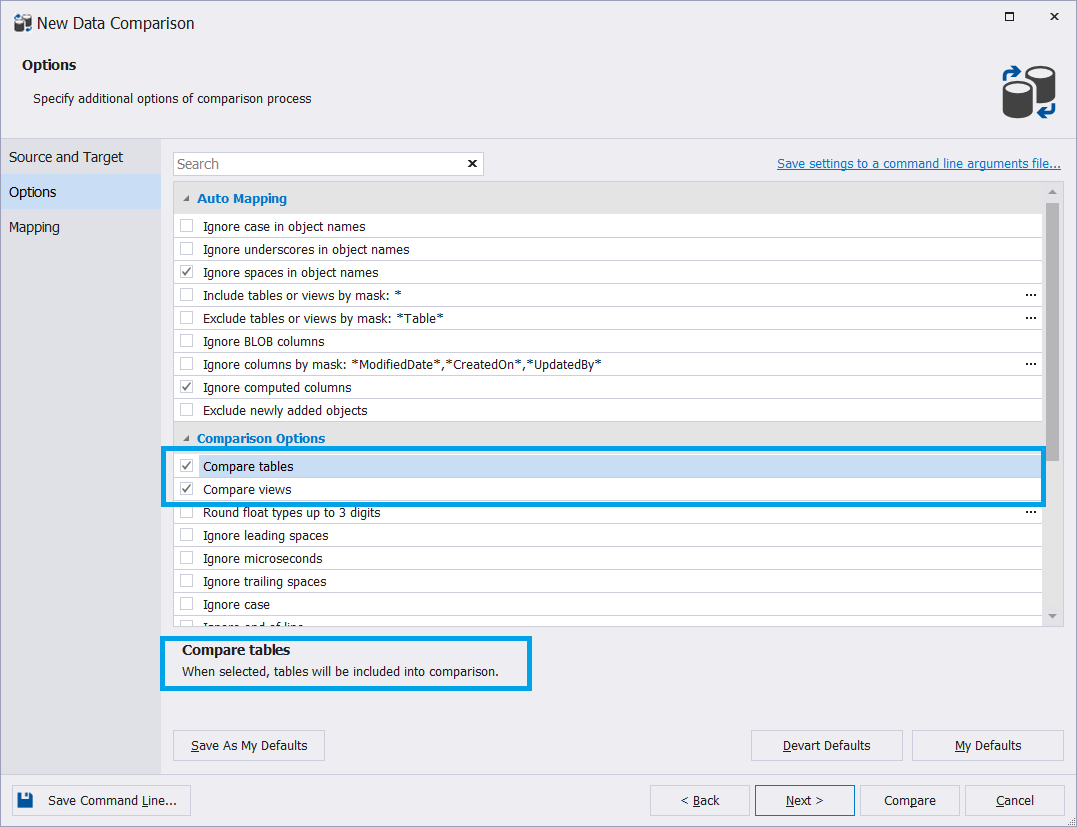
With Data Compare for MySQL, you can exclude all the tables from the comparison. The views will remain intact. To do that, clear the Compare tables checkbox when configuring comparison options in the New Data Comparison Wizard.
Filter columns
To exclude columns from the comparison:
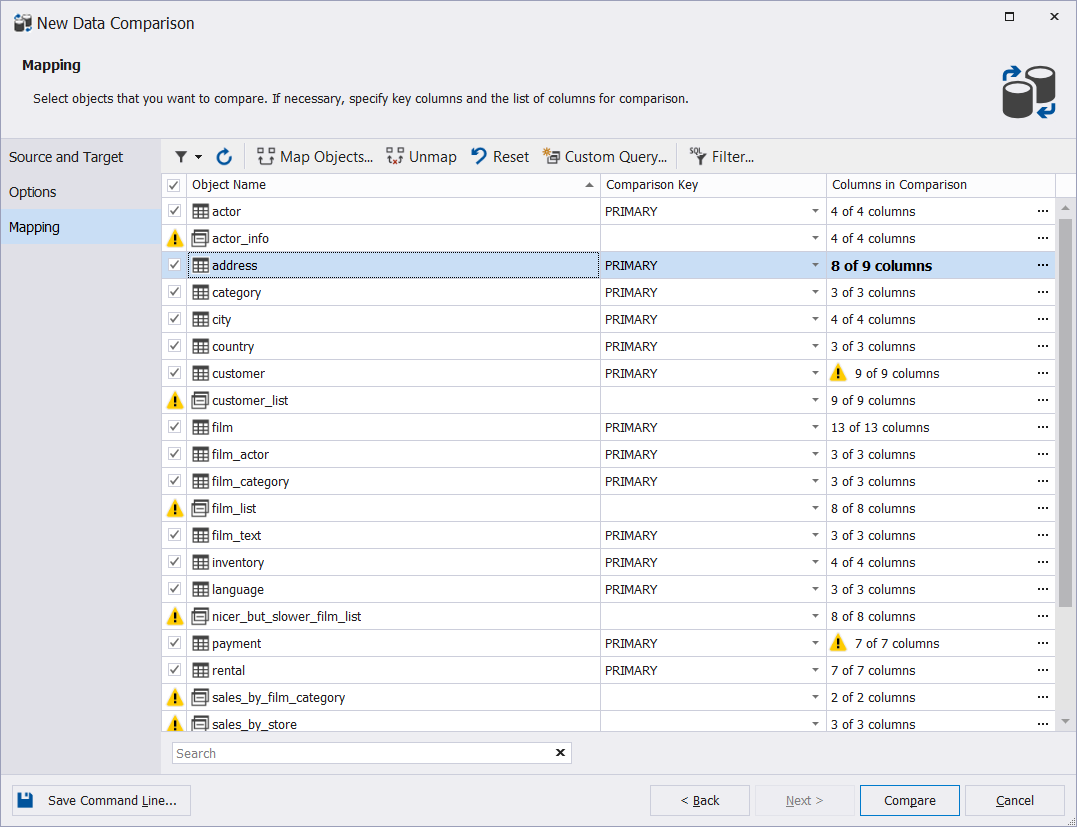
1. On the Mapping tab of the New Data Comparison Wizard, click  More in the Columns in Comparison column of the table from which you want to exclude columns.
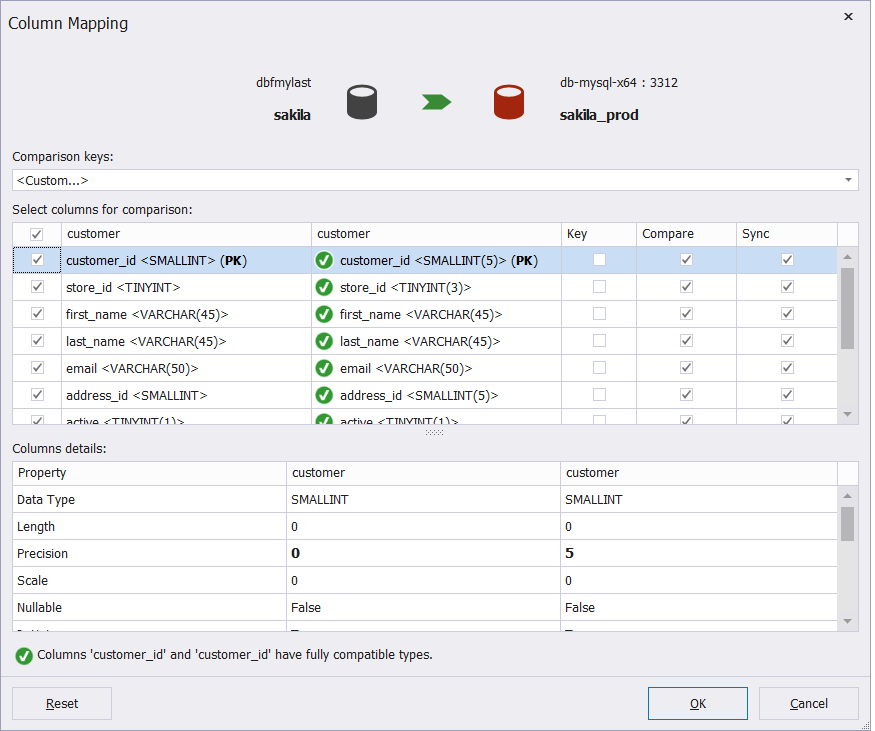
2. In the Column Mapping dialog that opens, specify a comparison key column. The difference between the columns will be ignored during comparison if the checkboxes in the Compare column are not selected. The column will be excluded from the UPDATE statement and will not be synchronized if the checkboxes in the Sync column are not selected.
Filter rows
With Data Compare for MySQL, you can exclude rows by applying a WHERE clause to the comparison.
Note
You can only filter rows if a database is selected as a data source. You can not use WHERE clauses for backups and scripts folders.
To filter the comparison with a WHERE clause:
1. On the Mapping tab, select the object to apply the filter to.
2. On the toolbar, click  Filter.

3. In the WHERE Filter dialog that opens, type a valid Transact-SQL WHERE clause.
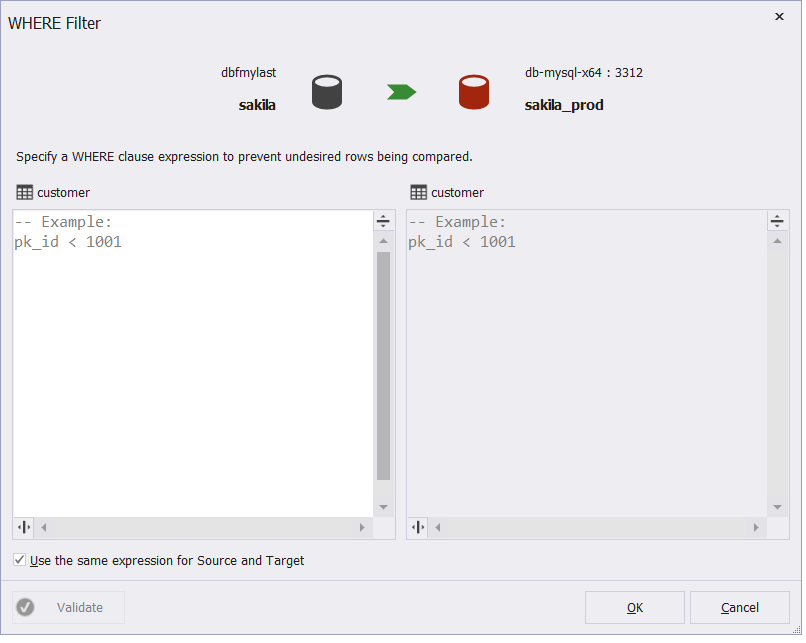
4. If you want to apply the expression to both Source and Target, select the Use the same expression for Source and Target checkbox.
5. Click OK to apply the filtering options.
The filtered object will be marked with a filter icon in the grid on the Mapping tab.
Review comparison options
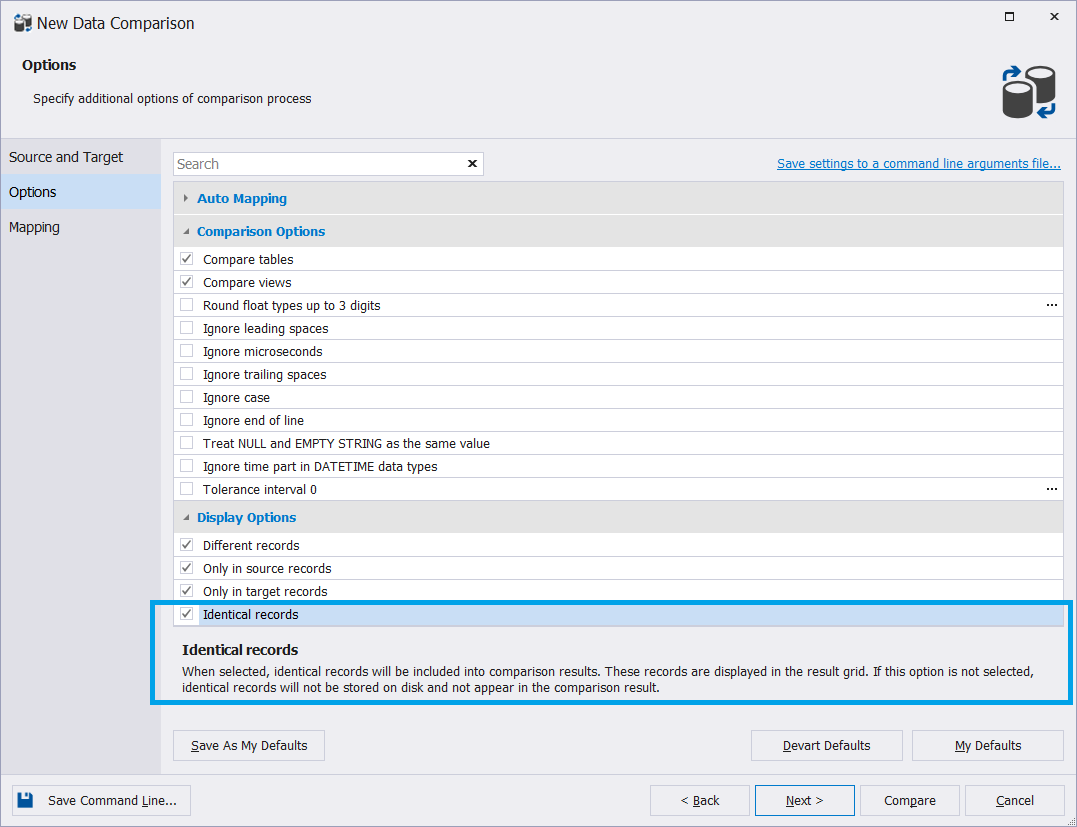
By default, identical records are included in comparison results. Data Compare for MySQL stores identical data temporarily.
In case your data sources always contain similar data, it is recommended to clear the Identical records checkbox on the Options tab of the New Data Comparison Wizard. This will reduce the required disk space as identical records will not be stored and won’t appear in the comparison result.
Schedule comparison and synchronization
If your comparison and/or synchronization tasks still take much time, you may want to schedule these tasks to run at a time when the server is less busy.
You can schedule or automate a comparison or synchronization with the help of Data Compare and a task scheduler tool.
First, you need to create a script for comparing and synchronizing the data sources.
Create a data comparison and/or synchronization script
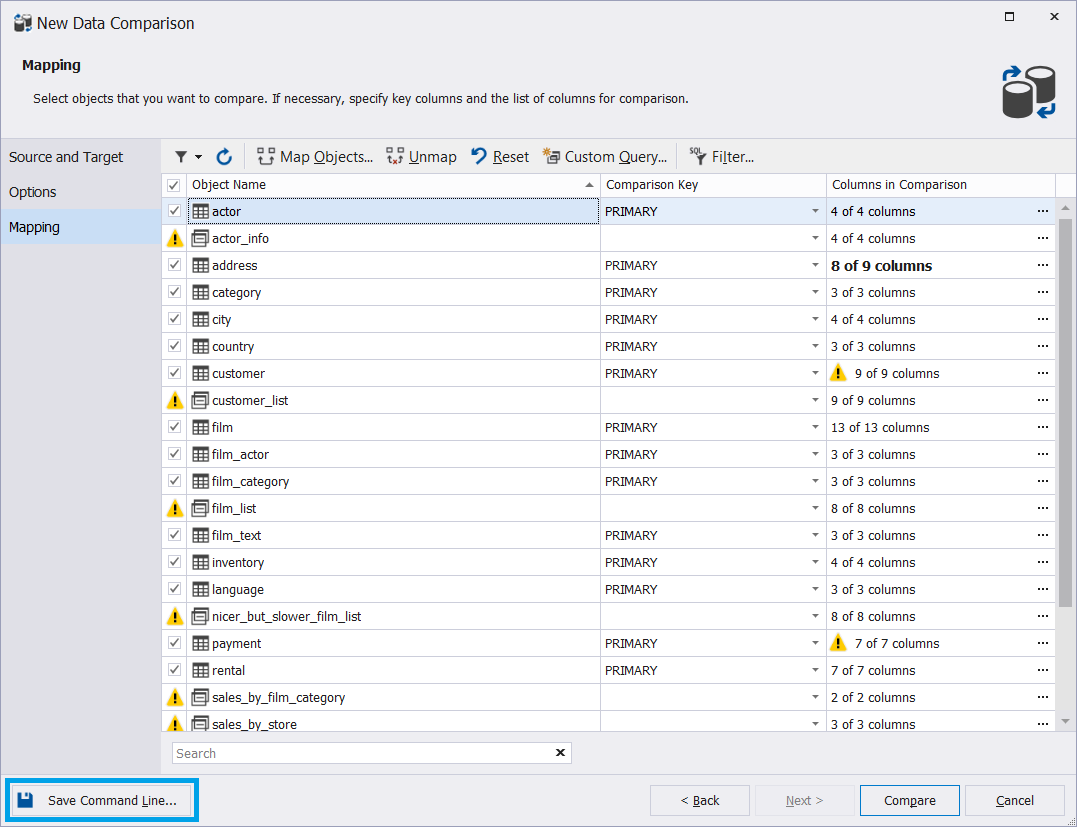
1. Having created and configured a new project, click Save Command Line at the bottom of the New Data Comparison Wizard.
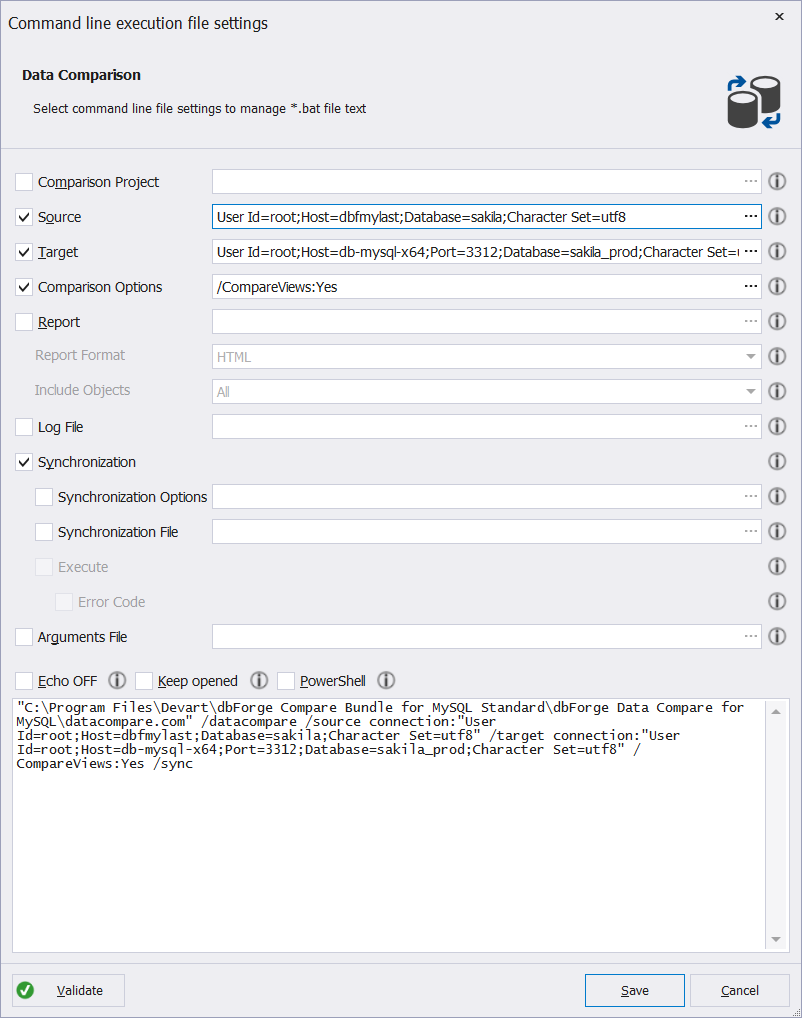
2. In the Command line execution file settings dialog that opens, verify and change the configurations if necessary.
Note
If you are interested in the comparison only, clear the Synchronization checkbox.
3. Click Validate to check if the settings are correct.
4. Click Save to save the command line settings to a .bat file.
Note
You can open the Command line execution file settings dialog from the Data Synchronization Wizard as well.
Schedule the execution of the script
To schedule a comparison and\or synchronization of the two data sources, you can use a Windows Task Scheduler or any other task scheduler tool.
In fact, you just need to set the required time or schedule the *.bat file execution.
To create a task with the Task Scheduler:
1. Run Task Scheduler.
2. In the Actions section, select Create Basic Task.
3. Type a name for the task and add an optional description, and then click Next.
4. Select a trigger for the task and click Next.
5. On the Action page, click Start a program.
6. Click Browse to enter a path to the *.bat file you saved earlier.
7. Click Next.
8. Check Summary for the task to be created.
9. Click Finish.