Export SQL Server data to PDF
PDF (Portable Document Format) is a file format developed by Adobe that displays and prints documents consistently across different devices and platforms. It preserves the fonts, images, graphics, and layout of the original document.
To export data to PDF:
1. Open the Data Export wizard in one of these ways:
-
On the Start Page, select Data Pump > Export Data.
-
In Database Explorer, right-click the required database or server connection and select Tasks > Export Data.
-
In Database Explorer, right-click the required table or view and select Export Data.
-
On the menu bar, select Database > Tasks > Export Data.
-
In Data Editor, click
 or right-click in the grid and select Export Data. You can export either the selected rows or the entire table.
2. On the Export format page, select PDF, then click Next.
Tip
Click Load Template to load export options from a template file if you saved it previously.
Note
To move between pages, click Next or select a page directly in the wizard.
To return to the previous step and review or change your settings, click Back.
To close the wizard without saving your changes, click Cancel.
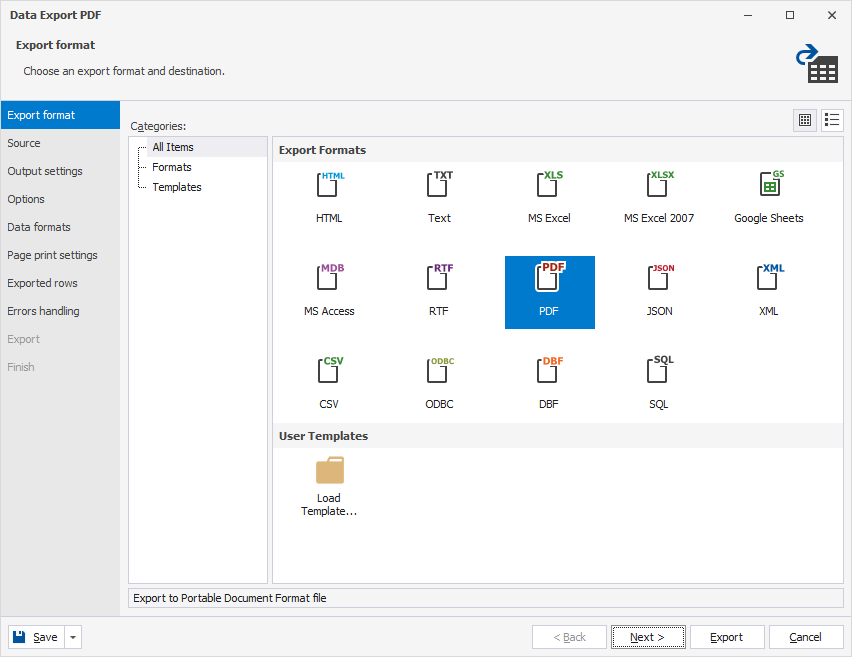
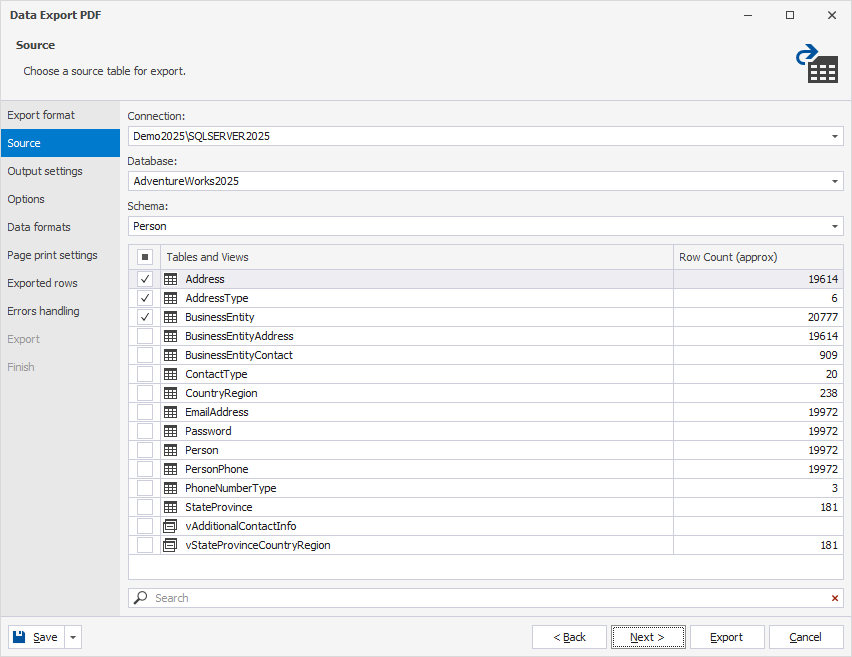
3. On the Source page, specify the connection details and select tables and/or views that you want to export, then click Next.
Note
The Source page is unavailable if you open the Data Export wizard from Data Editor.
3.1. In Connection, select the server connection for the database. You can also create a new connection or update an existing one.
Tip
To create or update a server connection:
1. In Connection, select Manage.
2. In the Connection Manager dialog, click New to create a connection or Edit to modify an existing one.
3. In the Database Connection Properties dialog, configure connection settings.
4. In the Connection Manager dialog, click OK to select this connection for data export.
3.2. In Database, select the database.
3.3. In Schema, select the appropriate database schema.
3.4. In the grid, select the required tables and/or views.
Tip
To export all tables and views, select Tables and Views.
To search for tables and views, enter a search query in the search box.
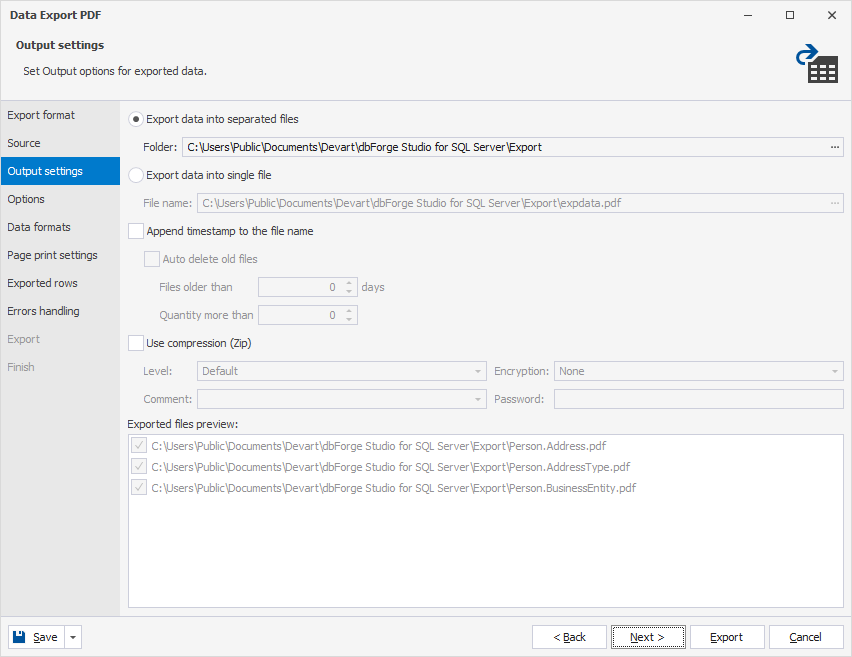
4. On the Output settings page, configure the output options for the exported data, then click Next.
4.1. Choose how you want to save the exported data.
-
Export data into separated files – Exports each selected table or view to a separate .pdf file. Specify the path to the folder where the exported files will be saved.
-
Export data into single file – Exports all selected tables or views to a single .pdf file. Specify the path to the file where the exported data will be saved.
The export files are displayed under Exported files preview.
Note
When exporting data from a single table, Export data into single file is selected by default, and Export data into separated files is unavailable.
When exporting data from multiple tables, Export data into separated files is selected by default. To export all tables into a single file, select Export data into single file.
4.2. Optional: Select additional options for the exported files.
-
Append timestamp to the file name – Adds a timestamp to the file names. By default, the option is selected. To exclude the timestamp, clear the checkbox.
-
Auto delete old files – Automatically deletes exported files that are older than the specified number of days or when the number of exported files exceeds the specified limit.
-
Use compression (Zip) – Creates an archive file with your exported data. Specify the compression level (No Compression, Best Speed, Fast, Default, Good, or Maximum), add a comment, encrypt your archive with AES128 or AES256, and specify a decryption password.
Note
Auto delete old files is available only when Append timestamp to the file name is selected.
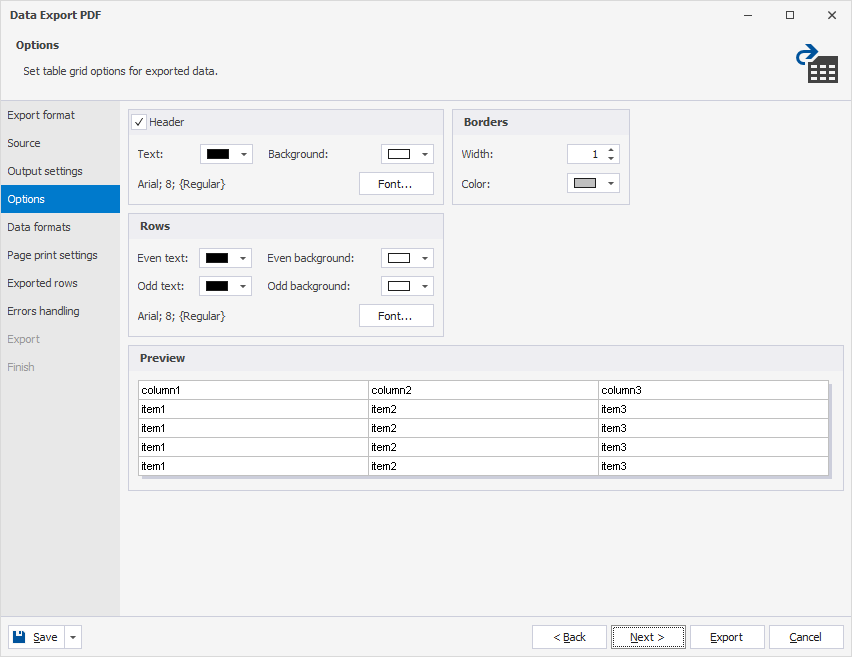
5. On the Options page, configure the formatting properties for the exported data, then click Next.
5.1. Under Header:
-
Text – Select the text color for header cells.
-
Background – Select the background color of the header row.
-
Font – Click Font to open the Font dialog, where you can select the font family, size, and style for header text. The default font is Tahoma 8 (Regular).
Note
Header is selected by default. To exclude the header from the files, clear the checkbox.
5.2. Under Borders:
-
Width – Select the border thickness for table cells.
-
Color – Select the color of table borders.
5.3. Under Rows:
-
Even text – Select the text color for even rows.
-
Odd text – Select the text color for odd rows.
-
Even background – Select the background color for even rows.
-
Odd background – Select the background color for odd rows.
-
Font – Click Font to open the Font dialog, where you can select the font family, size, and style for data rows. The default font is Tahoma 8 (Regular).
The results of your configuration are displayed under Preview.
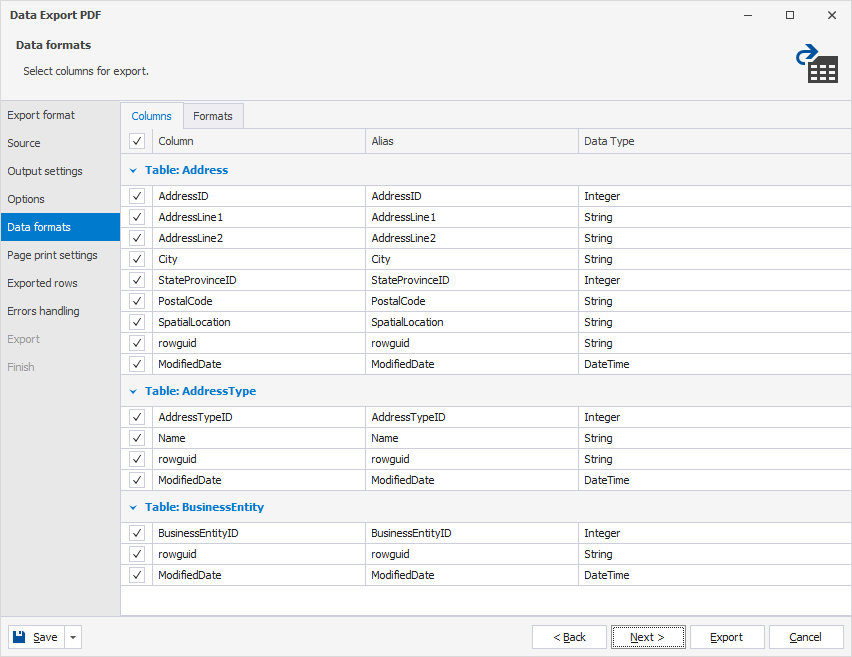
6. On the Data formats page, select the columns for export and specify their data formats, then click Next.
6.1. On the Columns tab, select the columns for export and check or edit their aliases and data types.
6.2. On the Formats tab, change the default format settings for Date, Time, Date Time, Currency, Float, Integer, Boolean, and Null String, and select the required binary encoding from the dropdown list.
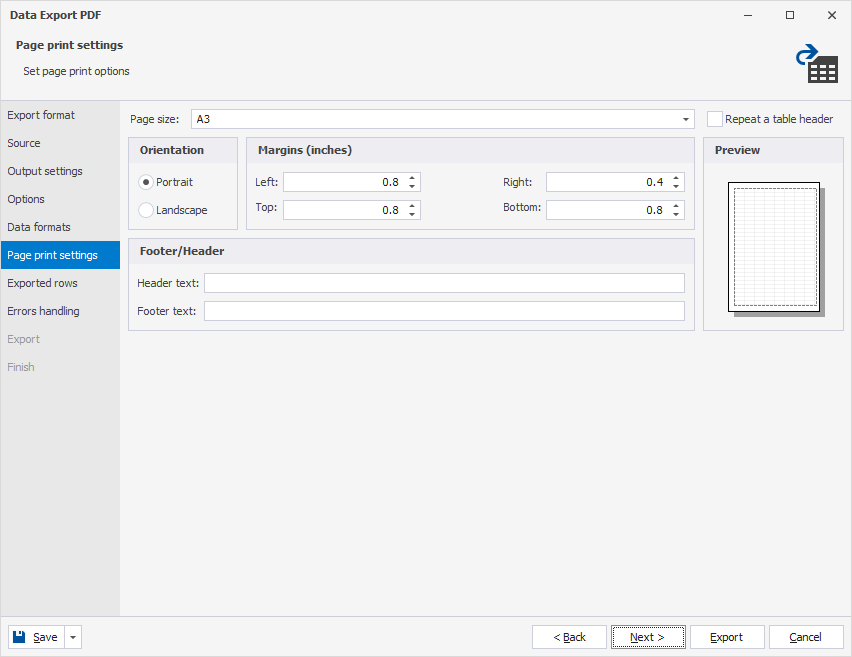
7. On the Page print settings page, configure print layout settings for the exported data, then click Next.
7.1. In Page size, select the paper size for printing the exported document: A3, A4, Executive, Legal, or Letter.
7.2. Under Orientation, select the page orientation for printing.
-
Portrait – Prints pages vertically.
-
Landscape – Prints pages horizontally.
7.3. Under Margins, specify the size of the Left, Right, Top, and Bottom page margins.
7.4. Optional: Under Footer/Header, enter the text you want to display in the header and footer of each printed page.
-
Header text – Displays the text at the top of the page.
-
Footer text – Displays the text at the bottom of the page.
7.5. Optional: Select Repeat a table header to display a table header row on each printed page.
The results of your configuration are displayed under Preview.
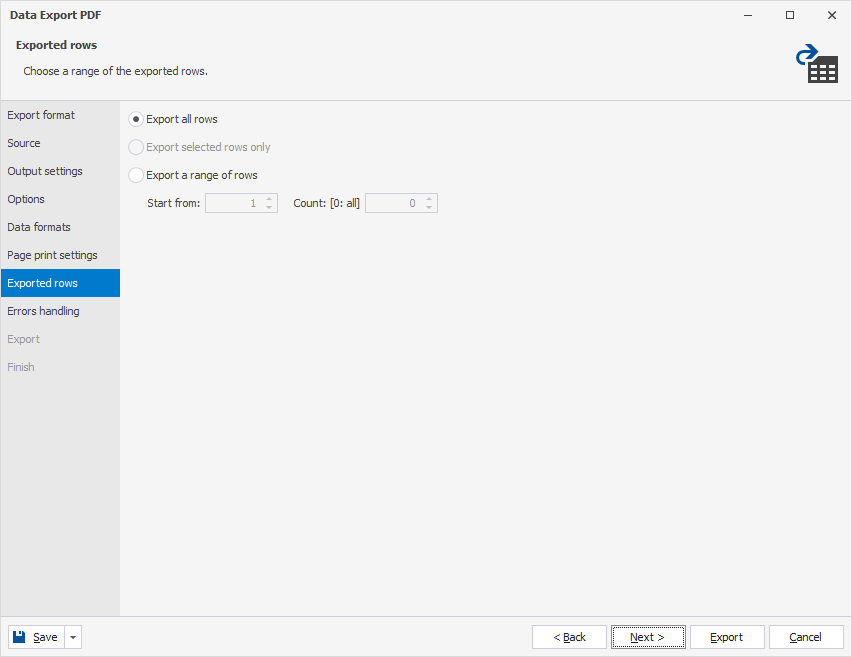
8. On the Exported rows page, specify the rows to export, then click Next.
-
Export all rows – Exports all rows in the table.
-
Export selected rows only – Exports only the rows selected in Data Editor.
-
Export a range of rows – Exports a specified range of rows. Enter the starting row and the number of rows to include in the export. To export all rows following the specified starting row, set Count to 0.
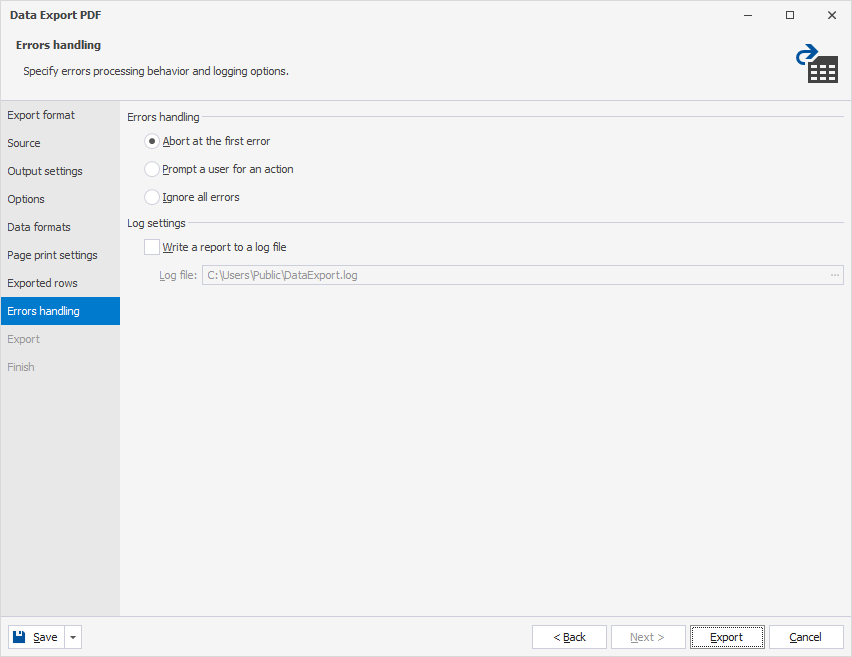
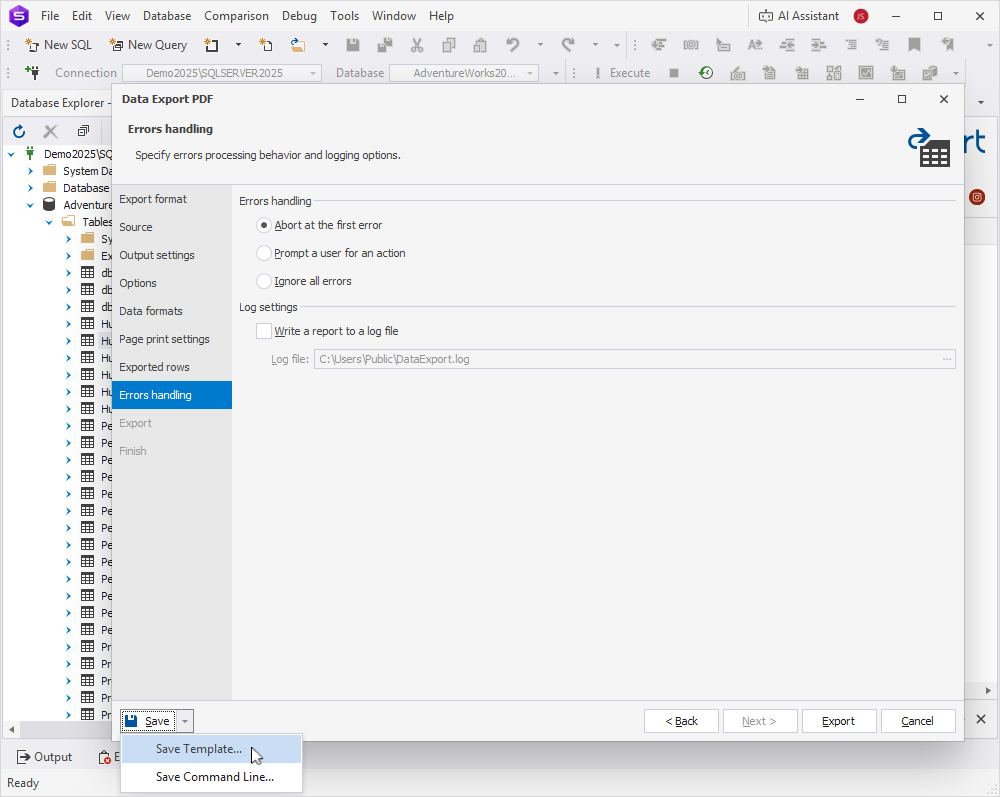
9. On the Errors handling page, choose how to process errors and how they should be logged.
9.1. Select one of the following error handling options:
-
Abort at the first error – Stops the export immediately when the first error occurs.
-
Prompt a user for an action – Stops the export when an error occurs and prompts the user to choose an action.
-
Ignore all errors – Continues the data export, skipping any errors without interruption.
9.2. Optional: To create a log file, select Write a report to a log file, then click the ellipsis (…) and select the folder where you want to save the file.
Note
To save your export settings as templates for recurring scenarios, expand the Save menu and select Save Template. You can then use the templates to export data from the command line.
10. Click Export.
11. On the Finish page, select one of the following actions:
-
Show log file – Opens the log file.
-
Open result file – Opens the exported file.
-
Open result folder – Opens the folder containing the exported file.
-
Export more – Starts another export.
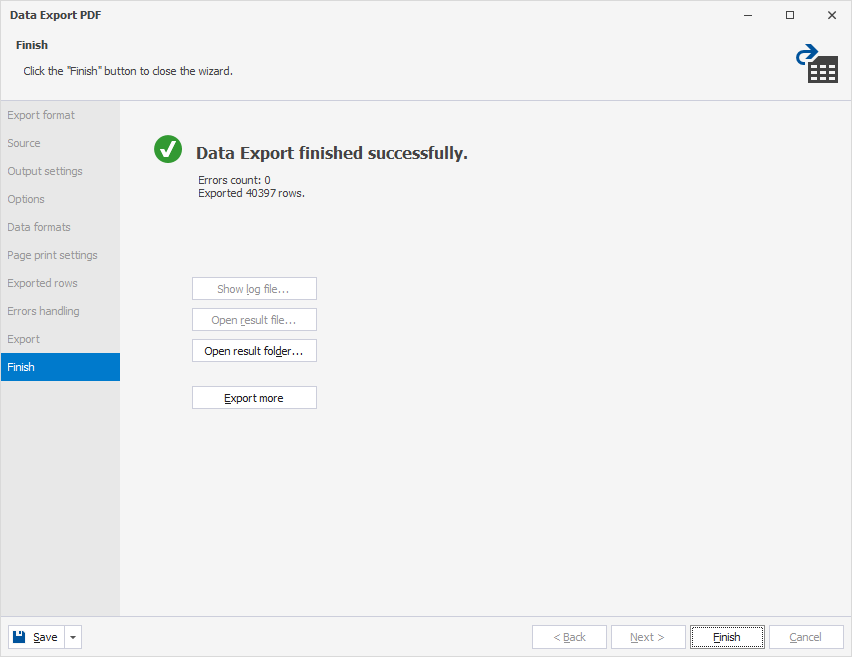
12. Click Finish.