Import data from ODBC to SQL Server
ODBC (Open Database Connectivity) is a standardized method that enables communication between applications and various database management systems (DBMS). It decouples the application from any specific DBMS by using an ODBC driver as a middleware layer, translating requests from the application into DBMS-specific queries.
The application communicates with ODBC functions through a driver manager, which dynamically loads the appropriate driver, enabling the execution of queries on the target DBMS.
The guide describes how to import data from PostgreSQL to SQL Server using the ODBC driver. For instructions on how to start working with Devart ODBC drivers, see Configure Devart ODBC drivers.
Prerequisites
-
Configure ODBC Driver for PostgreSQL and connect to the PostgreSQL database.
Import PostgreSQL data to SQL Server
1. Open the Data Import wizard in one of these ways:
-
On the Start Page, select Data Pump > Import External Data.
-
In Database Explorer, right-click the required database or server connection and select Tasks > Import Data.
-
In Database Explorer, right-click the required table or view and select Import Data.
-
On the menu bar, select Database > Tasks > Import Data.
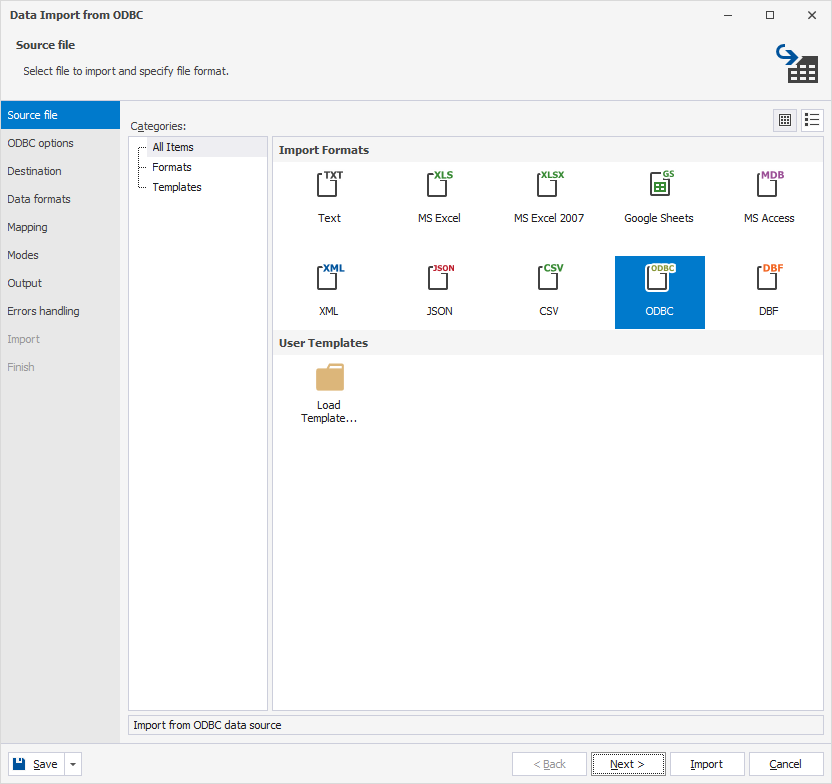
2. On the Source file page, select ODBC, then click Next.
Tip
Click Load Template to load import options from a previously saved template file.
Note
To move between pages, click Next or select a page directly from the navigation pane on the left.
To return to the previous step and review or change your settings, click Back.
To close the wizard without saving your changes, click Cancel.
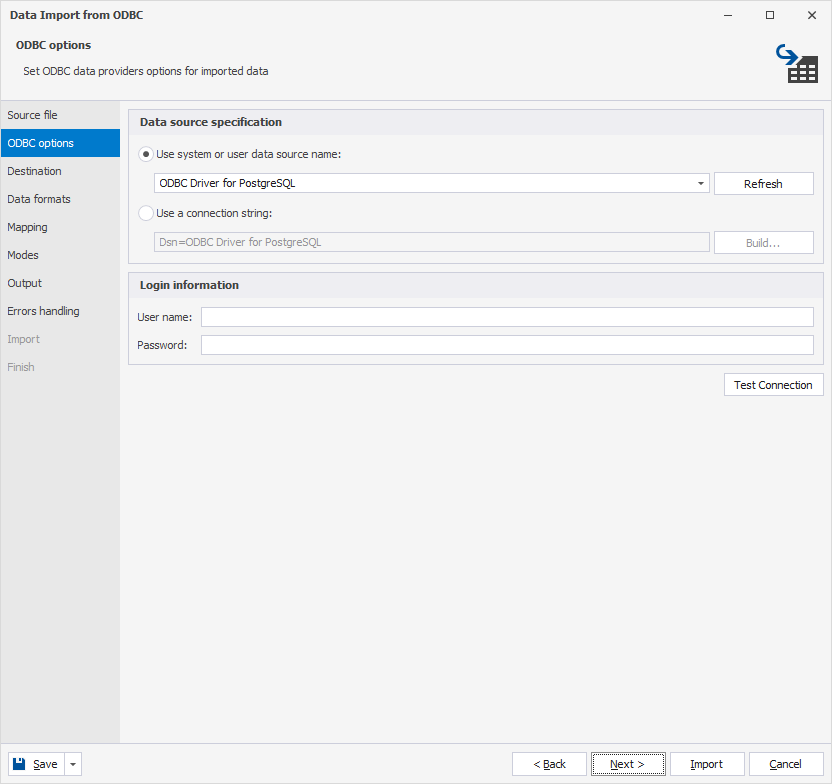
3. On the ODBC Options page, specify the system or user Data Source Name (DSN), then click Next.
-
If you already have a DSN:
1. Under Data source specification, select Use system or user data source name.
2. Select ODBC Driver for PostgreSQL.
-
If you don’t have a DSN:
1. In Use a connection string, click Build.
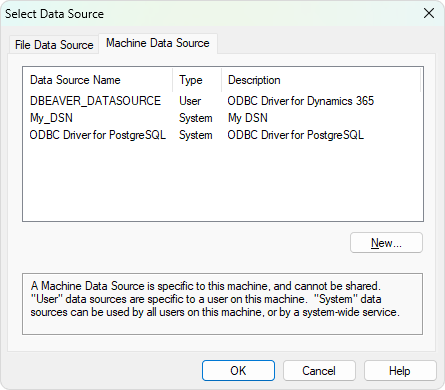
2. In the Select Data Source dialog, select Machine Data Source, then click New.
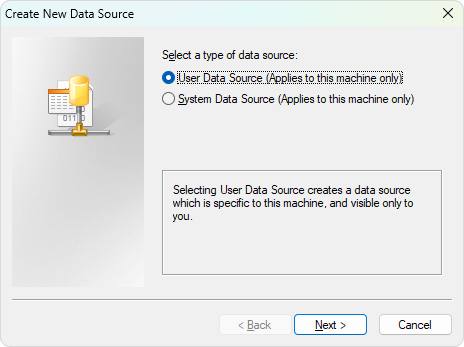
3. In the Create New Data Source dialog, select a data source type, then click Next.
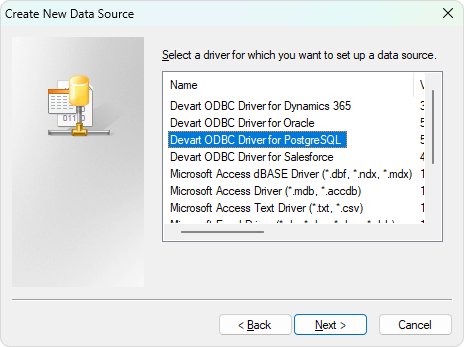
4. Select Devart ODBC Driver for PostgreSQL, then click Next.
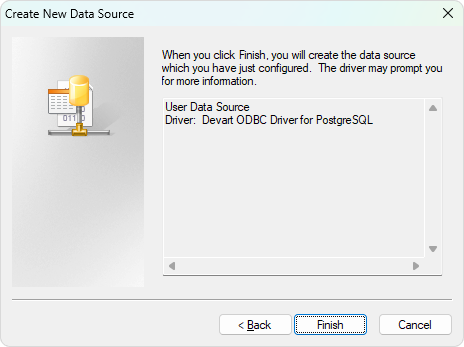
5. Click Finish to create a data source.
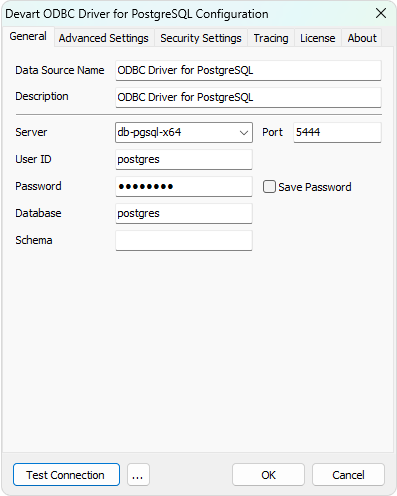
6. In the Devart ODBC Driver for PostgreSQL Configuration dialog, configure the PostgreSQL connection settings, then click OK.
Tip
To verify the connection settings, click Test Connection.
7. Click OK to close the Select Data Source dialog.
4. Optional: If you didn’t save the login and password during the DSN configuration, under Login information, enter your database credentials.
5. Optional: Click Test Connection to verify the connection settings.
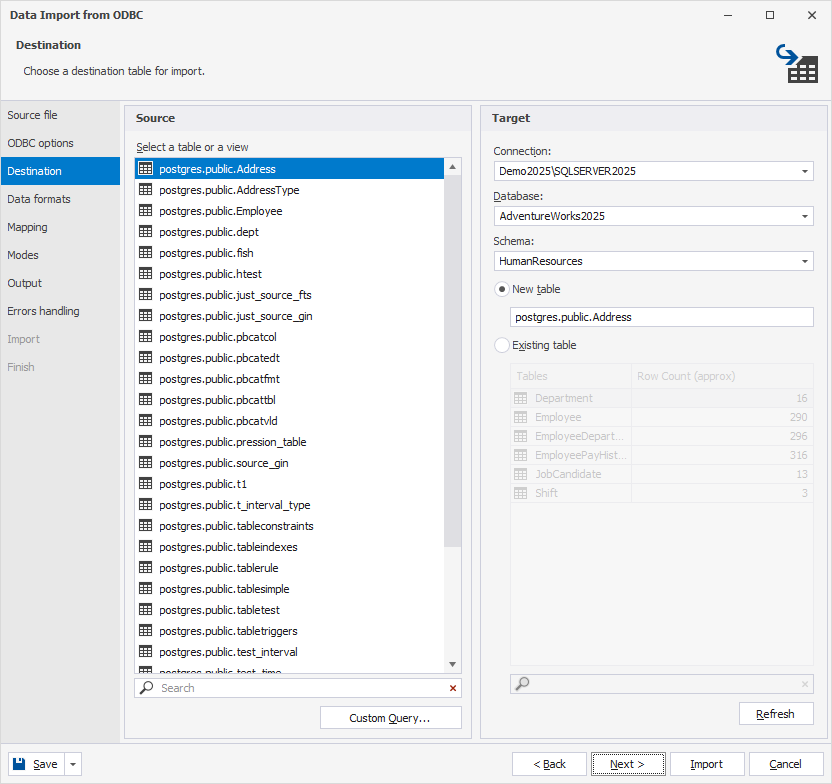
6. On the Destination page, select the source and target tables, then click Next.
-
Under Source:
1. Select the source table or view.
2. Optional: To import only specific data:
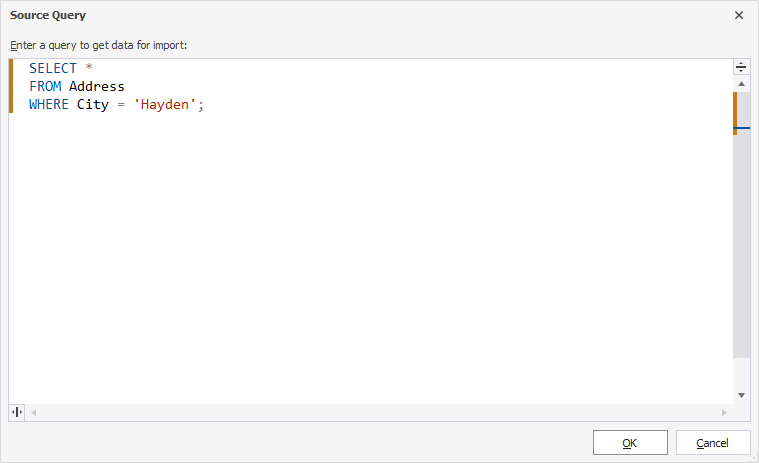
2.1. Click Custom Query.
2.2. In the Source Query dialog, enter a query.
2.3. Click OK.
After you enter a custom query and click OK, the Custom Query label appears in bold to indicate that the query is applied. If you save the import template, the custom query is saved as part of the template configuration.
Warning
Selecting a different table clears the custom query. Make sure to save the template before you switch tables to keep the query.
-
Under Target:
1. In Connection, select the server connection for the database. You can also create a new connection or update an existing one.
Tip
To create or update a server connection:
1. In Connection, select Manage.
2. In the Connection Manager dialog, click New to create a connection or Edit to modify an existing one.
3. In the Database Connection Properties dialog, configure connection settings, then click Connect.
4. In the Connection Manager dialog, click OK to use the connection for the import.
2. In Database, select the database.
3. In Schema, select the appropriate database schema.
4. Select the target table:
-
New table – Enter the name of a new table.
-
Existing table – Select an existing table.
-
Tip
To find tables or views, enter a search query in the search box.
To update the data in the grid, click Refresh.
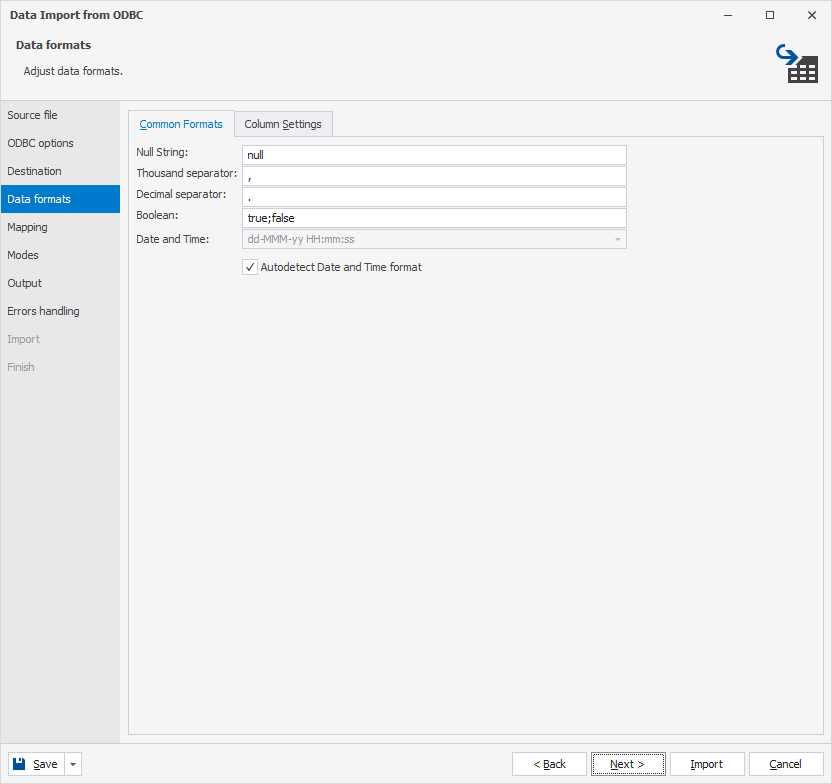
7. On the Data formats page, set the data import formats, then click Next.
7.1. On the Common Formats tab, change the default format settings for all columns: Null String, Thousand separator, Decimal separator, Boolean, and Date and Time.
7.2. On the Column Settings tab, change the default format settings for specific columns: Null String, Left Quote, Right Quote, and Date and Time.
Note
Autodetect Date and Time format is selected by default. To change the format, clear the checkbox, then select the required format in Date and Time.
If a format mask is not set, dbForge Studio automatically identifies date and time values.
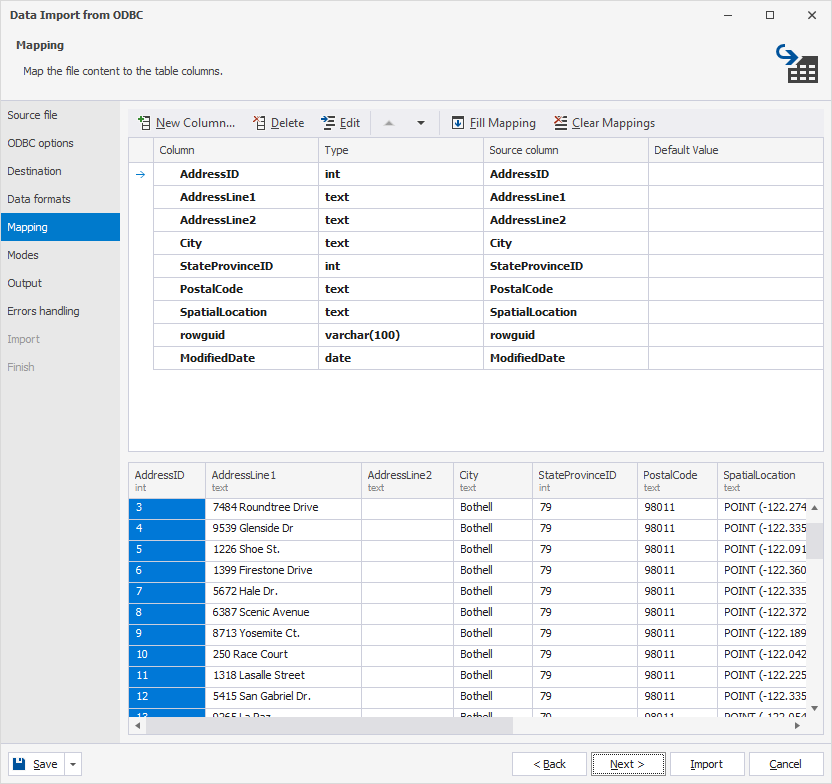
8. On the Mapping page, define how columns in the source and target tables should be mapped, then click Next.
-
For data import to a new table: In Source column, select the required column from the dropdown list.
-
For data import to an existing table:
1. In Source column, select the required column from the dropdown list.
2. In Default Value, specify a default value for each column.
3. Optional: In Key, select one or more key columns that uniquely identify each row for the data import.
Note
If no key column is selected, only the Append and Repopulate modes are available.
The result of your configuration appears in the Preview area.
Note
When you import data to a new table, dbForge Studio for SQL Server automatically creates and maps all columns.
When you import data to an existing table, columns with matching names are mapped automatically, while the rest must be mapped manually. If no columns with matching names are found, they are mapped sequentially, for example, the first source column to the first target column and the second to the second.
Tip
To cancel the mapping of all columns, click Clear Mappings.
To restore the mapping, click Fill Mapping.
To remove a column, select it and click Delete.
To move a column to a specific position, click
or
, or drag the column to the desired location.
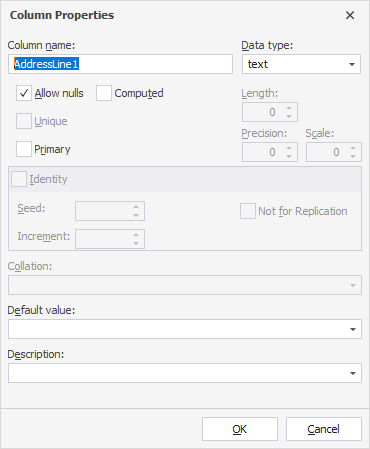
To add a column, click New Column. In the Column Properties dialog, specify column properties, then click OK.
To edit a column, select it and click Edit. In the Column Properties dialog, specify column properties, then click OK.
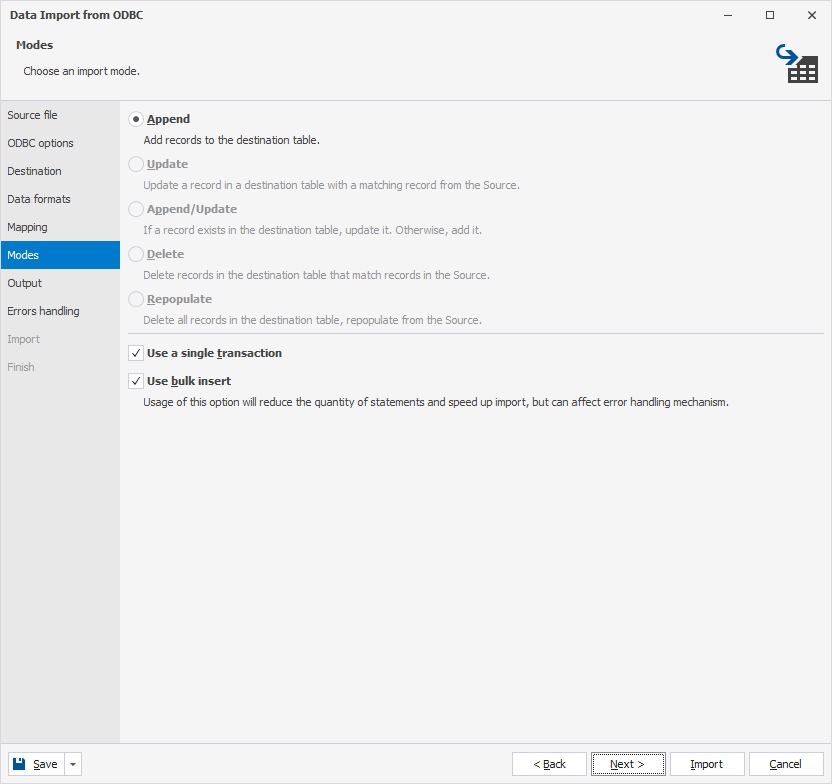
9. On the Modes page, select a data import mode, then click Next.
-
Append – Adds new records from the source table to the target table. Existing records in the target table are not modified.
-
Update – Replaces records in the target table with matching records from the source table.
-
Append/Update – Updates existing records in the target table if a match is found. If no match exists, it inserts a new record.
-
Delete – Deletes records in the target table that match records in the source table, then inserts the corresponding records from the source table.
-
Repopulate – Deletes all records from the target table and repopulates it with records from the source table.
Note
By default, Use a single transaction and Use bulk insert are selected. When Use a single transaction is selected, the tool runs the data import within a single database transaction. When Use bulk insert is selected, import performance (especially for large datasets) is improved. To turn off the option, clear the checkbox.
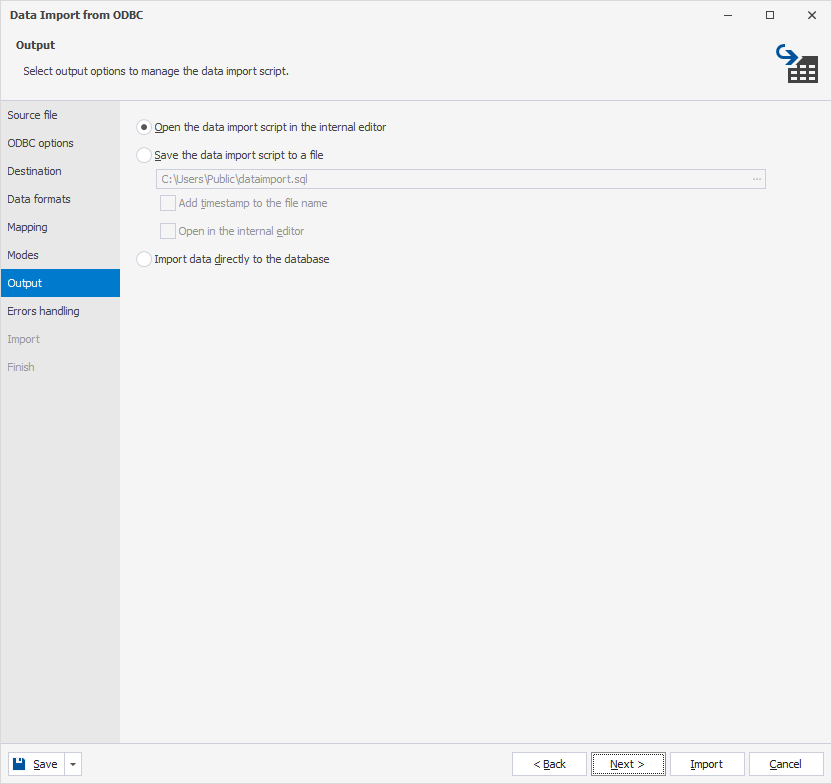
10. On the Output page, select the output option, then click Next.
-
Open the data import script in the internal editor – Opens the script in dbForge Studio after the data import is complete.
-
Save the data import script to a file – Saves the import script to a file. Click the ellipsis (…) and specify the path to the file where the script will be saved.
To add the date and time to the file name, select Add timestamp to the file name.
To open the file in the internal editor after the import completes, select Open in the internal editor.
-
Import data directly to the database – Inserts data directly into the target database.
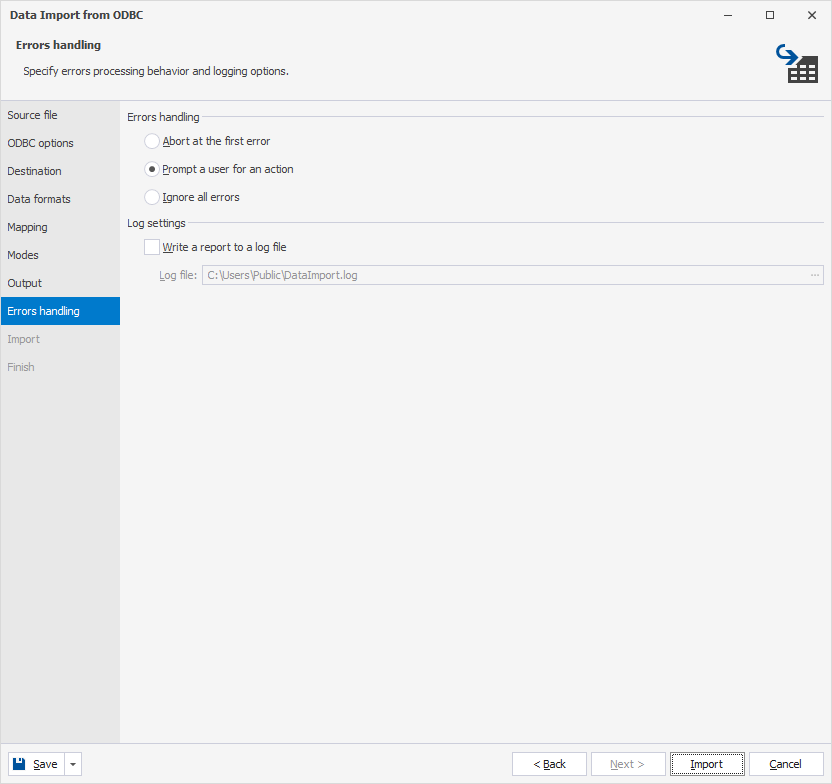
11. On the Errors handling page, choose how to process errors and how they should be logged.
-
Abort at the first error – Stops import immediately when the first error occurs.
-
Prompt a user for an action – Stops the import when an error occurs and prompts the user to choose the action.
-
Ignore all errors – Continues the data import, skipping any errors without interruption.
Tip
To create a log file, select Write a report to a log file, then click the ellipsis (…) and select the folder where you want to save the file.
Note
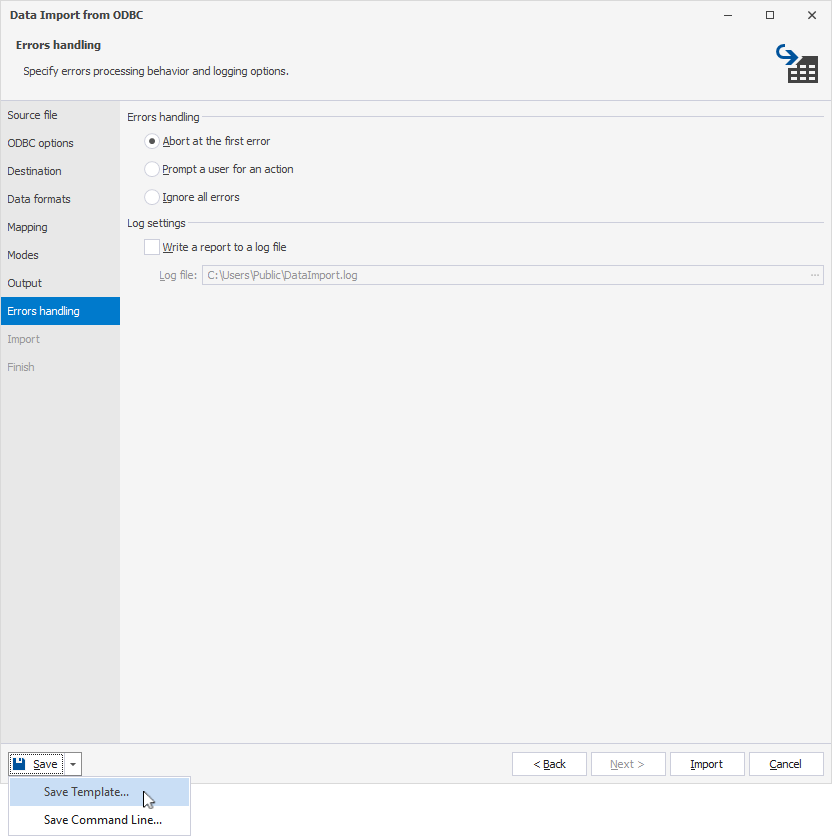
To save your import settings as templates for recurring scenarios, expand the Save menu and select Save Template. You can then use the templates to import data from the command line.
12. Click Import.
13. On the Finish page, select one of the following actions:
-
Show log file – Opens the log file.
-
Import more – Starts another import.
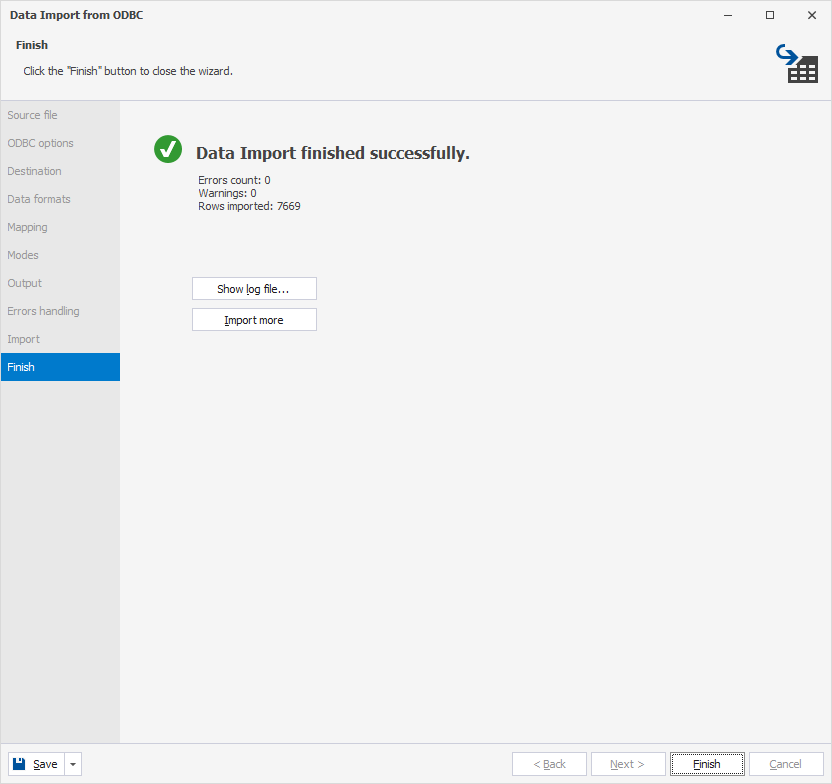
14. Click Finish.