Configure population options
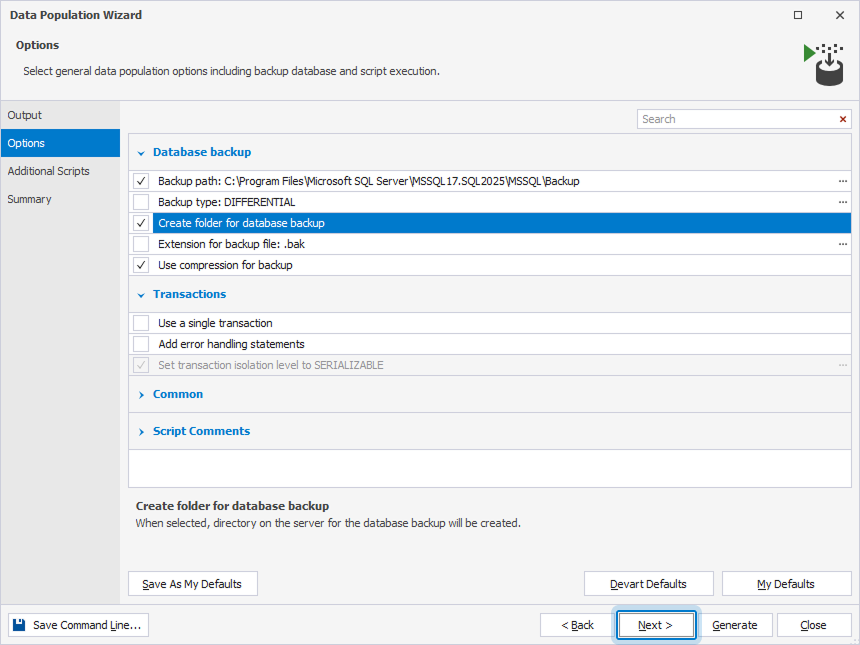
After you select the output option to manage a deployment script, you can configure the data population options on the Options page of the Data Population Wizard.
Configure data population options
1. In the Data Population Wizard, navigate to the Options page.
2. Select the checkboxes for the options you want to include in data population. Clear the checkboxes for the options you want to exclude.
The options are grouped in collapsible categories. When you select an option, its description appears below the options grid.
3. Click Next to add custom scripts to run before or after data population.
Tip
To return to the previous step and review or change your settings, click Back.
To save the data population settings to a .bat file to automate recurring scenarios from the command line, click Save Command Line.
Data population options
The table provides a list of data population options available on the Options page, grouped by categories.
Database backup
| Name | Description | Default state |
|---|---|---|
| Backup path | Specifies the backup file path. Click the ellipsis (…) to change the default location of the target database backup file before the population. The backup file name is generated in the following format: <database_name>_<yyyy>_<MM>_<dd>_<hh>_<mm>.bak. |
On |
| Backup type | Creates a backup in the selected mode. Click the ellipsis (…) and select a backup type. Note: Differential backups require a prior full database backup. If the database has never been backed up, a full database backup will be automatically created. The copy-only mode is supported in SQL Server 2008 or higher versions. |
Off |
| Create folder for database backup | Creates a directory on the server for a database backup. | On |
| Extension for backup file | Specifies the extension for a backup file. The default extension is .bak. To change the file extension, click the ellipsis (…) and specify a different extension. |
Off |
| Use compression for backup | Performs the backup compression. This option is supported in SQL Server 2008 or higher versions. |
On |
Transactions
| Name | Description | Default state |
|---|---|---|
| Use a single transaction | Executes the data population script within a single transaction. If any error occurs, all changes are automatically rolled back. | Off |
| Add error handling statements | Stops script execution when an error occurs. | Off |
| Set transaction isolation level to | Sets a transaction isolation level. This option is available when Use a single transaction is selected. The available transaction isolation levels are: SERIALIZABLE (default), SNAPSHOT, REPEATABLE READ, READ UNCOMMITTED, and READ COMMITTED. To use a different transaction isolation level, click the ellipsis (…) and select the required one. |
On |
Common
| Name | Description | Default state |
|---|---|---|
| Disable check constraints | Drops the CHECK and NOT NULL constraints before data population. After data population, the constraints are restored using the WITH NOCHECK parameter. To restore the constraints using the WITH CHECK parameter, select Restore constraints using WITH CHECK. |
Off |
| Disable DDL triggers | Turns off DDL triggers before data population. After data population, the triggers are turned on. |
On |
| Disable DML triggers | Turns off DML triggers before data population. After data population, the triggers are turned on. The option applies to tables and views. |
On |
| Disable foreign keys | Drops foreign keys before data population. After data population, the foreign keys are restored. |
Off |
| Disable primary keys, indexes and unique constraints | Drops primary keys, indexes, and unique constraints before data population. After data population, they are restored. A primary key, index, or unique constraint that is used as a comparison key can’t be dropped. |
Off |
| Include USE < database_name > | Adds the USE <database_name> clause to the script. |
On |
| Insert multiple rows of data | Inserts all data into the table using an INSERT statement. The option is ignored for the sql_variant columns. |
Off |
| Restore constraints using WITH CHECK | Creates constraints using the WITH CHECK parameter. This option increases execution time because existing data is validated and may cause the operation to fail if inconsistencies are found.If the option isn’t selected, constraints will be created in the fast mode using the WITH NOCHECK parameter. |
Off |
| Synchronize database in the single user mode | Populates a database in the single user mode. | Off |
| Synchronize via files path | Creates a separate file using the OPENROWSET function for each value whose size is greater than 1 MB. To upload the files onto a remote server, click the ellipsis (…) and specify a shared network folder accessible from both the client and server computers. |
Off |
Script Comments
| Name | Description | Default state |
|---|---|---|
| Exclude comments | Excludes comments from the data population script. | Off |
| Include print comments | Inserts comments into the output file during the script execution. Including PRINT comments in the script helps identify specific items in the output. |
Off |
Use default options
To save your current selection of options as defaults for all new projects, click Save As My Defaults.
To restore your saved defaults, click My Defaults.
To reset all options to default settings, click Devart Defaults.
Find options
To find options, type a search query in the search box.
Search behavior:
- Matching text is highlighted in yellow.
- The number of matches appears in the search box.
- The search is case-insensitive. For example, searching for Tab matches Tab and tab.
- If the query contains multiple words, each word is matched separately, and all matches are highlighted.
To clear the search results, click  in the search box.
Keyboard shortcuts in the search box
The table provides keyboard shortcuts you can use in the search box.
| Keyboard shortcut | Description |
|---|---|
| Ctrl+A | Selects all. |
| Ctrl+Left Arrow (←) | Moves the caret to the beginning of the word. |
| Ctrl+Right Arrow (→) | Moves the caret to the end of the word. |
| Ctrl+Shift+Left Arrow (←) | Selects text from the current caret position to the beginning of the current word and moves the caret to the beginning of the word. |
| Ctrl+Shift+Right Arrow (→) | Selects text from the current caret position to the end of the current word and moves the caret to the end of the word. |
| Ctrl+Backspace | Deletes the word to the left of the caret. |