How to work with Master-Detail Browser document
This topic explains how to work with the Master-Detail Browser document in dbForge Query Builder for SQL Server.
Working with the Design view
To start working with the tables or views in the Design view, you need to add tables or views to the diagram by using one of the following ways:
- From Database Explorer, drag tables to the designer area.
- In Database Explorer, right-click the selected tables and select Send to > Master-Detail Browser.
- On the Database menu, click Master-Detail Browser.
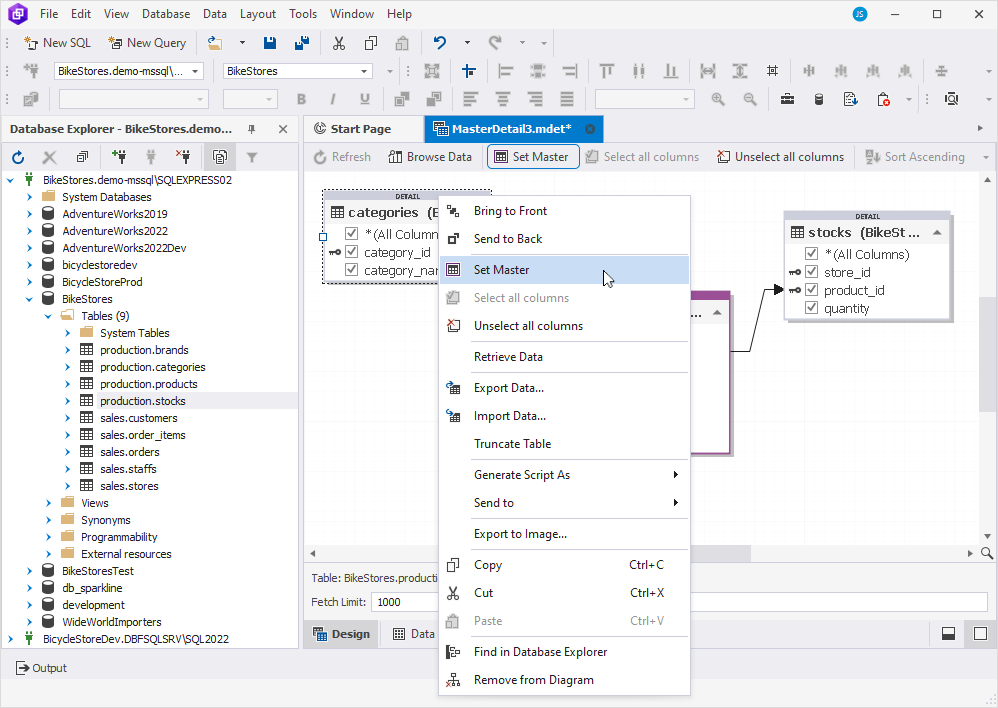
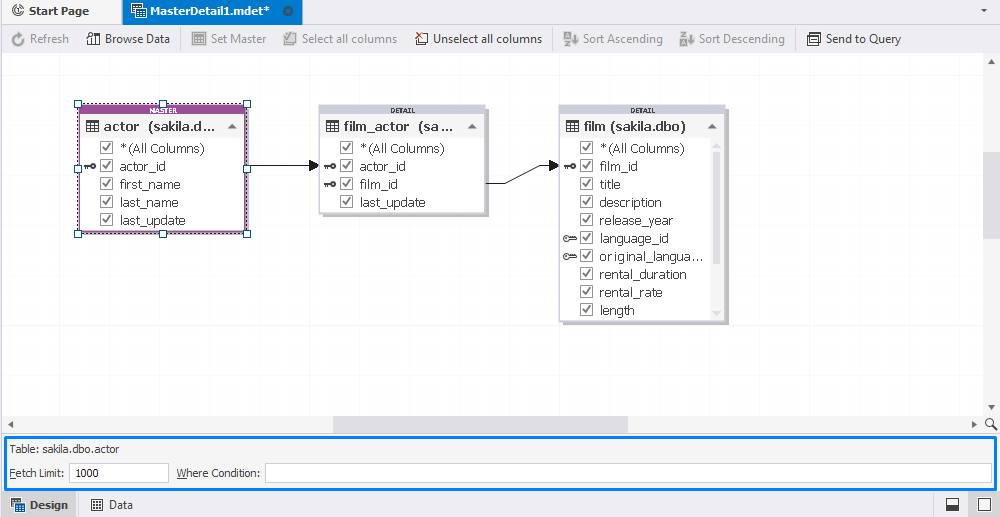
The first table/view you drag will be automatically set as a master table/view. To set the other table/view as master, select this table/view and click Set Table as Master on the document toolbar or right-click it and select Set Master on the shortcut menu.
Note
At least one parent table/view (without any arrows pointing to it) must be added to the document. Otherwise, an error message will be displayed if you try to view results.
When you drag tables to the Designer area, a line is automatically created between tables if at least one table has a foreign key reference to the other table.
An arrow pointing in the direction of the link indicates a one-to-one relationship. Also, you can create custom links between different columns. To add a link, drag a column from one object to a column of another object that you want to link. You can change the direction of the relationship (arrow) from the master table to the detail table. To do so, right-click the arrow and select Change Link Direction on the shortcut menu.
Note
You can not create links between columns of different types.
Next, you can select columns you want to include in or exclude from the result. By default, all columns are selected. If you want to exclude some columns, clear the checkboxes next to these columns. To add or remove all columns to/from the output, click Select all columns or Unselect all columns on the document toolbar or table/view shortcut menu respectively.
In addition, you can sort columns in ascending or descending order by clicking Sort Ascending or Sort Descending on the document toolbar or the shortcut menu respectively.
At the bottom of the designer area, you can specify the number of rows to be retrieved and add a filtering condition to a specific table.
To set a limit for the rows in the result set and specify a filtering condition
1. In the Design view, select the table for which you want to filter the result set.
2. In the Fetch Limit field, enter the the number of rows to be displayed in the result set.
3. In the Where Condition field, specify the filtering condition as follows:
[enter a column name] [enter the comparison or logical operator for the condition] [enter a value]
Note
When saving a master-detail document, the values you specified in the Fetch Limit and Where Condition fields are kept as well.
After everything is set up, click Browse Data on the document toolbar or press F5 to view the result.
If you want to open the related tables on the Query Builder diagram, click Send to Query on the document toolbar.
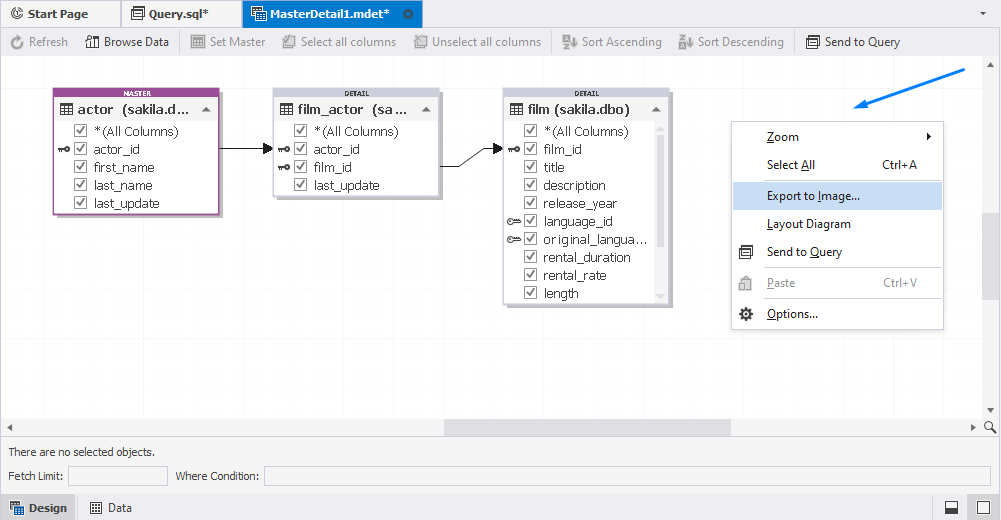
In the Design view, you can also perform the following actions by using the shortcut menu:
- Zoom in and out
- Export the related tables to the image
- Layout the diagram
- Send the related tables to the Query Builder diagram
- Set up page or print options. To do so, select Options.
Working with the Data view
After you click Browse Data, you are redirected to the Data view that displays the result.
In the Data view, the retrieved rows from the master table/view are displayed on the upper grid, and rows from the detail tables - on the lower grid. When navigating through the records of the master table/view, the detail tables/views show the corresponding data. If there are multiple detail tables/views, click + to view data of these detail tables/views.
For the master and detail tables/views, you can change the order of the records and apply a filtering condition. For more information about sorting and filtering data in parent and child tables/views, see Sorting and filtering data in Master-Detail Browser.
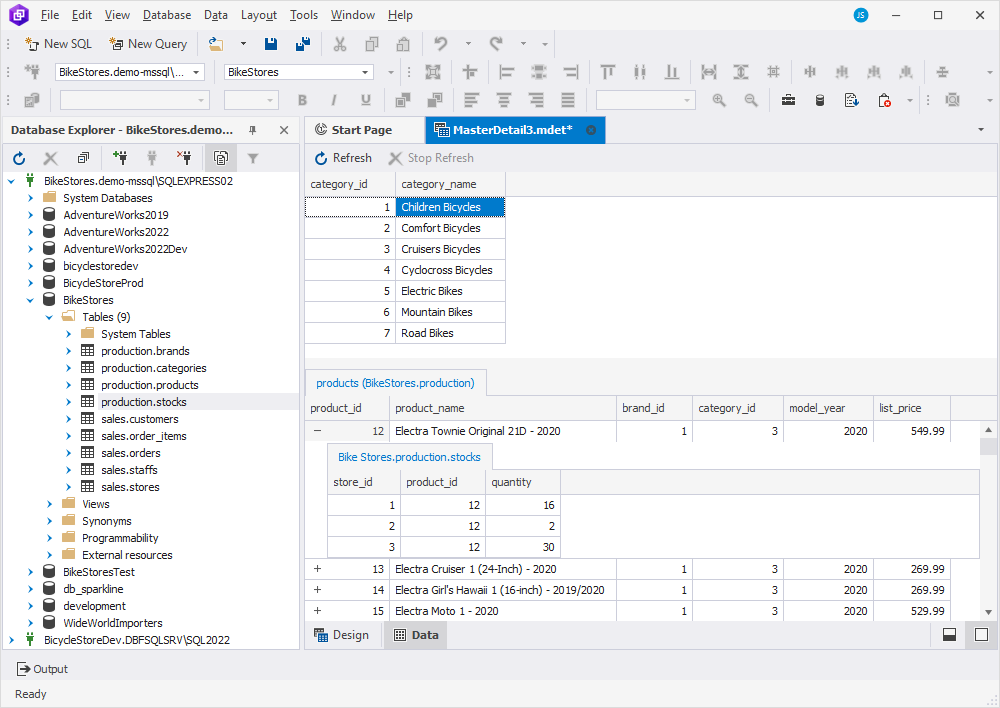
To refresh data, click Refresh. To stop refreshing, Stop Refresh.
If you double-click a cell either of the master or detail tables, the Data Viewer editor opens where you can edit, save, and manipulate data.
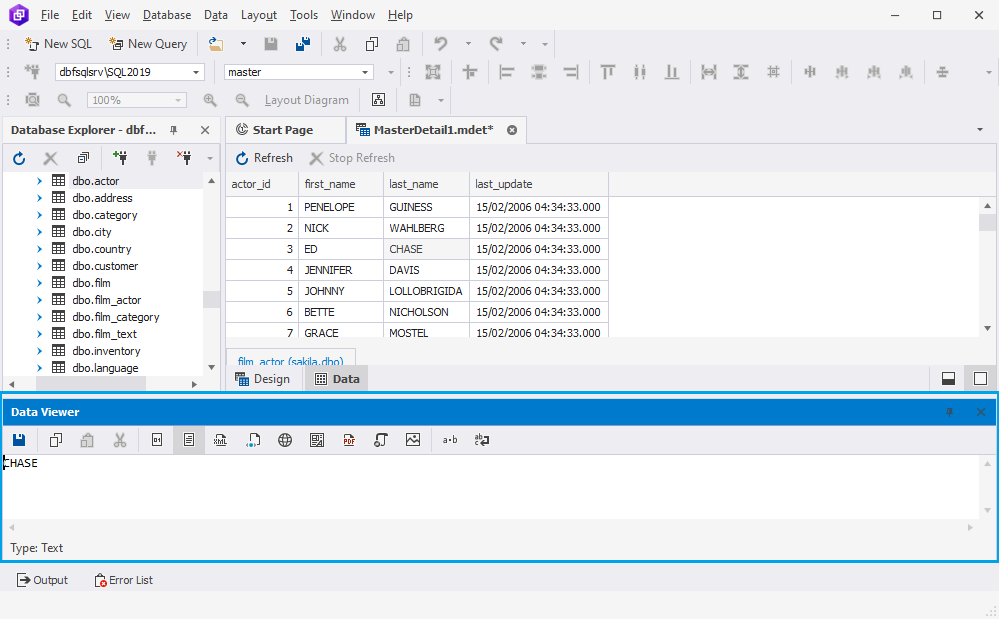
If you select the other cell, data in the Data Viewer editor will be automatically updated.
Set up page or print options
You can set up page and print options either for all documents you create or for a specific master-detail document you are working on.
To set up page and print options for a master-detail document you are working on
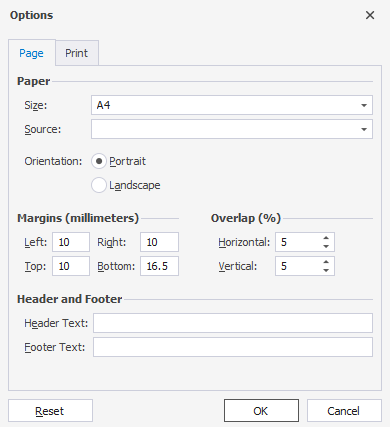
1. In the Design view of the master-detail document, right-click the view area and select Options.
2. In the Options dialog that opens, on the Page tab, set up page options, such as paper size, source, orientation, or margins. You can also enter the text such as a file name, the current date or time, page numbers or page count that you want to be displayed in the header or footer on each page.
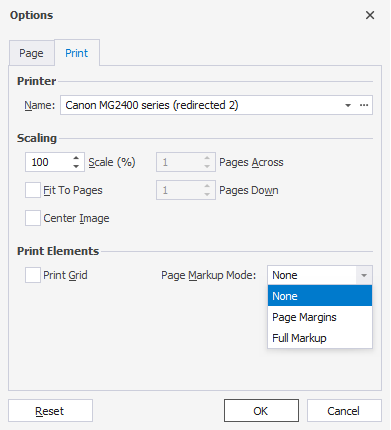
3. Switch to the Print tab and configure printing settings, such as scaling or page markup mode.
4. Click OK to apply changes.
Note
If you want to set up page and print options for all master-detail documents you create, navigate to the Tools main menu > Options > Master-Detail.