Configure Oracle Database Gateway for ODBC
After successfully installing the Oracle Database Gateway for ODBC, you can proceed to configure Oracle and the ODBC driver to use the ODBC connection.
To enable the Oracle Database Gateway for ODBC, you need to modify three configuration files: initsalesforce.ora, listener.ora, and tnsnames.ora.
Once these files are correctly configured, they allow communication between the Oracle Database Gateway for ODBC and the Oracle Database. Note that incorrect entries in these files may cause connectivity issues.
The steps for setting up the Oracle Database Gateway for ODBC and the ODBC driver include:
- Configure DSN
- Create the initialization file
- Edit the listener.ora file
- Edit the tnsnames.ora file
- Create database links
Configure DSN
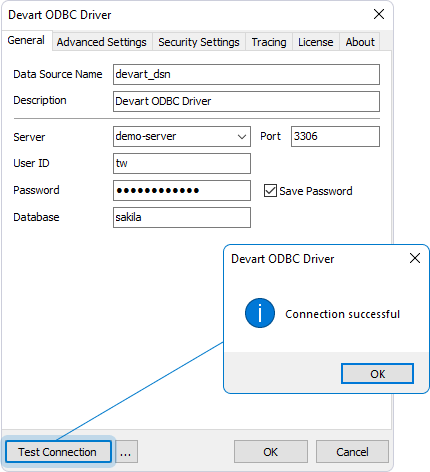
Before configuring Oracle, install the ODBC driver on the computer where the gateway is installed and add a system DSN. A system DSN enables the connection to the target database, such as Salesforce.
1. Open the ODBC Data Source Administrator.
Note
The bitness of the ODBC Data Source Administrator, whether 32-bit or 64-bit, must correspond to the bitness of the Oracle Database server installed on your computer.
2. On the System DSN tab, configure the DSN settings for ODBC Driver for Salesforce. For instructions, see Configure a Windows DSN for Salesforce.
Note
In the ODBC Data Source Administrator, it is obligatory to select System DSN, as User DSN is not supported by the application.
Once the preliminary DSN settings are complete and the ODBC connection is verified, you can configure the Oracle Database Gateway to use the connection.
Create the initialization file
Tip
Throughout this section, replace GATEWAY_HOME with the path to your gateway home directory. For example, C:\app\tg\test\product\19.0.0\tghome_1. For more information, see Install Oracle Database Gateway for ODBC.
1. Navigate to the GATEWAY_HOME\hs\admin folder, then make a copy of the template gateway initialization file, initdg4odbc.ora.
2. Rename the copied initdg4odbc.ora file to initsalesforce.ora, as this name corresponds to your target database.
Note
The name must be prefixed with
init; for example,initsalesforce.ora. You need a separate initialization file for each ODBC data source.
3. Open the initsalesforce.ora file in any text editor, then change the value of the HS_FDS_CONNECT_INFO parameter to the name of the system DSN you created earlier, such as salesforce. For instructions, see Configure DSN.
After editing, the content of the resulting initsalesforce.ora file should look as follows:
HS_FDS_CONNECT_INFO = salesforce
Edit the listener.ora file
The Oracle listener monitors incoming requests from the Oracle database. To enable the listener to receive requests from the Oracle Database Gateway for ODBC, you need to update the listener.ora configuration file.
1. Navigate to the GATEWAY_HOME\NETWORK\ADMIN folder, then open the listener.ora file.
2. Change the value of the HOST parameter to localhost.
HOST=localhost
3. Copy and paste the following code into the top section of the listener.ora file. This configuration enables the gateway to respond to connection requests.
SID_LIST_LISTENER=
   (SID_LIST=
      (SID_DESC=
         (SID_NAME=test_driver)
         (ORACLE_HOME=D:\ORACLE_HOME)
         (PROGRAM=dg4odbc)
      )
   )
4. Change the setting of ORACLE_HOME to your GATEWAY_HOME directory; for example: ORACLE_HOME=C:\app\tg\test\product\19.0.0\tghome_1.
5. Change the setting of SID_NAME to salesforce; for example: SID_NAME=salesforce.
Note
The
SID_NAMEvalue for the gateway must match theSID_NAMEin both thelistener.oraandtnsnames.orafiles; for example:SID_NAME=salesforce.
Edit the tnsnames.ora file
Next, modify the tnsnames.ora file. You need to add a connect descriptor for the gateway, specifying the Oracle server to connect to and the corresponding SID value.
Tip
In this section, replace ORACLE_HOME with the path to the home directory, where the Oracle Database server is installed. For example, C:\app\oracle\product\19.0.0\dbhome1.
1. Navigate to ORACLE_HOME\NETWORK\ADMIN, then open the tnsnames.ora file.
2. Copy and paste the following code at the bottom of the tnsnames.ora file.
salesforce=
  (DESCRIPTION=
    (ADDRESS=(PROTOCOL=TCP)(HOST=localhost)(PORT=1521))
    (CONNECT_DATA= (SID=salesforce))
    (HS=OK)
  )
Note
The
SIDvalue must match the one specified in thelistener.ora; for example,SID=salesforce.
Restart the listener
You need to restart the Oracle listener to apply the new changes in the listener.ora file. To do this, run the following commands in the Command Prompt.
1. Open Command Prompt as an administrator.
2. Stop the listener.
lsnrctl stop
3. Start the listener.
lsnrctl start
Create database links
To access an ODBC data source through the Oracle Database Gateway for ODBC, create a database link using SQL Plus or dbForge Studio for Oracle.
Create a database link with SQL Plus
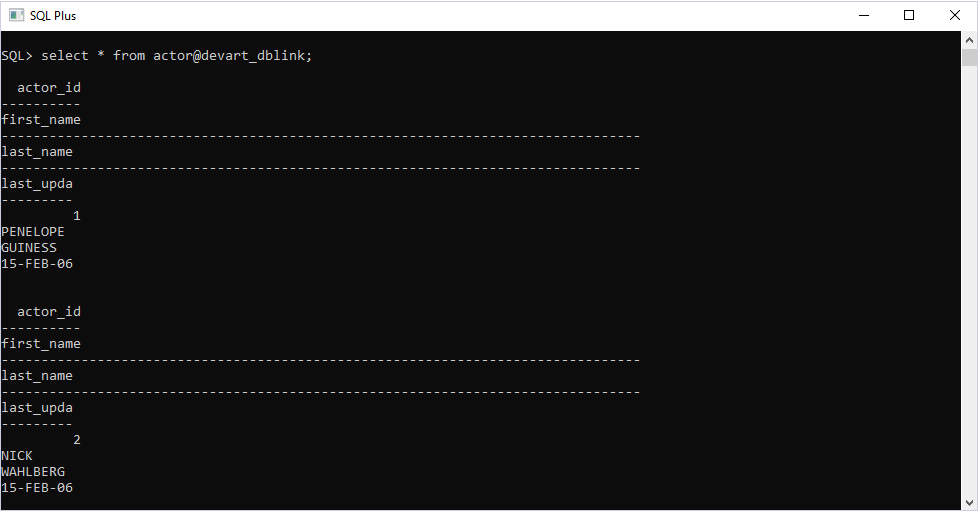
1. Open SQL Plus, then connect to your local database server.
2. Run the following command to create a database link:
CREATE PUBLIC DATABASE LINK <your_dblink_name> USING 'salesforce';
3. Run a SQL statement to retrieve data from a table. For example:
SELECT <ColumnName> FROM <TableName>@<your_dblink_name>;
This query retrieves data from Salesforce.
Create a database link with dbForge Studio for Oracle
1. Open dbForge Studio for Oracle, then connect to your local database server.
2. Click New SQL, then enter the following statement:
CREATE PUBLIC DATABASE LINK <your_dblink_name> USING 'salesforce';
3. Select SQL > Execute to run the statement.
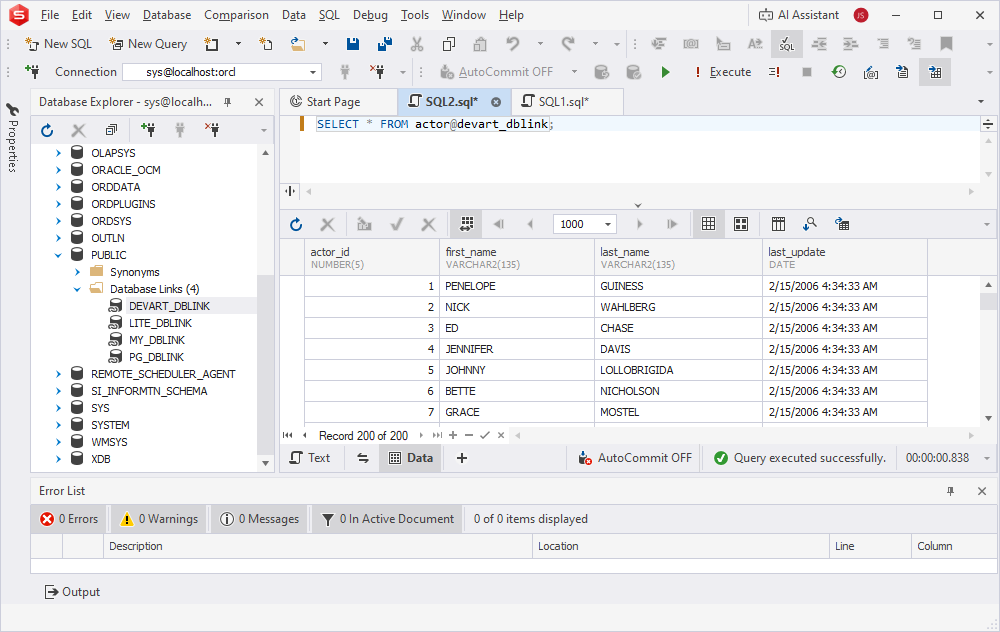
Once the database link is created in dbForge Studio for Oracle, you can view it under Database Links in the Database Explorer pane.
4. Run a query against the ODBC data source. You can specify the table columns to retrieve from the table, for example:
SELECT <ColumnName> FROM <TableName>@<your_dblink_name>;
The retrieved data is displayed in dbForge Studio for Oracle.