Configure a Windows DSN for Salesforce
A Data Source Name (DSN) stores connection details, such as server information and user credentials, for establishing a connection to Salesforce.
Create a DSN
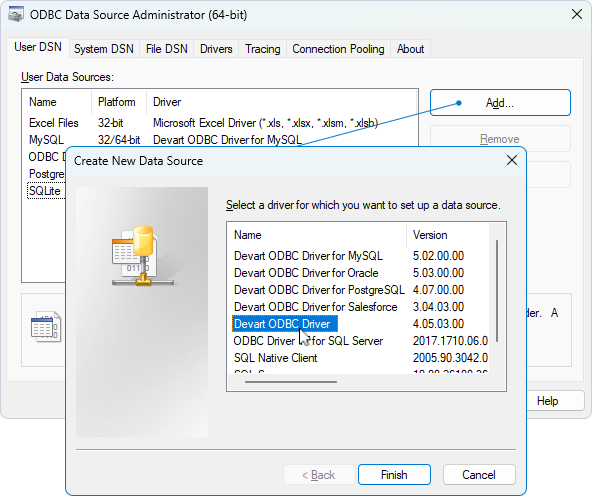
1. Type ODBC Data Sources into the Windows search box and select the version of the ODBC Data Source Administrator that matches the bitness of your third-party application (32-bit or 64-bit).
2. Select the appropriate tab to choose the DSN type:
-
User DSN – Specific to a user account and only accessible to that user.
-
System DSN – Accessible by all users on the computer and used by system-wide applications.
-
File DSN – Portable and system-independent, a File DSN stores connection details in a file, allowing it to be shared across different systems.
Note
Most applications support all DSN types, but some may require a specific one.
3. Click Add.
4. In the Create New Data Source dialog that opens, select Devart ODBC Driver for Salesforce, then click Finish.
5. In the Devart ODBC Driver for Salesforce Configuration dialog that opens, give a name to your data source and provide the connection details.
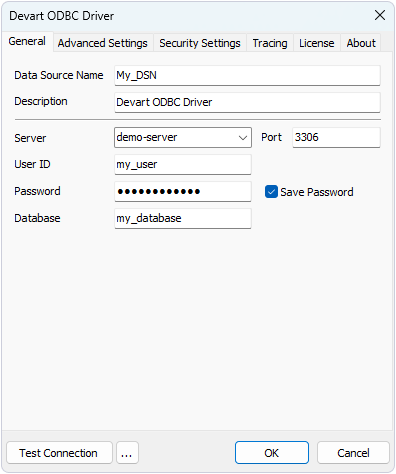
The default authentication method is OAuth 2.0. To use basic authentication, select User ID and Password from the Authentication menu.
6. Optional: Click Test Connection to verify that the connection details are valid.
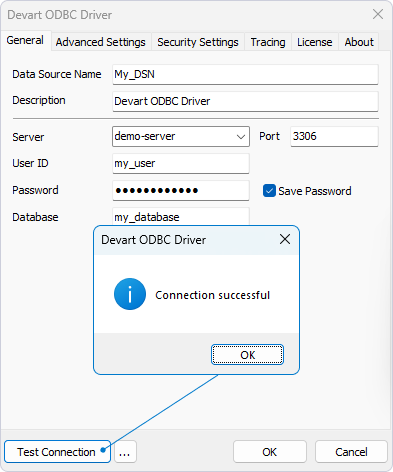
7. Click OK to save the DSN settings.
Note
If you’re using Login and Password authentication when connecting to a data source and the password isn’t saved in the DSN, you’ll be prompted to enter it at runtime. If the password is saved in the DSN, or if you’re using OAuth 2.0 authentication, leave the User ID and Password fields empty.