Setting Up Data Comparison
From this topic you will learn all steps that can be taken during data comparison process and alternative ways for accomplishing routine comparison tasks.
-
To start comparing data, you need to open Data Comparison wizard. You can do this:
1.1. In the Fusion menu, point to Oracle, and then click New Data Comparison;
1.2. In Database Explorer, right-click a database, and select New Data Comparison from the shortcut menu.
-
In the Data Comparison wizard, select source and target connection from the dropdown list. Also you can create new connection by clicking New or modify existing ones by clicking Edit.
-
Select source and target databases in the grid to compare. To quickly find a required one, use the Filter field. To hide system schemas in the grid, select the corresponding check box. You can easily swap source and target databases by clicking the
 Swap button.
(To immediately compare the data, click the Compare button. To tune the comparison, click the Next button to move to other wizard pages).
Swap button.
(To immediately compare the data, click the Compare button. To tune the comparison, click the Next button to move to other wizard pages).Note
This is available only in the Standard editon.
- Click Next.
-
On the Options page, you can customize your comparison by checking required options. Here you can generate a file with command line arguments. Click Next.
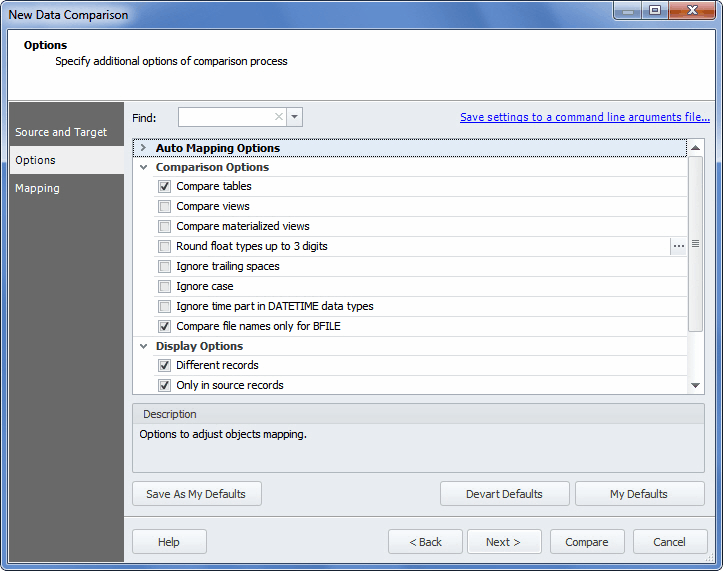
Note
The whole list of options is available only in the Standard edition.
-
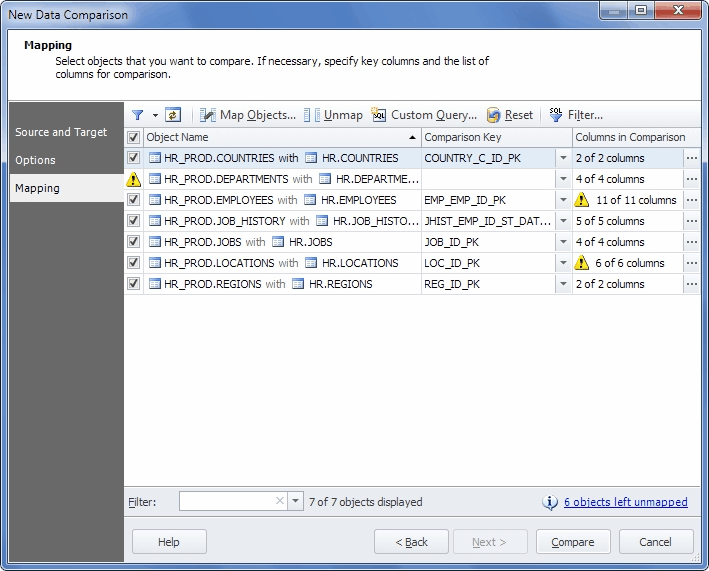
On the Mapping page, you can customize mapping. Use this page if you want to change the default mapping or map tables with different names or columns with different names and structure. Read more about mapping in the Object Mapping section. Click Compare.
-
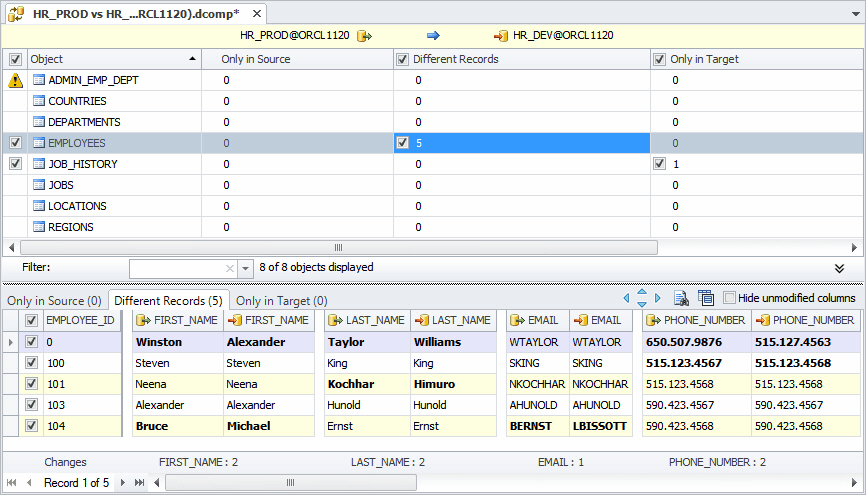
After comparison process is completed, you can view results in the Data Comparison document.