Entity Framework Core supports Database-First approach via the Scaffold-DbContext command of Package Manager Console. This command scaffolds a DbContext and entity type classes for a specified database.
This tutorial shows how to create a simple console application, powered by Entity Framework Core and using Database-First approach. In less than 10 minutes you will have a ready-to-use data access layer for your business objects.
This tutorial is for .NET Core. For Full .NET Framework see Entity Framework Core Database-First Tutorial for Full .NET Framework.
Requirements
This tutorial requires the following:
- Visual Studio 2017 or higher (for Entity Framework Core 3.1 - Visual Studio 2019)
- If you want to use Entity Framework Core 2.2 - .NET Core SDK 2.2. For Entity Framework Core 3.1 - .NET Core SDK 3.0
- Latest version of NuGet Package Manager
- Latest version of Windows PowerShell
We will use the tables, we have created in the Creating Database Objects and Inserting Data Into Tables tutorials. In this tutorial it is assumed that you already have the database objects created. If you haven't created them yet, please do it before starting this tutorial.
Creating New Project
- Open Visual Studio
- On the File menu point to New and then click Project. The New Project dialog box will open.
- On the left side of the dialog box select Installed -> Visual C# -> .NET Core.
- On the right side of the dialog box select Console App.
- Enter the project name and location if necessary.
- Click OK. A new project will be created.
Installing NuGet Packages
After we created a new project, we need to add the necessary NuGet packages to it.
Now let's install the necessary packages:
- On the Tools menu point to NuGet Package Manager and then click Package Manager Console.
- For Entity Framework Core 5, run the following command in the Package Manager Console:
Install-Package Microsoft.EntityFrameworkCore.Tools
- For Entity Framework Core 3.1, run the following command in the Package Manager Console:
Install-Package Microsoft.EntityFrameworkCore.Tools -Version 3.1.10
For Entity Framework Core 2.2, run the following command in the Package Manager Console:
Install-Package Microsoft.EntityFrameworkCore.Tools -Version 2.2.6
For Entity Framework Core 1.1, the command will be the following:
Install-Package Microsoft.EntityFrameworkCore.Tools -Version 1.1.5 - For Entity Framework Core 3.1 or 5.0 run the following command in the Package Manager Console:
Install-Package Devart.Data.PostgreSql.EFCore
For Entity Framework Core 1.1, the command will be the following:
Install-Package Devart.Data.PostgreSql.EFCore.Design
Note that the dotConnect for PostgreSQL assembly for Entity Framework Core 2.2 is not available via NuGet packages anymore. It is installed by the dotConnect for PostgreSQL installer to the \Entity\EFCore2\netstandard2.0\ subfolder of the dotConnect for PostgreSQL installation folder.
Creating a Model From the Database
For Entity Framework Core, creating a model from the database is as easy as entering the Scaffold-DbContext command with a connection string and a provider as parameters. For example, you can run the following command in the Package Manager Console:
Scaffold-DbContext "host=server;database=test;user id=postgres;" Devart.Data.PostgreSql.Entity.EFCore
If you have other tables in your database, you may use additional parameters - -Schemas and -Tables - to filter the list of schemas and/or tables that are added to the model. For example, you can use the following command:
Scaffold-DbContext "host=server;database=test;user id=postgres;" Devart.Data.PostgreSql.Entity.EFCore -Tables dept,emp
As the result, a context class and entity classes are generated, based on the Dept and Emp tables.
Entity classes are just simple classes, representing the data, stored in the database. The context represents a session with the database and allows you to query and save instances of the entity classes.
Here we may comment or delete the warning about the connection string. After this we can start using our model to retrieve and modify data.
Using Model
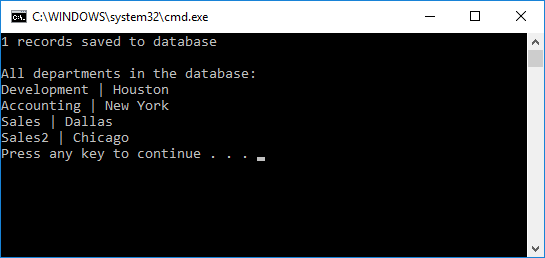
Open your Program.cs file and paste the following code instead of the Main function:
After this, on the Debug menu, click Run without debugging.
