General Information
dotConnect for PostgreSQL leverages managing DataSets in your applications with special wizard that takes you through the process of creation and tuning of client-side data handling. This topic provides information on functions of every screen of dotConnect for PostgreSQL DataSet Wizard and how to use all its features. For detailed information on data access basics please refer to article "Using DataSets in ADO.NET" in MSDN.
There are three ways to invoke the wizard:
- In the Tools menu, point to PostgreSQL, and then click DataSet Wizard.
- In DataSet Manager, click Add New DataSet or Configure DataSet with Wizard button.
- Right-click a PgSqlDataAdapter component and then click DataSet Wizard.
The wizard allows you to keep resultsets structure as DataAdapters, TableAdapters or just metadata information. The behavior of Wizard slightly differs depending on whether you had some Windows Forms or Web Forms Designer focused when the DataSet Wizard was invoked. If there was a designer focused, its name is shown in Wizard caption, otherwise the caption contains name of the project, and DataAdapters can't be used as data source for database objects.
This feature is available in Developer Edition only.
Step 1: Choose DataSet
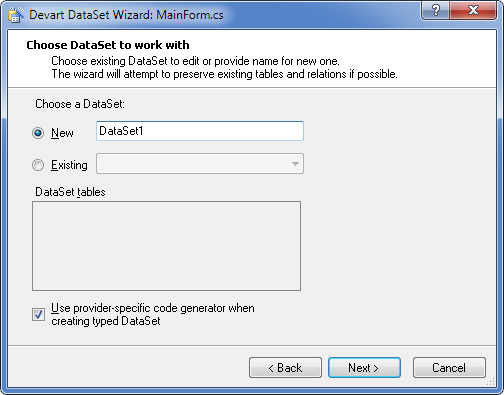
This dialog allows you to choose whether you want to create new DataSet or modify existing one. When you select existing DataSet its tables are shown in the list. The wizard attempts to preserve existing tables and relations whenever possible.
Step 2: Choose Database Objects
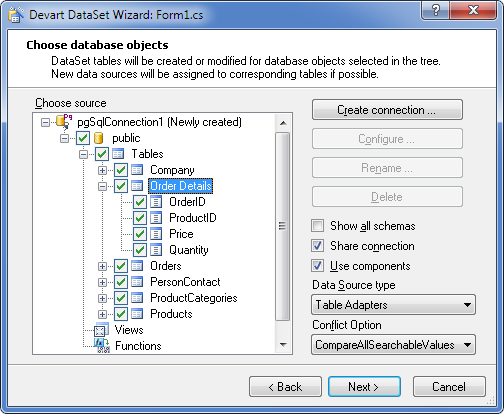
This dialog allows you to select database objects you want to include in the dataset. You can mark tables, views, individual columns, stored procedures and stored functions. Selecting a table automatically selects all its columns. Database relations are not listed in the database hierarchy because you will be able to setup it later.
Note that when you click Next, every selected stored procedure is executed with default parameters' values. Do not select stored procedures that may damage your data.
The buttons to the right of database tree allow you to create, configure, rename and remove connections. The Show all databases check box controls whether you can see all databases on the server or only those specified as default for connections. If a connection has no default database, all databases are visible regardless of this setting.
The Data Source type combo box to the right of the tree allows you to choose how to store all selected database objects. For example, if you choose Data Adapter, new DataAdapter components will be created for all checked tables, views and stored procedures. Similarly, if you choose Command Schema, DataSet will contain structure (metadata) of all selected objects. Every database object can be adjusted on the next step regardless of this setting.
The screenshot above demonstrates that you can select whole tables as well as individual columns.
The Conflict Option combo box allows you to generate update commands with the specified ConflictOption mode.
Step 3: Setup Individual Tables
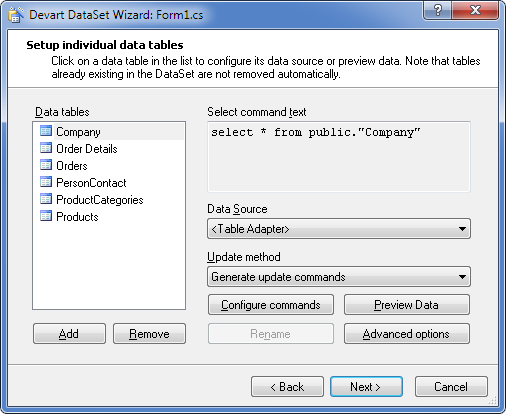
The DataSet Wizard allows you to configure data source for every individual table. Click on the list at the left part of screen to view its settings. The buttons Configure, Preview Data and Rename perform corresponding actions on underlying data source, while buttons Add and Remove control list of tables.
This page also allows you to map a table name. To do it, select a table from the list and press F2. As presented on the screenshot, tables dept and emp are renamed to departments and employees. These new names will be used on consecutive pages of DataSet Wizard.
The Data source combobox allows you to choose what way every database object will be represented: Table Adapter, Data Adapter or Command schema (this means that only description of data structure is stored in the DataSet). Choose required data source type and then click Configure button to set it up. You can also use existing DataAdapters on the form.
Another combobox, Update method, allows you to enable or disable generating of update commands. It has following options:
- Do not generate update commands. You typically choose this option when adapter will be used only to read data from a data source, not write it back. Or you wish to fill in the commands yourself after the wizard has finished. This is the only choice available for stored procedures and Command schemas.
- Generate update commands. When you choose Data Adapter as data source, DataSet Wizard generates SQL statements for the adapter's UpdateCommand, InsertCommand, and DeleteCommand properties. For Table Adapters the Wizard also generates Fill() and GetData() methods.
- Use CommandBuilder. This option is available for Data Adapters only, if a Form Designer was focused when Wizard started. Wizard will create a CommandBuilder object, setup it and place it on the form.
Step 4: Choose Column Mappings
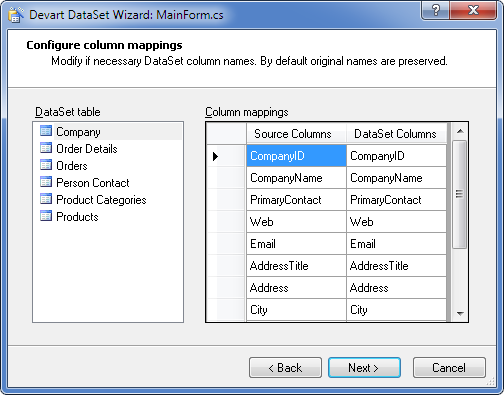
This step allows you to adjust column name mapping. Click on a table in the left list to reveal its columns. Note that column names must be unique. You can't add or delete columns on this step.
You can map a table name in step 3.
Step 5: Specify Database Relations
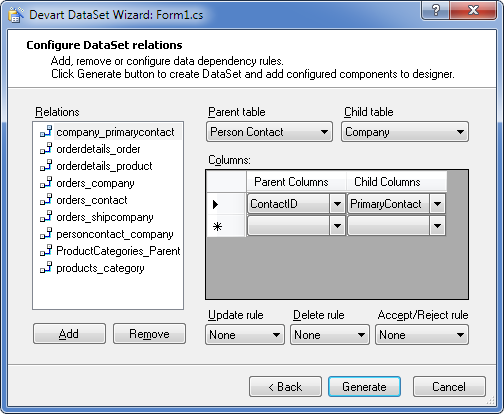
The last step in generating dataset allows you to add, delete or edit database relation. The Wizard automatically imports existing data constraints from database. You can setup a relationship that maintains information about corresponding records in two data tables in a dataset. Creating a relationship also creates a foreign-key constraint that is added to the child table. A foreign-key constraint can implement referential integrity between parent and child tables.
- Update rule. Specifies how changes are made to child records when a parent record is updated to maintain referential integrity.
- Delete rule. Specifies how changes are made to child records when a parent record is deleted to maintain referential integrity.
- Accept/Reject rule. Specifies how changes are made to child records when changes to a parent record are accepted or rejected to maintain referential integrity. For this option the only allowed values are None and Cascade.
The following values are available:
- None. No action taken on related rows. This is the default value.
- Cascade. Delete or update related rows.
- SetDefault. Set values in related rows to some default value.
- SetNull. Set values in related rows to DBNull.
The screenshot contains example of a relation in single table. According to the layout, if a record is deleted, all MGR fields that once pointed to the record become NULL.
Step 6: Choose DataSet placement
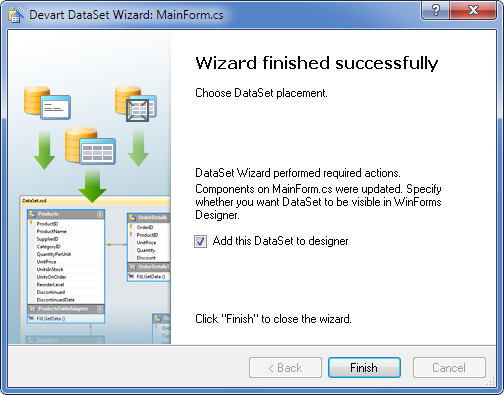
After dataset is generated you can let Wizard create an instance of generated class. It will be visible in Forms Designer. This option is not available if no designer was focused when wizard started.
Keep in mind that DataSet Wizard creates additional .xse file with some settings. This file is required for the project to build correctly.
See Also
Developing Database Applications with dotConnect for PostgreSQL