
dotConnect for Dynamics 365 Documentation
This tutorial describes how to connect to Dynamics 365.
In this walkthrough:
In order to connect to Dynamics 365 you need to have the corresponding account, dotConnect for Dynamics 365 installed and IDE running. You also have to know the required connection parameters described below.
Note that if you do not use design-time (specifically, if you do not place designer DynamicsConnection component from the Toolbox to the form), you have to embed licensing information manually. This is described in topic Licensing.
To establish a connection to server you have to provide the required connection parameters to dotConnect for Dynamics 365. This information is used by DynamicsConnection component to connect to Dynamics 365. The parameters are represented as a connection string. You can compose the connection string manually or have dotConnect for Dynamics 365 construct it for you.
The following connection string parameters are required:
The easiest way to get the required parameters is to create a connection at design-time or in the Server Explorer, by performing the procedure described below. Actually, in this case the Client Id and Client Secret are not required, because dotConnect for Dynamics 365 implicitly uses its own values for them. These values are obtained from an embedded OAuth app, registered by Devart. However, it's still recommended to register your own application and using your own values.
If you cannot obtain the refresh token using design time or Server Explorer, registering your own OAuth application is required. You can find more information in the Microsoft documentation
Design time creation
The following assumes that you have IDE running, and you are currently focused on a form designer.
Run time creation
You can also configure a connection at run-time by setting its ConnectionString property (note that you have to add references to Devart.Data.Dynamics.dll, Devart.Data.SqlShim.dll, and Devart.Data.dll assemblies):
dynamicsConnection1.ConnectionString = "Server=https://your_company.crm4.dynamics.com;User [email protected];Password=A123456789;"; |
dynamicsConnection1.ConnectionString = "Server=https://your_company.crm4.dynamics.com;User [email protected];Password=A123456789;" |
Using connection string builder
If you decide to setup connection by assigning values to several properties, consider using DynamicsConnectionStringBuilder class. It has all of the possible connection settings exposed as properties, thus allowing to customize the connection at full extent.
DynamicsConnectionStringBuilder connectionStringBuilder = new DynamicsConnectionStringBuilder(); connectionStringBuilder.Server = "https://your_company.crm4.dynamics.com"; connectionStringBuilder.UserId = "[email protected]"; connectionStringBuilder.Password = "mypassword"; DynamicsConnection myConnection = new DynamicsConnection(connectionStringBuilder.ConnectionString); |
Dim connectionStringBuilder As DynamicsConnectionStringBuilder = New DynamicsConnectionStringBuilder connectionStringBuilder.Server = "https://your_company.crm4.dynamics.com" connectionStringBuilder.UserId = "[email protected]" connectionStringBuilder.Password = "mypassword" Dim myConnection As DynamicsConnection = New DynamicsConnection(connectionStringBuilder.ConnectionString) |
Notice that in this example we used DynamicsConnection constructor that accepts connection string as argument.
For the information on arguments allowed in the connection string, refer to the description of the DynamicsConnection.ConnectionString property.
Creating Connection in Server Explorer
To create a Server Explorer connection:
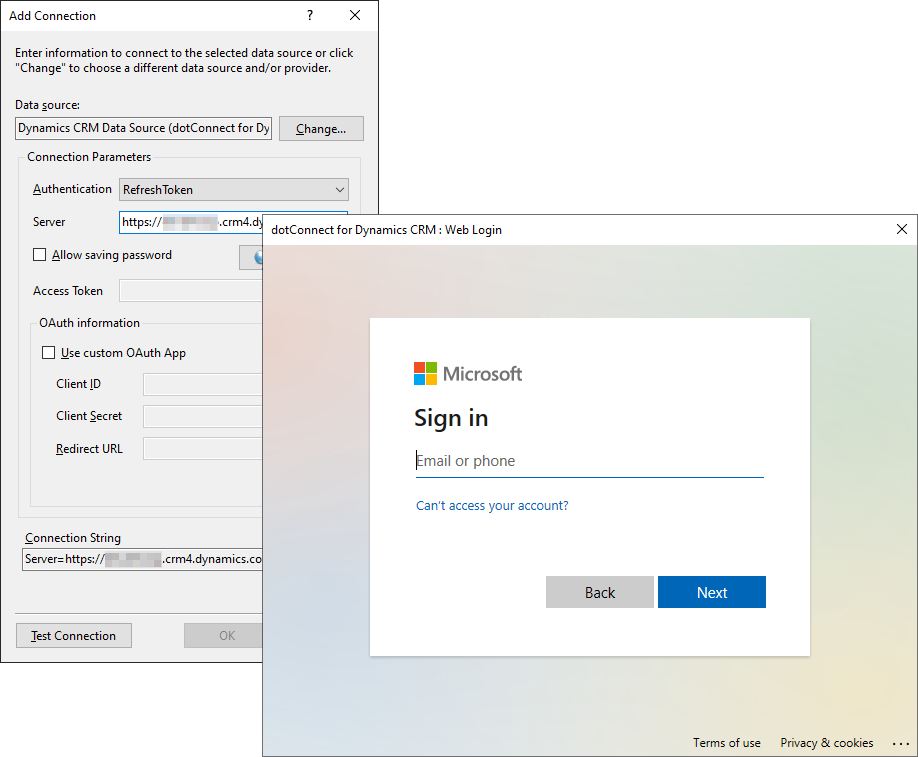
After this you can browse Dynamics 365 objects in Server Explorer.
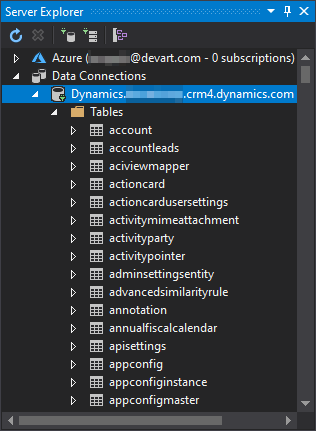
Opening a connection is as simple as that:
Of course, the myConnection1 object must have a valid connection string assigned earlier. When you call Open, dotConnect for Dynamics 365 tries to find the host and connect to Dynamics 365. If any problem occurs it raises an exception with brief explanation on what is wrong. If no problem is encountered dotConnect for Dynamics 365 tries to establish the connection during ConnectionTimeout interval. Finally, when connection is established, the Open method returns and State property is changed to Open.
In design time you can connect to server in few steps:
Or you can simply change the State property to Open in the Properties window to establish a connection using the current connection string.
To close a connection call its Close method, or set its State property to Closed.
The following example summarizes aforementioned information and shows how to create, setup, open, use and then close the connection.
DynamicsConnection myConn = new DynamicsConnection(); myConn.ConnectionString = "Server=https://your_company.crm4.dynamics.com;User [email protected];Password=A123456789;"; myConn.Open(); MessageBox.Show(myConn.ServerVersion); myConn.Close(); |
Dim myConn As DynamicsConnection = New DynamicsConnection() myConn.ConnectionString = "Server=https://your_company.crm4.dynamics.com;User [email protected];Password=A123456789;" myConn.Open() MessageBox.Show(myConn.ServerVersion) myConn.Close() |
The sample code connects to server, shows its version and then closes the connection. This actually is a rare usage, because in real applications connections are used by other objects like DynamicsCommand, DynamicsDataReader and others. For more information on this please see corresponding tutorials or reference information.
You can modify connection by changing properties of DynamicsConnection object. Keep in mind that while some of the properties can be altered freely, most of them close connection when new value is assigned.