Populating a Database
To populate the database with meaningful data, follow the steps:
-
On the Data Generator toolbar, click
 Populate data to the target database.
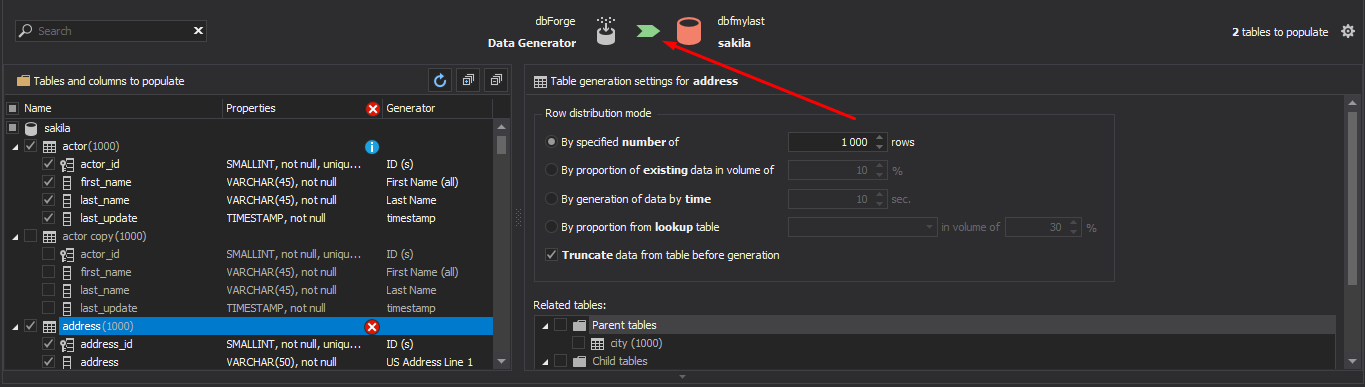
-
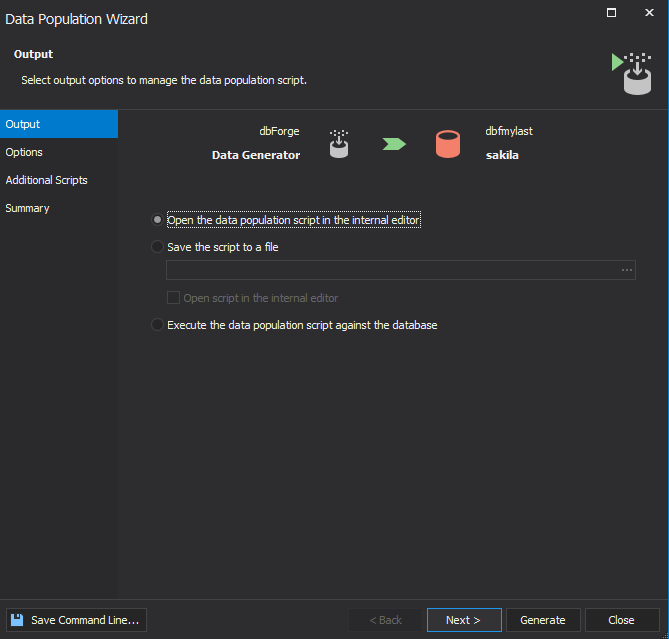
In the Data Population Wizard that opens, select one of the following options and then click Next:
- Open data population script in the internal editor to add custom data to the database
- Save the script to a file
- Execute the data population script against the database
-
In the Options tab, configure the synchronization options and click Next.
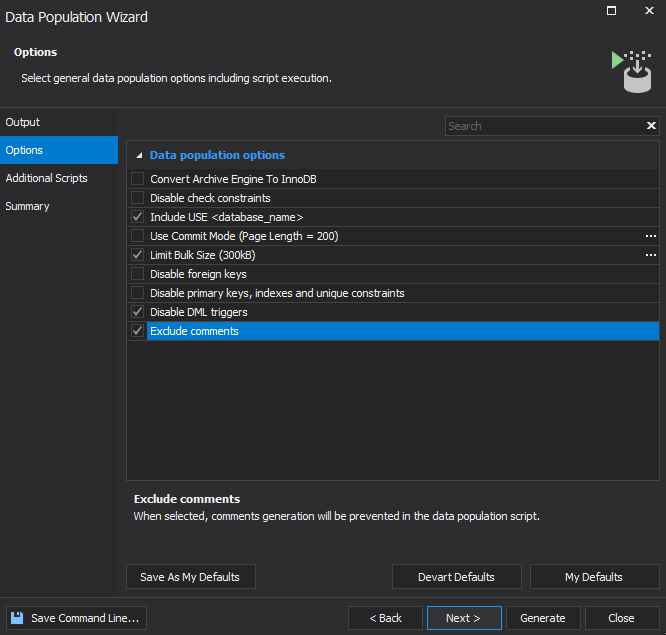
Optional: You can customize data population settings and make them to be your default settings.
To save your default settings, click Save as My Defaults to make the settings you’ve selected to be the default ones.
To restore the default settings from Devart for the current wizard, click Devart Defaults. Keep in mind that these settings will not become default until you click Save as My Defaults.
To restore your default settings for the current wizard you saved for the last time, click My Defaults.
-
Optional: In the Additional Scripts tab, add scripts to be executed before and/or after data population and click Next.
-
In the Summary tab, view the data population actions and warnings.
When you are setting up the tables and columns that you want to populate, SQL Data Generator displays warning and error messages to inform you when there may be a problem with the data generation.
-
To complete data generation, click Generate.