Generate a comparison report
dbForge Data Compare for MySQL allows you to schedule or automate the generation of the comparison report. You can use a task scheduler tool to schedule the report generation.
In our example, we consider the following case: Suppose that you are a Business Analyst. Every Monday you receive backups of MySQL databases which you need to deploy and then compare their data. In addition, you need to compare only tables and views that have film in their names. The comparison should result in the report in a .csv file format.
For demo purposes, we will compare two MySQL databases: sakila and sakila_test. The generation of the comparison report will include the following steps:
1. Create a .bat file to deploy the databases.
3. Create a .bat file to compare the databases.
4. Generate the report in a .csv file format.
5. Schedule the comparison report generation
Create a .bat file to deploy the databases
1. On the toolbar, click Execute Large Script.
2. In the Execute Script Wizard that opens, specify a path to a .sql file that creates a database.
3. Click Save Command Line to generate a .bat file for the database deployment.
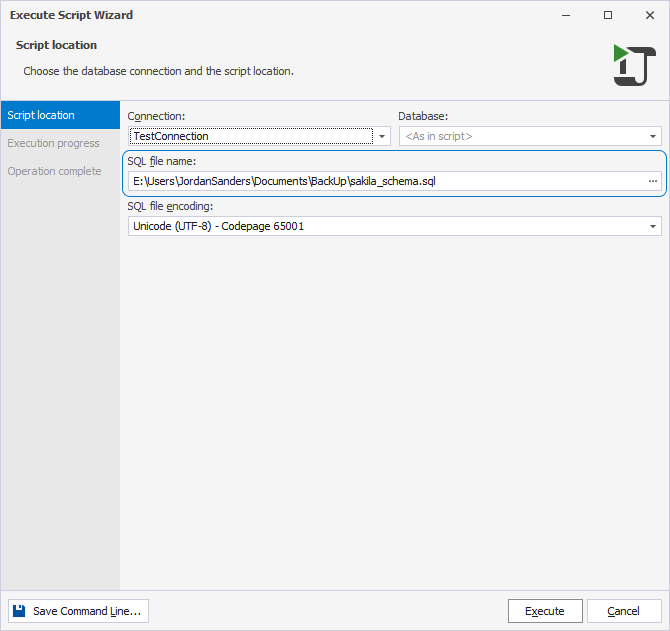
4. Optional: In the Command line execution file settings dialog, click Validate to verify that the settings to manage the .bat file are valid.
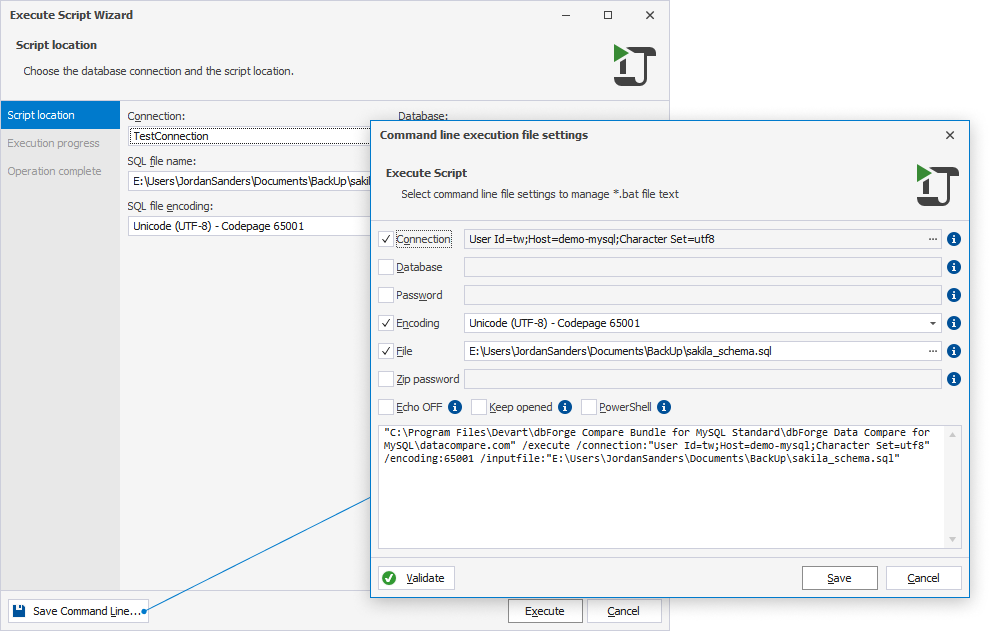
5. To save the file settings, click Save. In the Save As dialog, specify the file location, enter the file name, and then click Save.
Repeat the same steps to create .bat files to deploy data and schema for the database to be compared.
Deploy the databases
After you have created the .bat files, you need to run them to deploy the databases. Then, you can compare the databases using the .bat file created with the help of dbForge Data Compare for MySQL.
Create a .bat file to compare the databases
1. On the toolbar, click New Data Comparison.
2. In the New Data Comparison > Source and Target wizard that opens, do the following:
- For Source and Target, select Database as a type.
- For Connection, specify the server on which you have deployed the databases.
- For Database, select the databases for comparison.
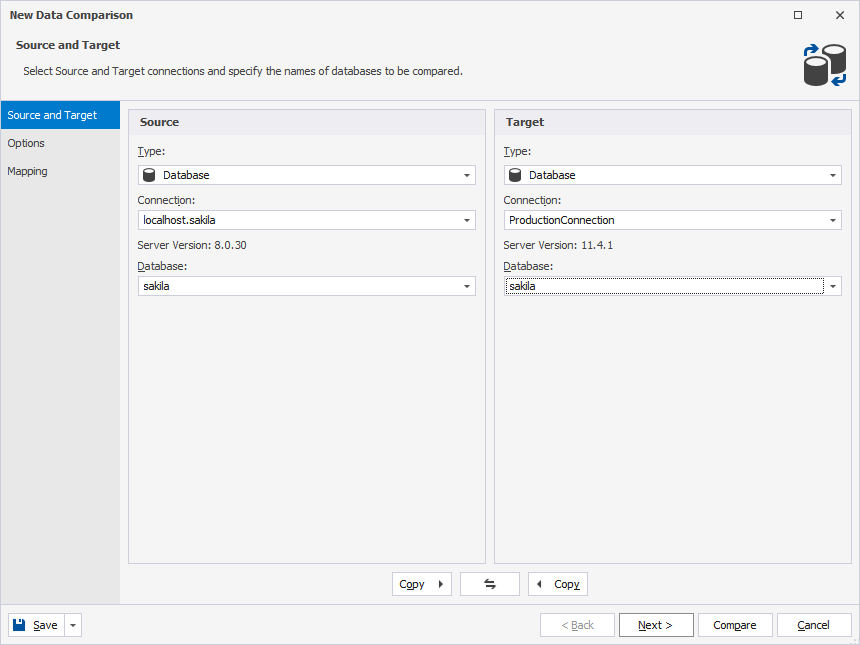
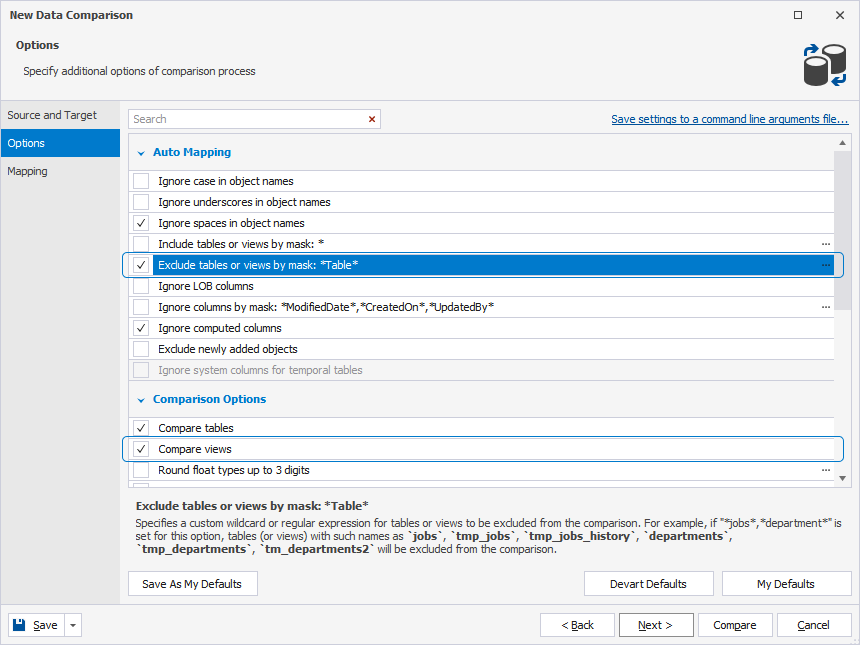
3. On the Options page, select the following checkboxes:
- In the Comparison Options section: Compare views.
- In the Auto Mapping section: Include tables or views by mask:. To filter tables and views whose names include film, add the film mask. To do that, click
 More options. In the Edit Mask pop-up window that opens, type the table name and then click OK.
4. Click Save Command Line to open the wizard for report generation.
5. In the Command line execution file settings wizard that opens, select the Report checkbox and do the following:
- For Report, click
 More options and set a path to the folder into which the report will be generated.
 - For Report Format, select the .csv format from the dropdown list.
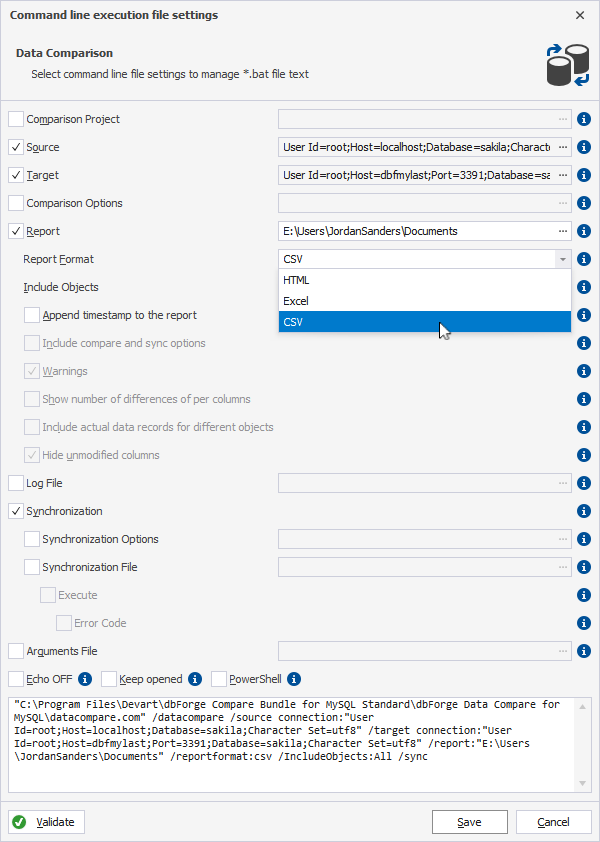
6. To save the .bat file, click Save. In the Save As dialog, specify the file location, enter the file name, and then click Save.
Generate the report in a .csv file format
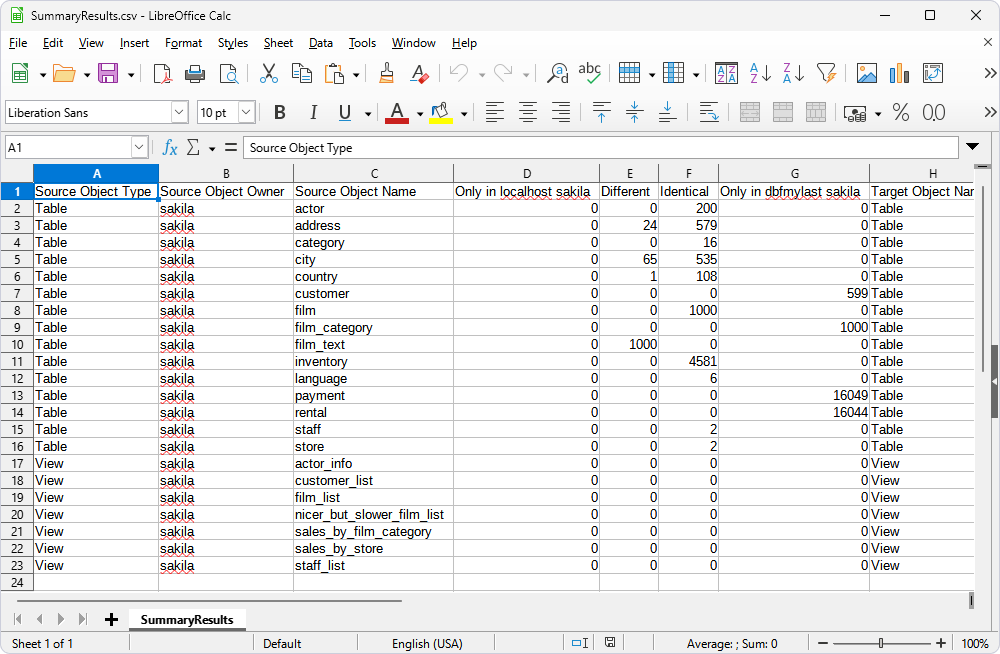
After the .bat file has been created, we can execute it to generate the comparison report in a .csv file format. To open the report, navigate to the folder that stores the report. Data Compare for MySQL generates a separate CSV file for each selected table or view, as well as creates a SummaryResults file.
Schedule the comparison report generation
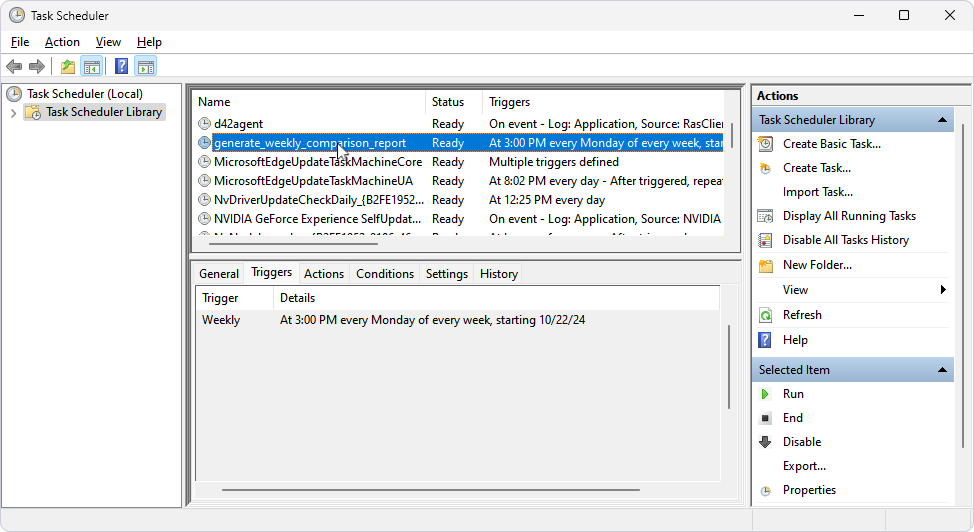
We can automate the process of the comparison report generation with the help of Windows Task Scheduler and schedule the report generation at a specific period of time. To do that, perform the following steps:
1.Open Task Scheduler.
2. In the Task Scheduler > Actions pane, click Create Basic Task to create a scheduled task.
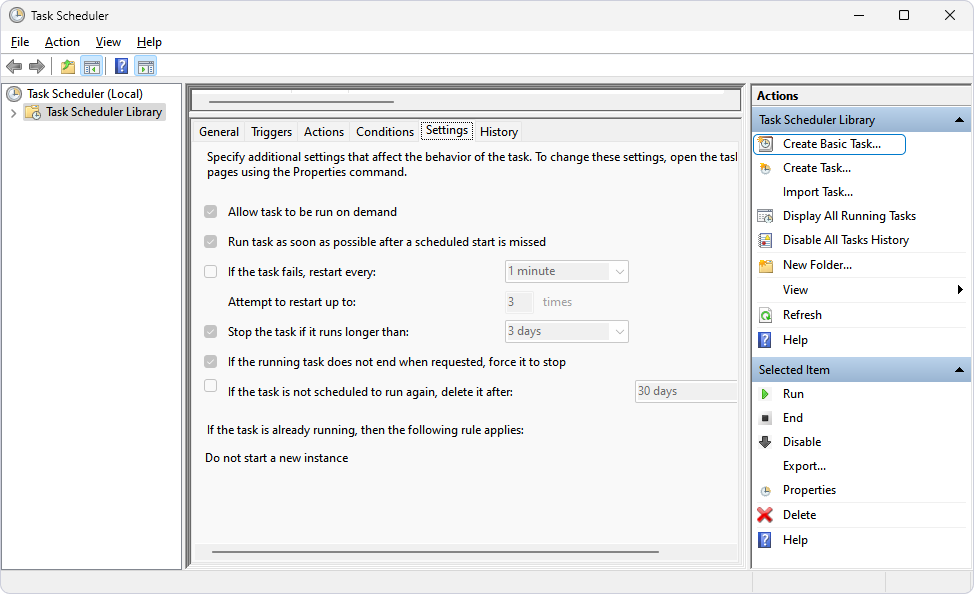
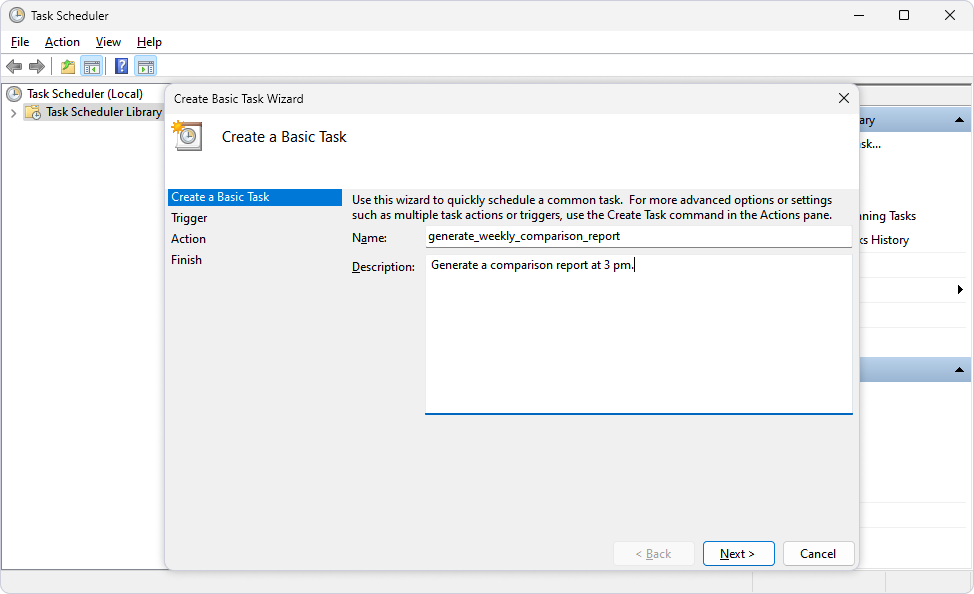
3. In the Create Basic Task Wizard dialog that opens, specify the name and optional description of the task and then click Next.
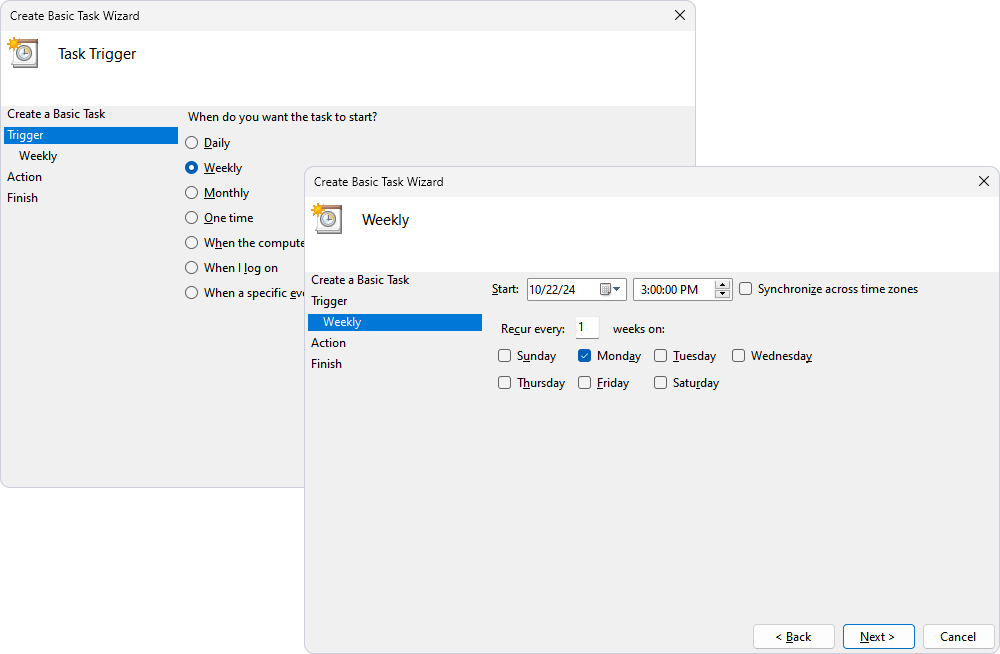
4. On the Trigger page, select Weekly and then click Next.
5. On the Weekly page, set time to start the task and then click Next.
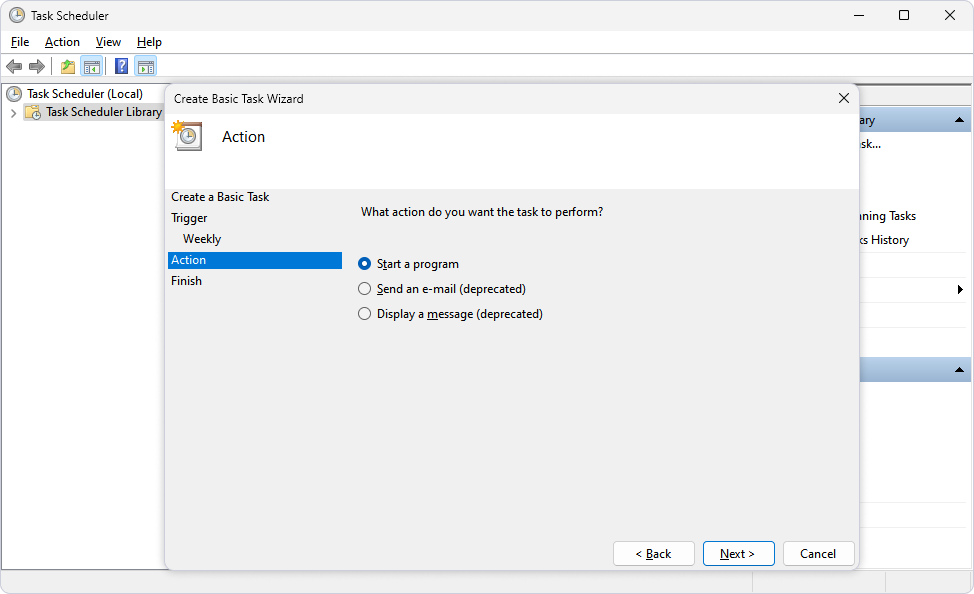
6. On the Action page, click Start a program to schedule a program to start automatically and then click Next.
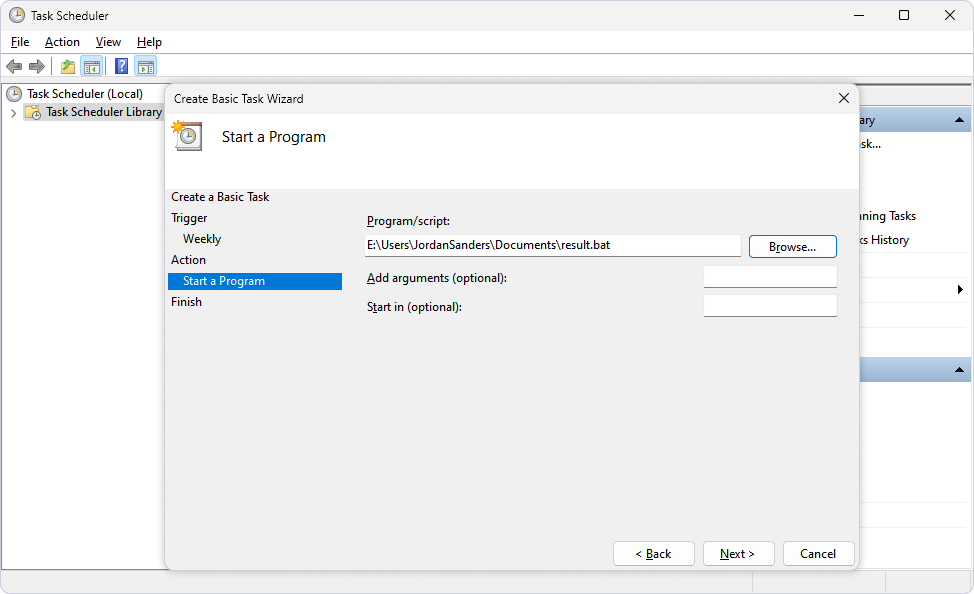
7. On the Start a Program page, click Browse to select the .bat file you have created in the Data Comparison Wizard and then click Next.
There are optional fields that you can set:
- Add arguments: Specify the arguments to run the task with specific instructions.
- Start in: Specify the folder in which the program will start.
8. On the Finish tab, verify the settings and click Finish.
The task will be displayed in the Active Tasks section.
