Schedule database synchronization
You can schedule or automate a comparison or synchronization with the help of Data Compare, a Task Scheduler tool, or a PowerShell script.
The scheduling of database synchronization includes the following steps:
- Create a .bat file via dbForge Data Compare
- Create a synchronization task using the Windows Task Scheduler
Create a .bat file via Data Compare
First, you need to create a file with the .bat extension for comparing or synchronizing the databases.
1. On the standard toolbar, click New Data Comparison. The New Data Comparison Wizard window will open.
2. On the Source and Target tab, select the source and target connections and databases for comparison and click Next.
3. On the Options tab, select the options for comparison and then click Next.
For more information about options, refer to Configure comparison options.
4. Optional: on the Mapping tab, verify the objects to be compared or change the mapping of tables and columns, and then click Compare to run the comparison process.
Note
By default, Data Compare automatically maps tables and views that have the same name in the source and target data sources. For more information about mapping settings, see Select tables and views.
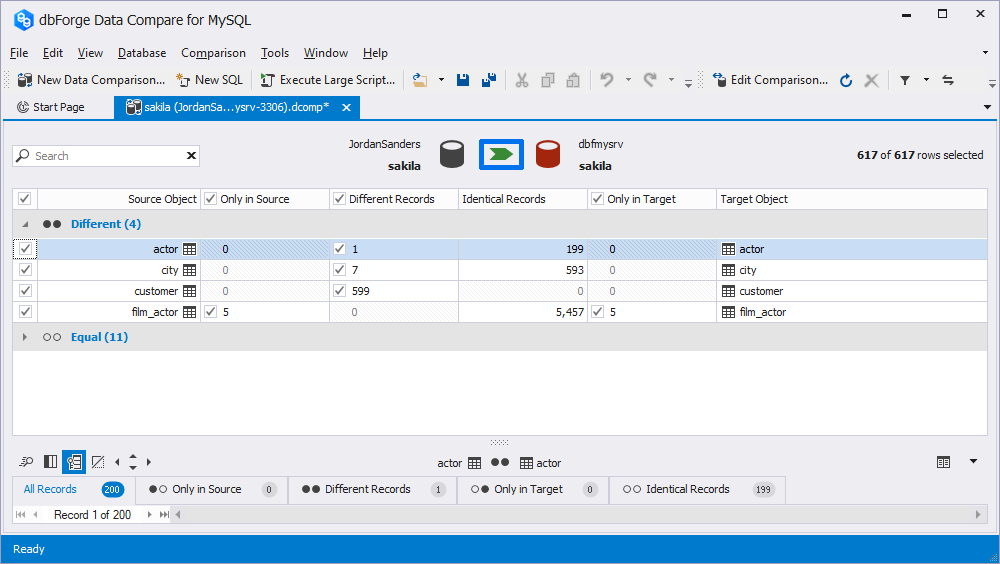
5. In the Data Compare window, select the objects you want to synchronize and click Synchronize data to the target database:
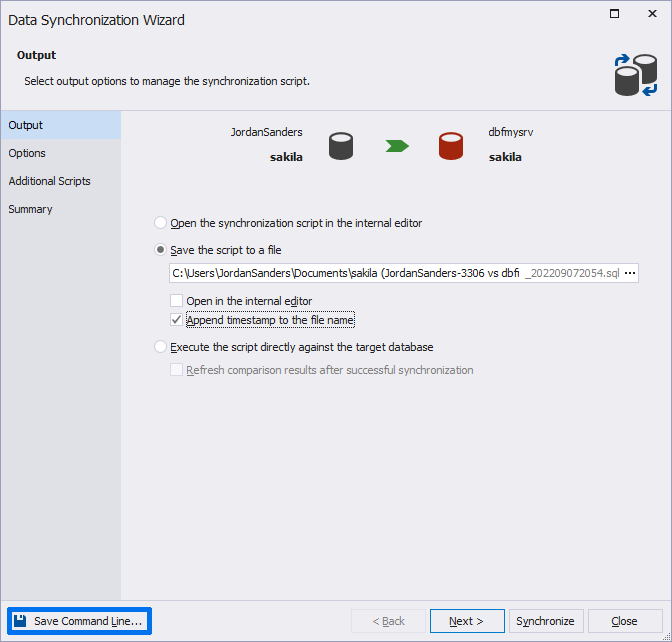
6. In the Data Synchronization Wizard window, set the synchronization options and then click Save Command Line.
7. In the Command line execution file settings window, verify and configure the settings to manage *.bat file text.
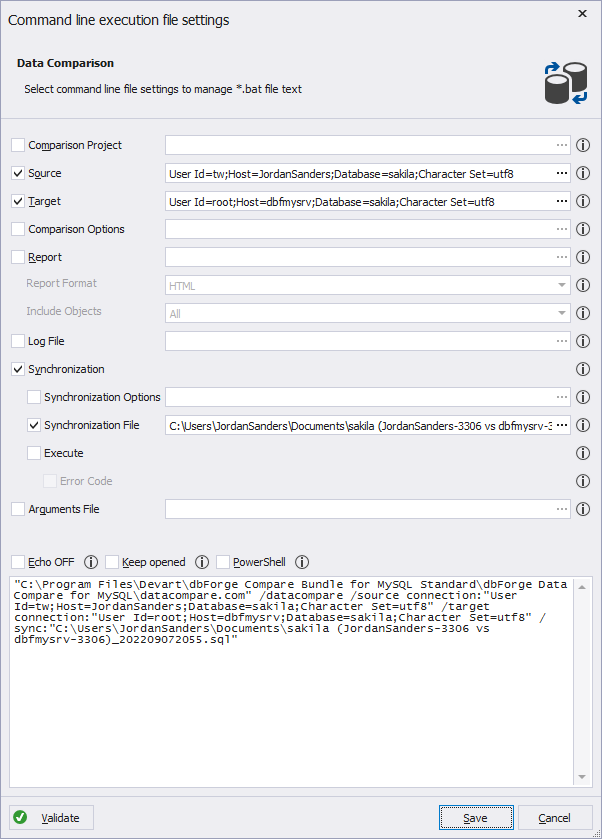
Command-line file settings
| Name | Default State | Description |
|---|---|---|
| Source | Yes | Specify the source options: a server, a connection, a backup, and a scripts folder. |
| Target | Yes | Specify the target options: a server, a connection, a backup, and a scripts folder. |
| Comparison Project | No | Load command-line settings from the previously created comparison project file with the .dcomp extension. |
| Comparison Options | No | Set options to manage the comparison process. |
| Synchronization | Yes | Start database synchronization. If you specify an output file, only the synchronization script will be generated. |
| Report | No | Generate a data comparison report file. |
| Report Format | No | Specify the format of the file comparison report: HTML, Excel, and CSV. If not specified, the format of the file comparison report takes the exension of the report file. |
| Log File | No | Generate a comparison log file in the specified directory. |
| Synchronization Options | No | Set options to manage the synchronization script. |
| Synchronization File | Yes | Specify a path to the database synchronization script file. |
| Execute | No | Execute the file received in the result of the previous commands execution. |
| Error Code | No | Enable the processing of error levels. |
| Arguments File | No | Specify a command-line arguments file. If you select a path to the arguments file, a separate command-line file will be generated. |
| Echo OFF | No | Disable echoing all commands in the batch file. All the text in the batch file is enclosed in the @Echo OFF … @Echo ON command. |
| Keep opened | No | Set a pause command at the end of the batch file text. The command window will be opened. |
| PowerShell | No | Generate the & symbol at the beginning of the batch file text. It’s required for the batch file to be compatible with PowerShell. |
8. Optional: to verify the command-line settings, click Validate.
9. To save the script as a *.bat file, click Save.
Create a synchronization task
After you generate the batch file for database synchronization, create the synchronization task using the Windows Task Scheduler so that the computer can carry out the task automatically.
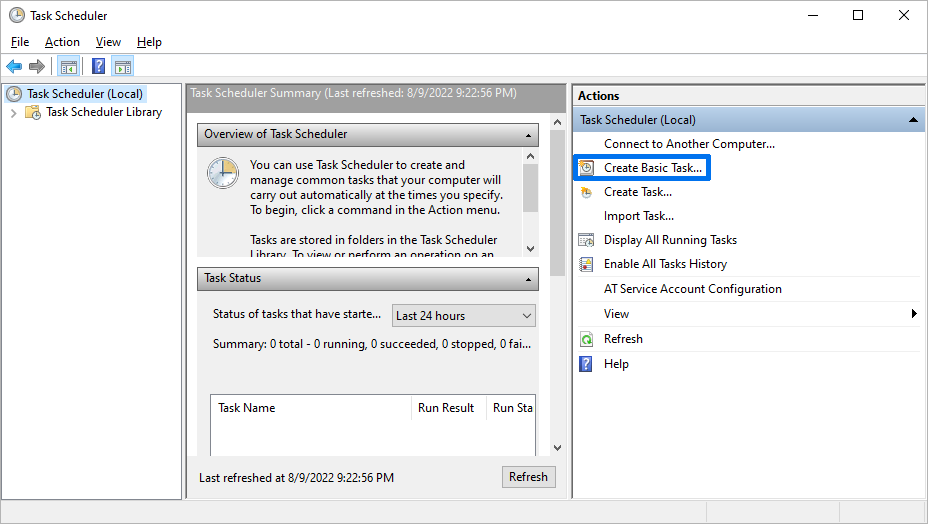
1. Open the Control Panel > Administrative Tools and select Task Scheduler.
2. In the Task Scheduler window, navigate to the Actions pane and click Create Basic Task to create a scheduled task.
Note
For quick access to the Task Scheduler, just start typing task in the Windows 10 search bar. Once you see the Task Scheduler in the list, click it to open.
3. In the Create Basic Task Wizard window, specify the name and description of the task and click Next.
4. On the Task Trigger tab, choose when to launch the task and then click Next.
- Schedule based on the calendar: Daily, Weekly, Monthly, or One time. For this, specify the schedule you want to use.
- Schedule based on every day recurring events: When the computer starts or When I log on.
- Schedule based on specific events: When a particular event is logged. For this, specify the event log, source, and event ID using the drop-down lists.
5. On the Action tab, click Start a program to schedule a program, and then click Next.
6. On the Start a Program subtab, click Browse to select the .bat file you have created in the Data Synchronization Wizard and then click Next.
There are optional fields that you can set:
- Add arguments (optional): specify the arguments to run the task with specific instructions.
- Start in (optional): specify the folder in which the program will start.
7. On the Finish tab, verify the settings and click Finish.
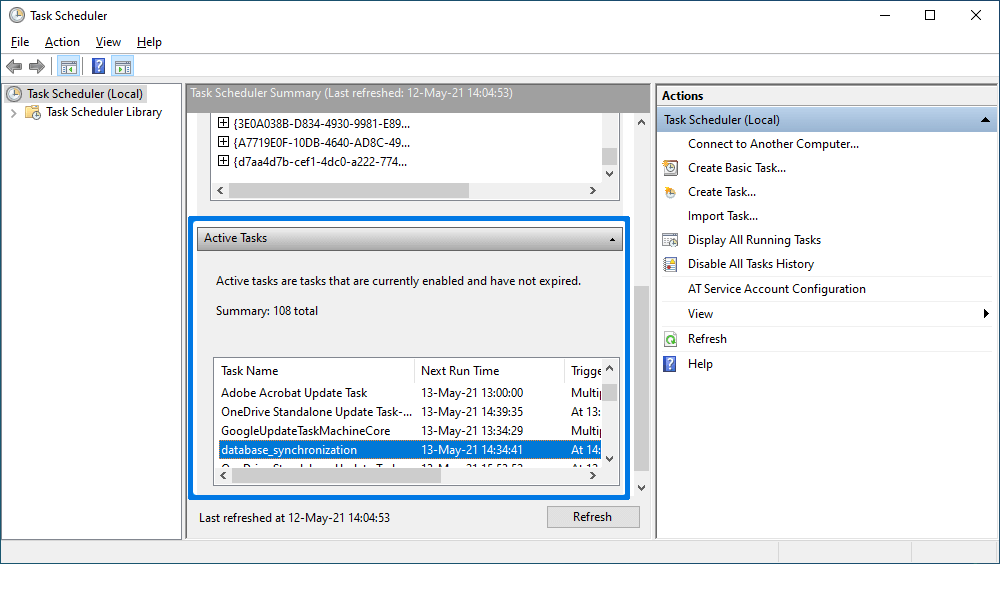
The task will be displayed in the Active Tasks section.