Export SQL Server data to ODBC
ODBC (Open Database Connectivity) is a standardized API that enables communication between applications and various database management systems (DBMS). It decouples the application from any specific DBMS by using an ODBC driver as a middleware layer, translating calls from the application into DBMS-specific queries.
The application interfaces with ODBC functions through a driver manager, which dynamically loads the appropriate driver, enabling the execution of queries on the target DBMS.
Note
The guide describes how to export data from SQL Server to PostgreSQL using the ODBC driver. For instructions on how to start working with Devart ODBC drivers, see Configure Devart ODBC drivers.
Prerequisites
-
Configure ODBC Driver for PostgreSQL and connect to the PostgreSQL database.
Export data to a PostgreSQL database
1. In Database Explorer, right-click the database you want to export, then select Tasks > Data Export.
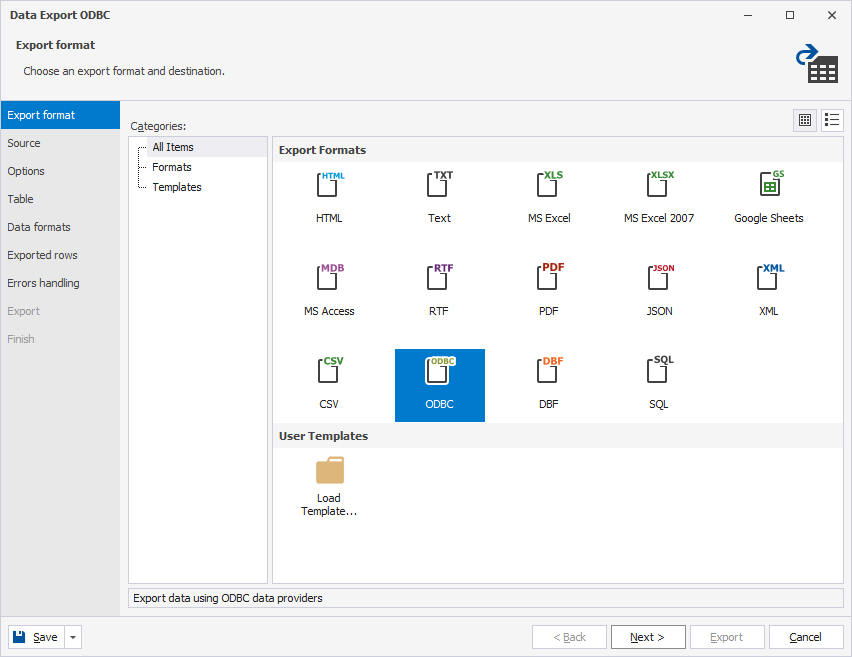
2. On the Export format page, select ODBC.
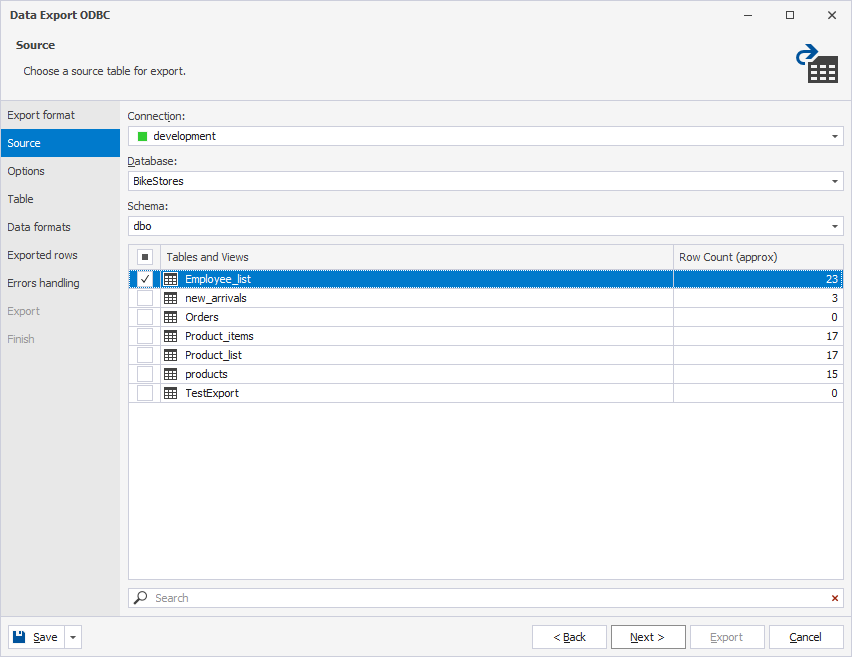
3. On the Source page, select the schema and table to export data from.
4. Specify the ODBC DSN:
-
If you have an existing DSN:
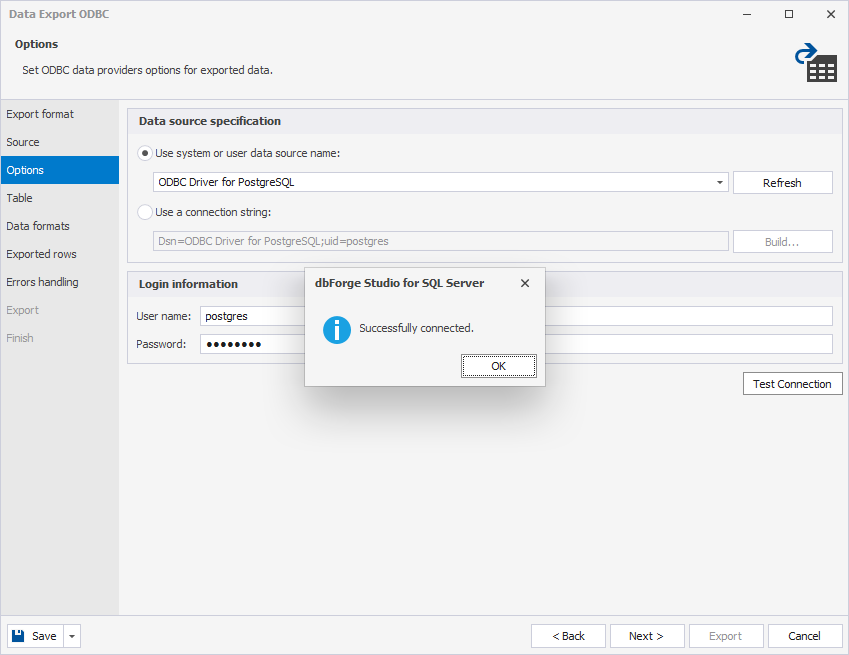
1. Under Data source specification, select Use system or user data source name.
2. Select ODBC Driver for PostgreSQL.
-
If you don’t have an existing DSN:
1. In Use a connection string, click Build.
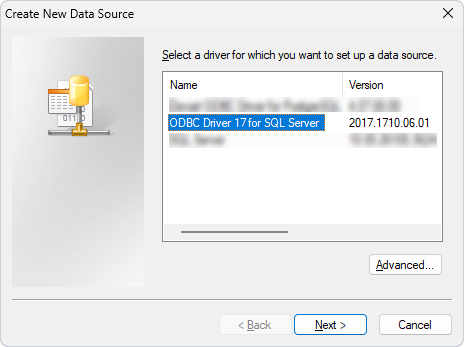
2. In the Select Data Source dialog, click New next to the DSN Name field.
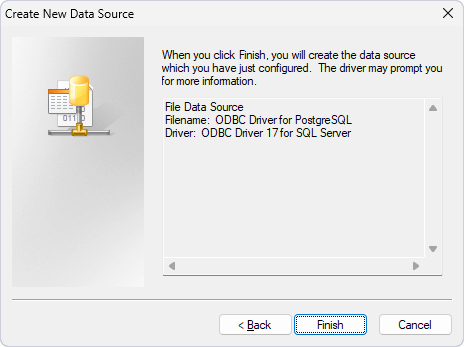
3. In the Create New Data Source dialog, select ODBC Driver for PostgreSQL, then click Next.
4. Specify the full path to the file to save the connection settings, then click Next.
5. Click Finish to create a data source.
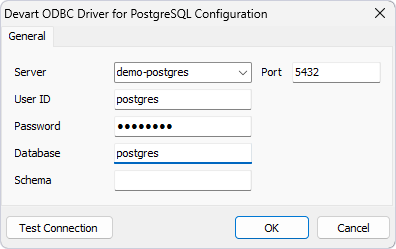
6. In the Devart ODBC Driver for PostgreSQL Configuration dialog, specify the PostgreSQL connection properties, then click OK.
7. Click OK to close the Select Data Source dialog.
5. Optional: If you didn’t save the login and password during the DSN configuration, under Login information, enter the database user credentials.
6. Optional: Click Test Connection to verify the connection settings.
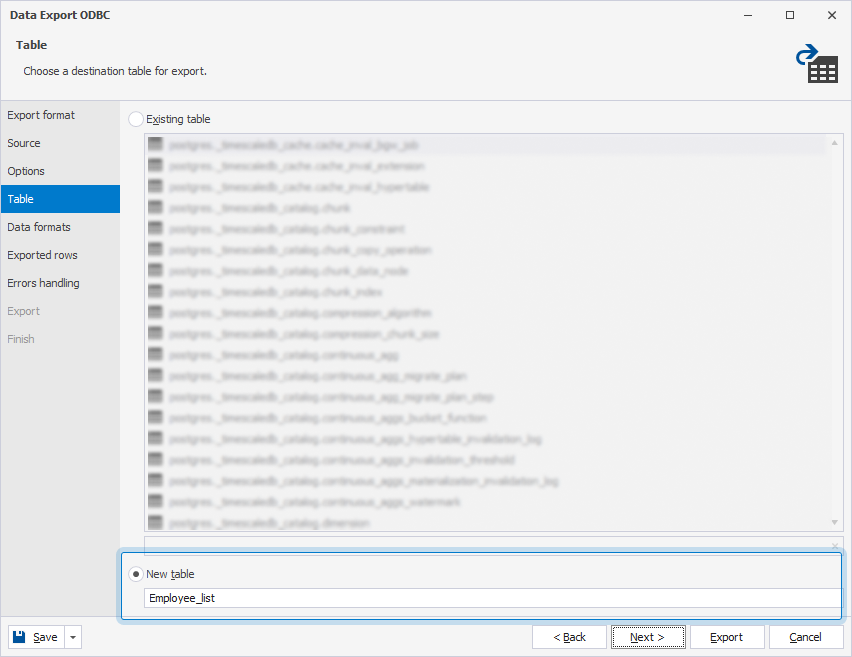
7. On the Table page, select the destination table for export—an existing table or a new one.
8. On the Data formats page, select the columns to export. If needed, review or edit their aliases and data types.
Note
By default, all columns are selected for export.
9. On the Exported rows page, specify the data range to be exported:
-
Export all rows – Exports the entire dataset.
-
Export only the selected rows – Export the rows currently selected in the data grid.
-
Export a specified range of rows – Specify the starting and ending row numbers to export a custom range.
Note
The Export only the selected rows option is available only when you export rows directly from the results grid in Data Editor.
10. On the Errors handling page, define how the export process should respond to errors and how they should be logged:
-
Abort at the first error – Stops the export immediately when the first error occurs.
-
Prompt a user for an action – Pauses the export and prompts the user to choose how to proceed when an error occurs.
-
Ignore all errors – Continues the export process, skipping any errors without interruption.
Tip
To reuse your export configuration, click Save Template in the bottom-left corner of the wizard.
11. Click Export.
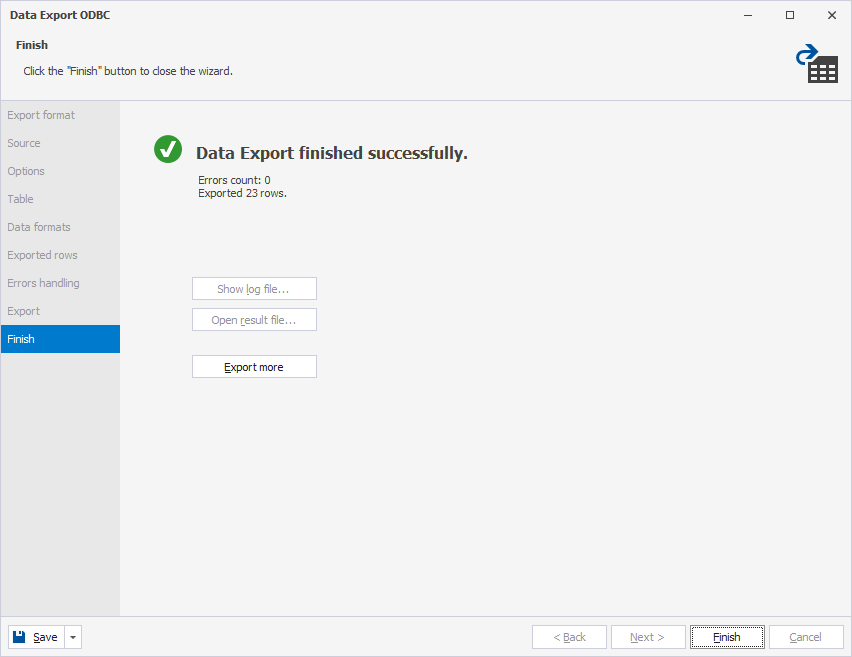
12. On the Finish page, either start another export operation or click Finish to close the wizard.