Create a compressed backup
A compressed backup is a full backup where the data is reduced in size to save storage space.
When you perform a backup, dbForge Studio compresses the data instead of copying files in their original size.
This topic describes how to create a compressed database backup in SQL Server using the Backup wizard of dbForge Studio for SQL Server and using T-SQL in the SQL Editor.
Limitations
- Backup compression is supported in the Enterprise, Standard, and Developer editions of SQL Server.
- Compression consumes additional CPU resources during both backup and restore operations.
- Compressed and uncompressed backups can’t exist in a single media set.
- Previous versions of SQL Server can’t read compressed backups.
- An encrypted backup can’t be further compressed.
Permissions
Creating a compressed backup doesn’t require any specific permissions; you must have the standard permissions required to back up the database.
- Database level:
BACKUP DATABASE,BACKUP LOG, or membership indb_backupoperatorordb_owner. - Server level: membership in
sysadmin.
Back up a database with compression
You can back up a database by using the Backup wizard or T-SQL.
Use the Backup wizard
To back up a database with compression:
1. Follow the steps described in Create a full database backup.
2. On the Backup options page, select Compress backup to create a compressed backup, regardless of the server-level default.
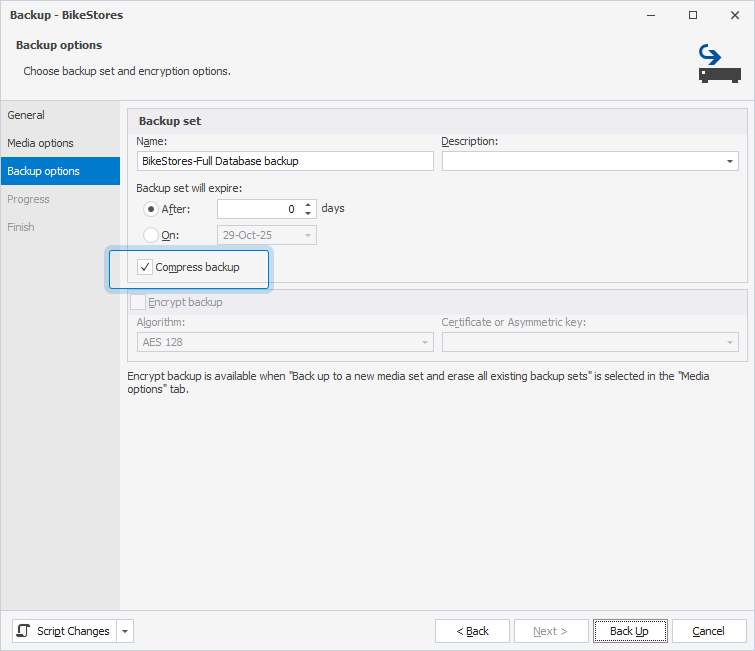
3. Click Back Up.
Use T-SQL
To back up a database with compression:
1. On the SQL toolbar, click New SQL.
2. Enter the following BACKUP DATABASE statement and replace the parameter values with your actual data:
BACKUP DATABASE <database_name>
TO DISK = 'C:\Program Files\Microsoft SQL Server\<instance_name>\MSSQL\Backup\file_name.bak'
WITH COMPRESSION,
     INIT,
     STATS [= percentage];
where:
<database_name>: The name of the database to back up.'C:\Program Files\Microsoft SQL Server\<instance_name>\MSSQL\Backup\file_name.bak': The full path to the backup file.= percentage– The percentage value indicating the progress of a backup operation. For example, when you specifySTATS = 10, SQL Server prints a message each time 10% of the backup completes. If you omit the percentage value, SQL Server defaults toSTATS = 10.
3. On the SQL toolbar, click Execute or press F5 to run the statement.
Backup wizard options
Media options
The table describes the options available on the Media options page of the Backup wizard.
Overwrite Media
| Name | Description |
|---|---|
| Back up to the existing media set | Adds your backup to an existing media set, which can contain multiple backup sets. |
| Append to the existing backup set | Adds the new backup to the end of the current backup set. Existing backups are preserved. |
| Overwrite all existing backup sets | Replaces the current contents of the media set with new data. All previous backups on this set will be lost. |
| Check media set name and backup set expiration (checkbox) | Verifies the name and the expiration date of the backup sets. |
| Back up to a new media set and erase all existing backup sets | Creates a new media set, removing all existing backup sets on the media. |
| Media set name and Media set description | Specifies the name and description for the current media set. |
Reliability
| Name | Description |
|---|---|
| Verify backup when finished | Verifies the backup to ensure it can be read and restored correctly. |
| Perform checksum before writing to media | Adds a checksum for each page to detect corruption during the write operation. |
| Continue on error | Continues a backup operation if an error is encountered. |
Backup options
The table describes the options available on the Backup options page of the Backup wizard.
Backup set
| Name | Description |
|---|---|
| Name | Specifies a backup name. |
| Description | Specifies a backup description. |
| Backup set expiration | Specifies when the backup set can be overwritten:
|
| Compress backup | Reduces the size of the backup file, regardless of the server-level default. When selected, new backups are compressed by default. |
For more information on configuring SQL Server backups on a Windows system, see How to Set Up Every Day Database Auto Backup in SQL Server.