Automate database backup creation
You can automate the database backup process by creating a task in Windows Task Scheduler that runs at a specified time or in response to a specific event.
To automate the database backup, perform the following steps:
1. Create a .sql file that will store the database backup script.
2. Create a .bat file.
3. Schedule the database backup creation task.
Permissions
To automate a database backup, you must have at least one of the following permissions or role memberships:
BACKUP DATABASEpermission.- Membership in the
db_backupoperatorfixed database role. - Membership in the
sysadminfixed server role.
Additionally, the SQL Server service account must have write permissions to the backup directory at the file system level.
Create a .sql file
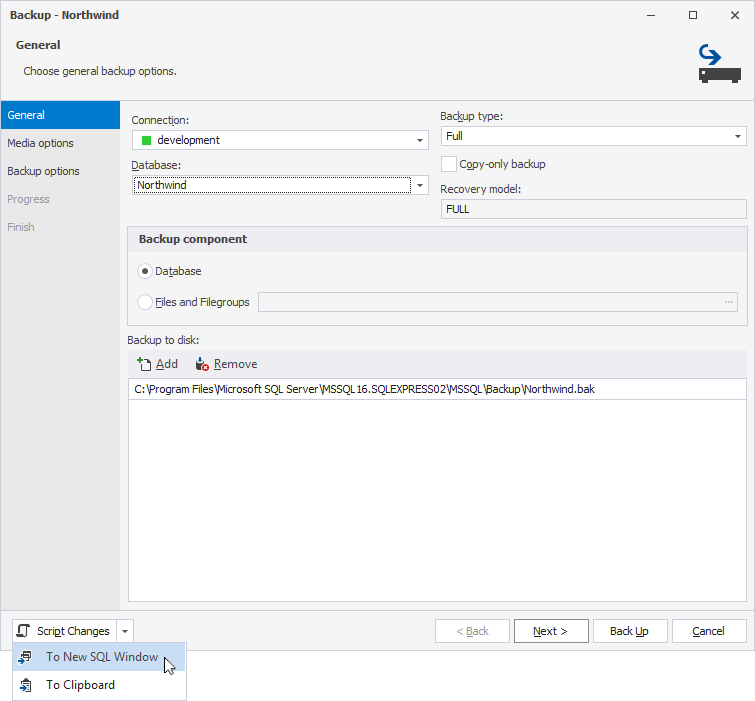
1. Open the Backup wizard in one of these ways:
- In the top menu, select Database > Tasks > Back Up.
- In Database Explorer, right-click the server connection or required database and select Tasks > Back Up.
- On the Start Page, click Administration > Back Up.
2. Configure the backup settings.
3. In the lower-left corner of the wizard, click the arrow next to Script Changes, then select To New SQL Window.
The following BACKUP DATABASE script is generated in a new SQL document.
BACKUP DATABASE AdventureWorks2025
TO DISK = N'C:\Program Files\Microsoft SQL Server\MSSQL17.MSSQLSERVER01\MSSQL\Backup\AdventureWorks2025_FULL.bak' WITH NAME = N'AdventureWorks2025-Full Database backup', NOFORMAT, NOINIT, SKIP, NOREWIND, NOUNLOAD, STATS = 1
GO
where:
AdventureWorks2025– The name of the database you back up.C:\Program Files\Microsoft SQL Server\MSSQL17.MSSQLSERVER01\MSSQL\Backup\AdventureWorks2025_FULL.bak– The full path to the backup file.
Note
The
MSSQL17.MSSQLSERVER01path segment may differ depending on your SQL Server version and instance name. Replace it with your actual installation path. To verify the correct path, check SQL Server Configuration Manager or your SQL Server installation settings.
4. In the top menu, select File > Save As.
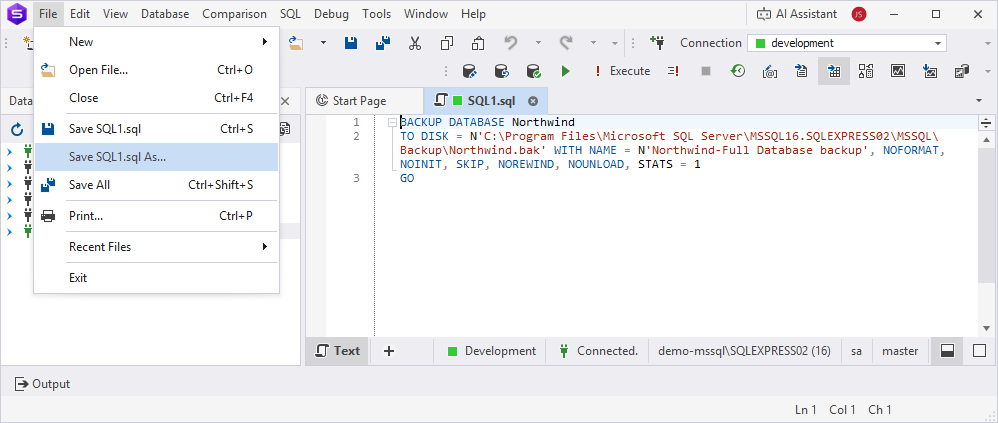
5. Specify the folder to store the .sql file, then click Save.
Create a .bat file
1. Open any text editor, for example, Notepad or Visual Studio.
2. Enter the following script and replace the values with your actual data:
"C:\Program Files\Devart\dbForge Studio for SQL Server\dbforgesql.com" /execute /connection:"Data Source=<server_name>;Integrated Security=False;User ID=<user_name>" /inputfile:"<path_to_file>" /password:<password> /quiet
where:
"C:\Program Files\Devart\dbForge Studio for SQL Server\dbforgesql.com"– The path to thedbforgesql.comfile. If you installed the Studio as part of dbForge Edge, the path is"C:\Program Files\Devart\Edge\dbForge Studio for SQL Server\dbforgesql.com".<server_name>– The name of the server where the source database resides.<user_name>– The username you use to connect to the server.<path_to_file>– The full path to the .sql file to be executed.
The table provides command-line arguments (switches) you use in the .bat file to execute the script.
| Argument | Description |
|---|---|
/execute |
Executes the script. |
/connection |
Specifies the connection string. Usage: /connection:<connection_string> |
/database |
Specifies the database to back up. The switch overrides the database used in the backup project or connection string. Usage: /database:<target_database> |
/inputfile |
Specifies the .sql file containing the script to be executed. Usage: /inputfile:<input_file> |
/password |
Specifies the server password. The switch overrides the password specified in the connection string. Usage: /password:<password> |
/quiet |
Runs the command in silent mode, suppressing all user prompts, dialog boxes, and interactive messages. |
Run the command without displaying prompts, dialogs, or user interaction.
3. Save the file with a .bat extension.
Tip
You can use this .bat file to back up the database from the command line. To do this, navigate to the file location and double-click the file.
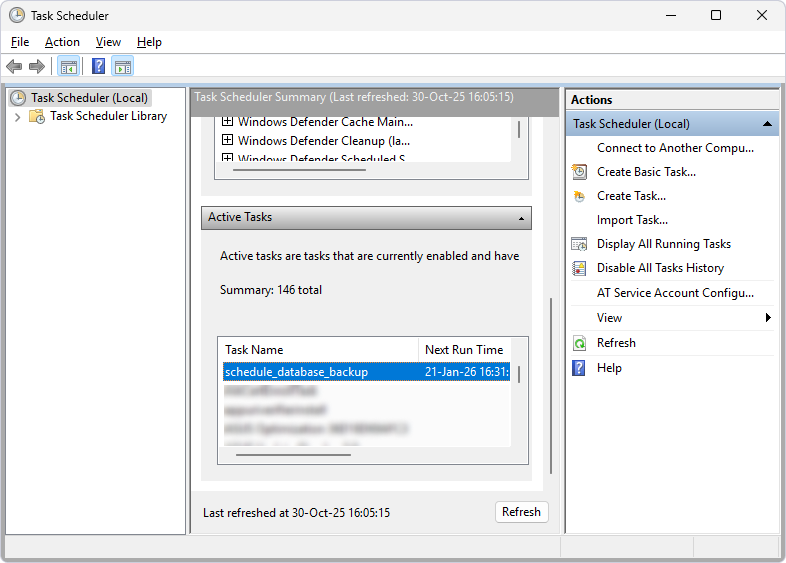
Schedule the database backup creation task
1. Open Task Scheduler in one of these ways:
- Open the Control Panel > Administrative Tools and select Task Scheduler.
- In the search bar, start typing Task Scheduler, then click it to open.
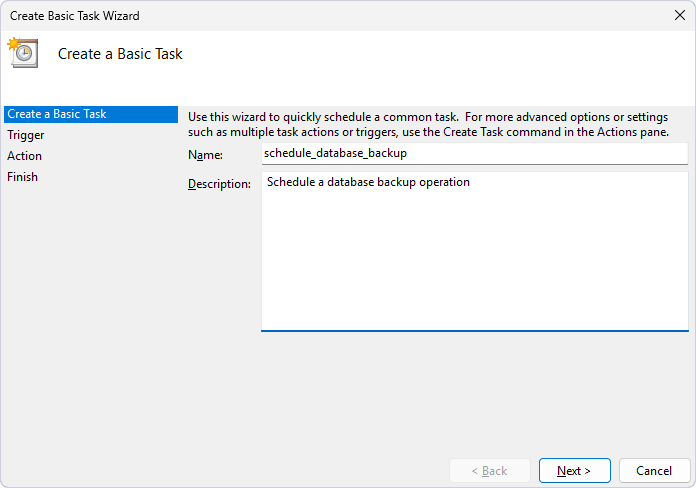
2. In the Actions pane, click Create Basic Task to open the Create Basic Task Wizard.
3. On the Create a Basic Task page, enter a name and optional description for the task, then click Next.
4. On the Trigger page, choose a schedule, then click Next.
5. Depending on your selection, specify the start time and date, and the recurrence frequency, then click Next.
6. On the Action page, select Start a program, then click Next.
7. Under Program/script, click Browse and specify the full path to the .bat file.
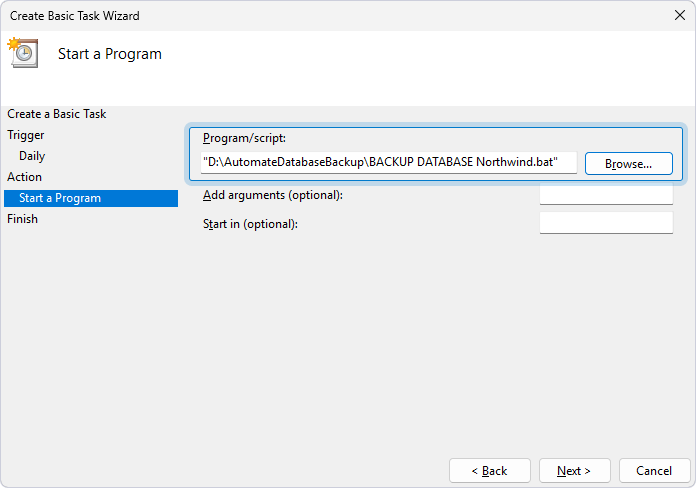
8. Click Next.
9. On the Finish page, verify the settings.
10. Optional: To update settings, click Back.
11. Click Finish to close the wizard.
The task appears in the Active Tasks pane of Windows Task Scheduler.